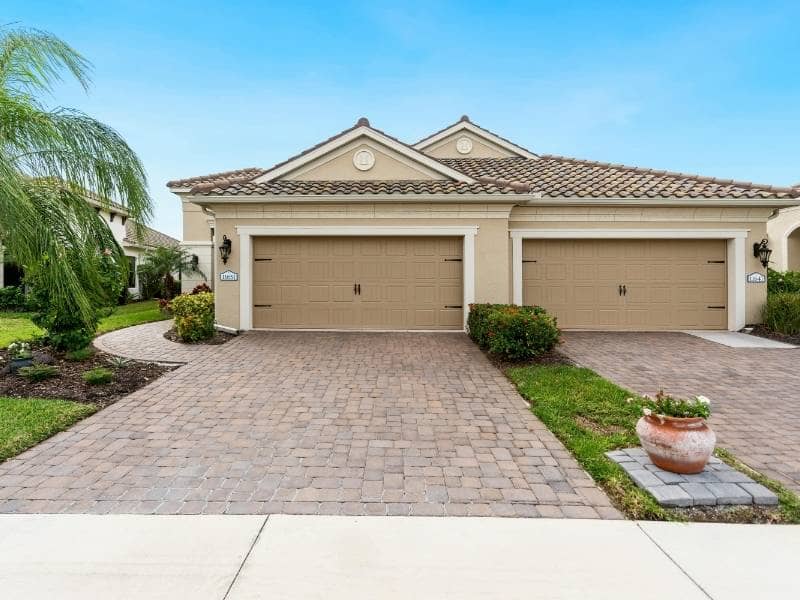
Water always finds the lowest spot on a driveway. If that spot sits against your garage door, you’ll see puddles on the slab, stained trim, and a door seal that never dries out. Brick pavers at the garage threshold need careful planning because this small part of a paver project often decides whether the whole job works.
Brick pavers and stone pavers both look sharp where the driveway meets the garage. The catch is that they need exact grade control along that line. Set the pavers slightly below the garage slab, slope them away from the door, and build a base that won’t settle under car tires. Get those three things right and the rest of the project has a solid starting point.
Setting the Correct Grade at the Garage Threshold
The finished brick pavers surface should sit a little lower than the garage slab and fall away from it. This small drop keeps rain from running back toward the door. Many installers aim for about 1/4 inch of fall per foot, but the right slope depends on driveway length, the existing slab, and where the water needs to go.
Getting there starts with careful measuring. A good crew checks the slab height at several points across the door opening, since older slabs are rarely perfectly level. They then carry that height out across the paved area with string lines or a laser level. Small errors grow fast here, because an eighth of an inch at the door can turn into a real dip ten feet out.
Watch for the opposite problem too. Pavers set too low leave a step that catches tires, shovels, and toes. The goal is a lip small enough to drive over smoothly but clear enough to stop water. If your slab has already sunk or cracked, bring that up before any pavers go in, since the new surface can only be as true as the edge it meets.
Choosing Brick Pavers for a Stable Garage Transition
Garage thresholds carry vehicle weight, so the pavers need to be made for it. Clay brick pavers and concrete pavers rated for driveways are usually thicker than patio units. Many vehicle areas use pavers around 80 millimeters, or a bit over 3 inches thick. Thinner units may work on a walkway but can crack or shift under turning tires.
Stone pavers are another good option. Natural stone looks right next to a stone patio or an existing stone masonry wall. For driveway use, the stone has to be thick and dense enough to carry loads, and some types are set in mortar over a concrete slab instead of on sand. Ask your contractor which setting method fits the stone you like.
Neither material is always the better pick. Brick masonry often matches homes with brick fronts, and clay brick tends to hold its color well. Stone offers more natural variation and texture. Your choice should come down to appearance, traffic, maintenance, and budget, along with how the new paving ties into the masonry you already have.
Laying Pattern Matters
The pattern affects stability as much as the pavers itself. Herringbone patterns lock units together and resist the twisting force of turning tires. Running bond and basket weave look nice but tend to shift more in vehicle areas. Make sure the row against the slab gets clean, full-sized cuts so thin slivers don’t end up right at the door.
Managing Drainage Where Brick Pavers Meet the Garage
Drainage around brick pavers at the threshold comes down to slope, base, and a place for water to go. Even perfectly graded pavers will hold water if the base under them can’t drain. The base is the layer of compacted crushed stone under the pavers, topped with a thin bed of sand. It should be compacted in lifts, which means thin layers packed down one at a time.
Base depth varies with soil and use. Clay soils hold water, so they may call for a deeper base or added drainage. A contractor may suggest fabric between the soil and the stone to keep the two from mixing. The right depth for your driveway depends on your soil, slope, traffic, and project design.
A trench drain can help when grading alone isn’t enough. It’s a narrow grated channel set flush with the pavers that catches water before it reaches the slab. It works well for garages that sit below the street or at the bottom of a sloped driveway. Plan where that water will end up before any digging starts.
Connecting Brick Pavers to Walkways, Patios, and Other Paved Areas
Garage pavers rarely stand alone. The driveway often feeds a walkway to the front door, a side path to the backyard, or a brick patio off the kitchen. Each link needs its own grade plan so water doesn’t flow from one area straight into another.
Walkways often run 3 to 5 feet wide, depending on how many people use them. Where a walkway meets the driveway, keep the paver tops flush so there’s no trip edge. A border row can mark the change without a height difference. A soldier course, which is a row of bricks set end to end along the edge, gives a clean line and helps hold the field in place.
Larger outdoor spaces bring more to plan. A path to an outdoor kitchen or outdoor fireplace should stay firm under foot traffic and rolling grills. Sloped yards may need steps or a retaining wall to handle changes in height. Matching or complementary materials help the driveway, stone patio, and walls read as one design.
Maintaining Brick Paver Grade and Joint Stability Over Time
Good installation does most of the work, but brick pavers still need some care. Joint sand washes out over time, especially near downspouts and garage edges. When sand is lost, pavers can rock and drift out of line. Refilling joints keeps the surface locked together.
Check the threshold a couple of times a year and after heavy storms. Most problems show up small before they get worse. Look for these signs:
- Standing water near the door after rain
- Pavers that rock or sound hollow under tires
- Joints with missing sand or weeds
- A growing gap or step between the pavers and the slab
- Edge restraints pulling away along the sides
Most fixes are fairly simple. A mason can lift a section, rework the base, and relay the same pavers. Polymeric sand, which hardens after it gets wet, can help joints resist washout. Sealing is optional and depends on the paver type, so ask what suits your material.
Frequently Asked Questions
How far below the garage slab should pavers sit?
Most installers set pavers slightly below the slab so water can’t flow back toward the door. The exact drop depends on the slab condition and the driveway slope. It should be small enough that tires roll over it smoothly. Your contractor should measure the slab at several points before setting a final height.
Are stone pavers strong enough for a driveway?
Many stone pavers can handle car traffic if they’re thick and dense enough. Some stones work better set in mortar over a concrete slab in vehicle areas. Thin stone meant for patios may crack under turning tires. Ask your installer to confirm the stone type and thickness for driveway use.
Why do pavers sink near the garage door?
Sinking usually points to a weak base or water getting under the pavers. Soft soil, thin base layers, or poor compaction can all play a part. Downspouts that drain onto the area can speed things up. Fixing it often means lifting the pavers, rebuilding the base, and relaying them.
Do I need a drain at my garage threshold?
Not every garage needs one. A drain makes sense when the driveway slopes toward the door or the garage sits low on the lot. A good surface slope handles water on many level sites. A site visit can show whether grading alone will do the job.
How often should I refill paver joints?
There’s no fixed schedule, since it depends on weather, traffic, and joint material. Many homeowners check joints once or twice a year. Areas near downspouts and edges tend to lose sand first. Refill low joints as soon as you notice them to keep pavers from shifting.