Brick Masonry Parapets Should Be Checked Before a Roof Replacement

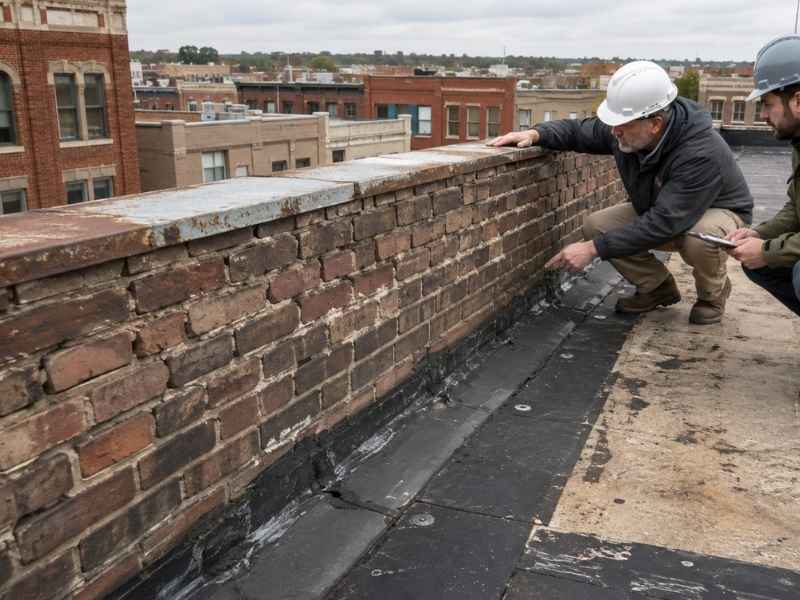
Brick parapet inspection before roof replacement in downtown Birmingham, Alabama

A roof replacement on an older commercial building involves more than the roof itself. The brick masonry parapet that runs along the roof edge plays a big role too. That short wall sits right where the new roofing crew will work, so its condition matters before the job starts. Plenty of building owners skip this check and run into trouble later.

Why Parapet Condition Matters Before Roof Replacement

An older commercial building often has a parapet, the low brick wall that rises past the roofline. On many downtown structures, that wall does real work. It forms part of the roof-edge assembly, which means the roofing membrane, flashing and edge metal all tie into it. When a crew tears off the old roof, they work right against this wall the whole time.

Because the parapet and the roof connect so closely, its condition shapes how smoothly the roofing job goes. A sound parapet gives the new roof a stable, dry edge to bond to. A weak or shifting one can pull at flashing, let water sneak behind the membrane, or crumble while the crew works nearby. So checking the wall before roofing starts helps the whole project land on solid footing. It’s a small step that keeps a big job from going sideways.

Brick Parapet Warning Signs to Identify Before Roofing Work

You don’t need special tools to spot early parapet trouble. A slow walk around the building, plus a look from the roof if it’s safe, tells you a lot. Watch for brick that has slipped out of line, since displaced units often signal movement below the surface.

Leaning sections are another red flag. When part of the wall tilts inward or outward, the masonry may have lost its grip, and that can worsen fast once roofers add weight and foot traffic. Open mortar joints matter too, because gaps let water into the wall core where it does quiet damage.

Look closely at soft, flaking or crumbling bricks as well. These worn areas show the wall has been taking on moisture for years. Cracks that run through several courses, or gaps where the parapet meets the roof, deserve a note before any roofing bid gets locked in.

How Roof Replacement Can Affect Existing Parapet Details

Roof work and parapet health affect each other more than people expect. Pulling off old roofing means cutting and prying material right at the base of the wall. If the parapet is already loose, that activity can shake bricks free or widen cracks that were holding on by a thread.

The new roof brings changes too. Fresh edge metal, flashing and membrane all fasten into or against the parapet. Workers may drill, seal and set new components along the same brick that’s sat untouched for decades. Weak spots that seemed fine can give way under fasteners or foot traffic.

Because of this back-and-forth, the two trades can’t work in a bubble. When roofers know which parts of the wall are fragile, they can plan their cuts and connections with care. That awareness protects both the old masonry and the new roof going on above it.

Checking Coping and Water-Shedding Details Along Downtown Buildings

The top of a parapet takes the worst of the weather, so it earns a close look. Most walls wear a coping, the cap that shields the brick below from rain. Along many downtown Birmingham buildings, that coping has aged for years and may have cracked, shifted or lost its seal at the joints.

When coping fails, water stops shedding away from the wall and starts soaking in. From there it travels down through the brick and out toward the roof edge, right where the new membrane needs to stay dry. Check for low spots on the cap where water pools instead of running off. Pooling near the roof line is a warning worth catching early.

Also trace where water is meant to flow once it hits the parapet. If the path sends runoff toward a seam or a tired section of brick, that detail should get sorted out before the roof goes down.

Coordinating Brick Masonry Work With a New Commercial Roof

A new commercial roof and the masonry around it work best when both crews agree on the order of work upfront. Before anyone climbs a ladder, the roofing and masonry contractors should map out who does what and when. That way the parapet gets protected instead of caught in the crossfire.

Sequence is the heart of it. Some parapet repairs need to happen before the roof goes on, so the membrane can seal against solid brick. Other masonry steps fit better once certain roof-edge pieces are set. Sorting this out early keeps a mason from tearing into a finished roof to reach the wall later.

Good coordination also spares the fresh roof from damage. When masons know where the new membrane runs, they can stage tools and mortar clear of it. A little planning between the trades keeps both the wall and the roof in good shape.

Frequently Asked Questions

Why should a parapet be inspected before a roof replacement?

Catching parapet problems ahead of time keeps them from tangling up the roofing job. If a mason spots a leaning section or failing joints early, that work can happen at the right moment instead of stalling the roofers halfway through. An upfront check also lets the crew plan and price wall repairs rather than getting surprised on day one.

What signs indicate that an older brick parapet needs attention?

Look for brick that has slid out of place, sections that lean and mortar joints that have opened up. Soft or flaking brick points to long-term water damage, and gaps where the wall meets the roof are worth flagging too. Any of these clues suggests the parapet should get a closer evaluation before roofing begins.

Can roof replacement damage an existing brick parapet?

It can, especially if the wall is already weak. Tearing off old roofing puts vibration and handling right against the brick, and installing new edge metal or flashing means drilling and fastening into it. Sections that were barely holding can shift or break during this work, which is why coordination matters so much.

Should parapet work be completed before or after a new roof is installed?

The right sequence changes with the wall’s condition and how the roof edge is built. Some repairs need to come first so the new membrane can seal against sound brick. Others fit better after certain roofing pieces are set. The best order comes from the mason and roofer talking it through before the job starts.

Why are parapets especially important on older downtown Birmingham buildings?

Many older commercial buildings in downtown Birmingham carry roof-edge construction that has stood for decades. The brick, mortar and coping up top have weathered years of heat, rain and freeze cycles. Because that aging masonry sits right where a new roof ties in, it deserves a careful look before a major roof replacement moves ahead.

Brick Mason Work After Removing Shutters, Signs, or Mounted Equipment

Brick wall showing holes and chipped areas left after removing a shutter, highlighting masonry repair needs.

Taking down an old shutter or a faded sign can leave more than an empty wall. It often leaves holes, chips, and stains that were hidden for years. A brick mason can look at that damage and figure out what the wall actually needs. Many owners call for a construction survey once a fixture comes down, just to see how deep the damage goes. Homes with older brick and stone often hide small surprises behind shutters, brackets, and mounted signs. 

What Brick Damage Can Be Left Behind After Removing Exterior Fixtures

Shutters and signs are usually held on with screws, bolts, or anchors drilled straight into the brick. Once you pull that hardware out, you’re left staring at a pattern of holes that rarely match the rest of the wall.

Some holes are clean. Others chip the brick face on the way out, leaving small craters or cracked edges around the mounting point. Satellite dishes and vents tend to leave larger anchor points, sometimes with chunks of mortar missing between the bricks nearby.

Discoloration is another common surprise. Brick under a shutter or sign spends years shielded from sun and rain. When you remove that cover, you get a patch of brick that looks noticeably different from the weathered wall around it. It’s not damaged exactly, but it stands out just as much as a hole would.

Matching Replacement Brick in Established Birmingham Homes

Older Birmingham neighborhoods pose a real challenge when it comes to brick matching. Brick made decades ago often came in sizes and textures that manufacturers don’t produce anymore. A brick made in 1955 rarely lines up with anything sold today.

Color adds another layer of difficulty. Sun exposure, rain, and decades of weather slowly shift a brick’s tone. Two bricks made from the same batch can look completely different after fifty years on opposite sides of a house.

A brick mason who works regularly in older neighborhoods usually keeps a stock of reclaimed or salvaged brick on hand. Pulling from that stock, rather than ordering something new off a shelf, gives a much better shot at a repair that blends into the wall instead of standing out from it.

Repairing Anchor Holes Without Creating a Visible Patch

A small hole seems like it should be a small fix. In practice, filling it the wrong way can leave a spot that’s more noticeable than the hole itself. Mortar that doesn’t match the surrounding color dries into a bright gray dot against older, weathered brick.

The mortar mix matters as much as the brick does. Sand color, aggregate size, and even the way old mortar was tooled all affect how a patch reads once it dries. A mason who skips this step can end up with technically solid repairs that still look wrong from the sidewalk.

Deeper anchor holes sometimes need brick plugs rather than mortar alone. Cutting a small piece of matching brick to fill the hole, then setting it with the right mortar joint, tends to disappear into the wall far better than a mortar patch on its own.

Coordinating Masonry Repairs With the Rest of a Renovation

Fixture removal rarely happens on its own. Shutters come down as part of a repaint. Old signs get pulled during a storefront update. Satellite equipment disappears when a homeowner switches providers or upgrades their setup.

Timing the brick repair matters here. Painters need a dry, finished surface to work over, so patched mortar has to cure before paint goes on. If siding or trim work is happening nearby, masons often need to finish their repairs first so other crews aren’t working around wet mortar or open holes.

Access matters too. Scaffolding or ladders set up for one trade can often serve another, which saves time and cost when everyone plans around the same schedule. Skipping that coordination usually means redoing setup work that could have been shared, or worse, damaging a fresh repair before it’s had time to cure.

When a Small Mounting Repair Needs a Brick Mason

Not every hole needs a professional. A single small anchor hole in solid brick, cleaned out and filled correctly, is sometimes a manageable fix. The trouble starts when removal affects more than one brick, or when what looked like a surface scratch turns into a deeper crack once you start working on it.

Multiple mounting points close together, like an old satellite bracket with four or five anchors, often mean several bricks took damage at once. That kind of spread damage is harder to patch evenly without a trained eye.

Material matching is the other trigger point. If the damaged area sits somewhere visible, on a front-facing wall or near an entrance, getting the brick and mortar to blend matters a lot more than it would on a side wall nobody sees. A brick mason brings the judgment and material access that a quick patch job usually can’t match.

Frequently Asked Questions

Can a brick mason repair holes left by removed shutters? 

Yes. A brick mason can look at the mounting holes and any surrounding damage, then decide on the right way to restore that section of the wall.

Can brick be matched after removing an old exterior sign? 

Often, though it can be tricky in older neighborhoods. Older brick tends to have its own color, texture, and weathering that newer brick doesn’t replicate easily.

What happens if removing equipment chips the brick? 

The damaged area gets inspected to see whether the existing brick can be repaired in place or whether specific units need to be pulled and replaced.

Will repaired mounting holes be noticeable on an older brick home? 

They can be, especially if the replacement brick or mortar doesn’t closely match what’s already there. That’s why color and material matching are such a big part of getting the repair right.

Should masonry repairs be completed before exterior renovation work? 

It depends on the project, but lining up the masonry work with other exterior trades often prevents finished repairs from getting disturbed later in the process.

Brick Repair Around Windows and Door Openings

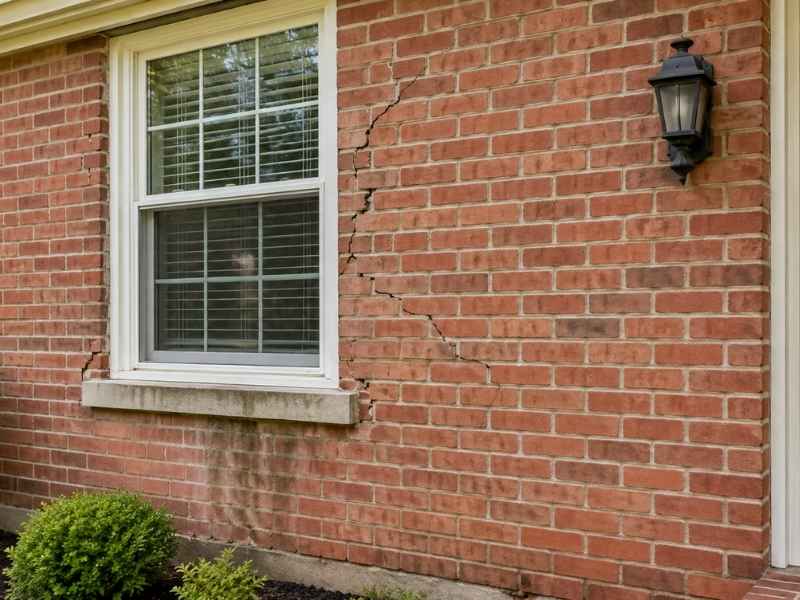
Brick repair around windows and door openings on a residential masonry exterior in Birmingham Alabama

Brick repair around windows and doors is not the same as fixing a plain brick wall. These spots take more stress than the rest of the house. A window or door breaks up the brick pattern, and that break point moves and settles differently than solid brick around it. Small gaps or cracks near a frame can look minor at first. Over time, they let in water and cause bigger problems underneath. This guide covers why these areas need special attention, what signs to look for, how repairs usually get done, and when the damage points to something bigger than a simple fix.

Why Brick Around Window and Door Openings Requires Special Attention

A solid brick wall moves as one piece. A wall with a window or door cut into it does not. The frame, the header above it, and the brick around the edges all shift at slightly different rates. That difference in movement puts stress right at the corners and edges of the opening. Temperature changes make this worse. Brick expands in the heat and shrinks in the cold, and the wood or metal frame inside the opening does the same thing at a different pace. That constant push and pull is why cracks so often start at the corners of windows and doors, not in the middle of a flat wall. A general brick inspection can miss this. These spots need their own close look.

Common Signs of Brick Damage Near Windows and Exterior Doors

Some signs are easy to miss until you know what to check for. Look for small cracks running diagonally from the corners of a window or door. These are one of the first warning signs. Gaps between the brick and the frame are another clue, especially if you can see daylight or feel air moving through them. Check the mortar joints too. Crumbling or missing mortar right around an opening wears out faster than mortar on a flat wall, since it takes more movement over time. Water stains on the brick below a window often mean water is getting in above and running down. Inside the house, peeling paint or a musty smell near a window frame can point to the same problem from the other side.

How Contractors Repair Damaged Bricks Around Masonry Openings

A contractor usually starts by figuring out why the damage happened, not just patching what’s visible. That means checking whether the issue comes from water, movement, or a frame that was never sealed right. Fixing the surface without fixing the cause just means doing the job again in a year or two. Once the cause is clear, damaged mortar gets removed and replaced, a process called repointing. If individual bricks are cracked or crumbling, the contractor removes those bricks and puts in new ones that match the size, color, and texture as closely as possible. Any flashing or sealant around the frame gets checked and replaced if it’s failed. The last step is making sure the repaired section blends in with the rest of the wall, so it doesn’t stand out as a patch job.

Preventing Future Brick Problems Around Frames and Entry Points

Good installation makes a bigger difference than most homeowners realize. Flashing, the thin material placed above and around window and door frames, directs water away from the brick instead of letting it soak in. When flashing is missing or installed wrong, water finds its way behind the brick and causes damage from the inside out. Proper spacing between the frame and the brick also matters, since it gives both materials room to expand and contract without cracking each other. Regular inspections catch small problems before they turn into big ones. Checking the brick around windows and doors once or twice a year, especially after a hard winter, is a simple habit that saves money later. Small cracks caught early cost far less to fix than a wall that’s been leaking for years.

When Brick Damage Around Windows and Doors May Indicate a Larger Masonry Concern

Not all cracks are simple to fix. If cracks show up in more than one spot, or if a crack keeps coming back after repair, that’s a sign the problem goes beyond the brick itself. Diagonal cracks that run wide at one end and stretch across several rows of brick can point to settlement in the foundation. Doors or windows that stick or no longer close properly, paired with brick cracks nearby, often mean the whole wall has shifted, not just the masonry around the opening. In these cases, patching the brick won’t solve anything long term. A professional assessment can figure out whether the movement has stopped or is still happening, and that answer changes what kind of repair actually makes sense.

Frequently Asked Questions

What causes bricks to crack around windows and doors? 

Stress builds up at the corners of openings because the frame and the brick move at different rates. Moisture that gets behind the brick, aging mortar, and small amounts of settlement over time all add to the problem. Most cracks near openings come from a mix of these causes, not just one.

Can individual bricks around a window or door be replaced? 

Yes, in most cases. A contractor removes the damaged brick and sets in a new one that matches the size and color as closely as possible. This works well when the surrounding brick is still solid and the frame itself isn’t the source of the problem.

How do I know if brick damage near an opening needs professional repair? 

Watch for cracks that keep coming back, gaps that let in air or light, or water stains that show up again after cleaning. If a door or window has started sticking along with visible brick cracks, that combination usually means the damage needs a proper evaluation, not a quick patch.

Can damaged brick around windows and doors lead to water problems? 

Yes. Cracks and gaps near frames give water a direct path into the wall. Once water gets behind the brick, it can damage insulation, wood framing, and interior finishes long before any of that shows up on the outside. Fixing small cracks early helps stop this before it starts.

Mailbox Repair Options for Existing Masonry Bases

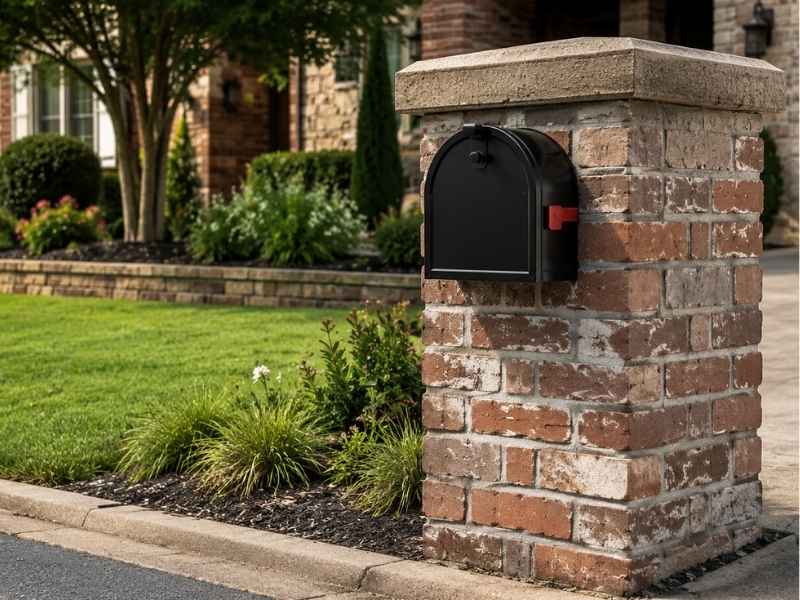
Mailbox repair for an existing brick masonry base with updated exterior features in Birmingham Alabama

Mailbox repair sounds easy until you look at the brick or stone base underneath. That base has sat outside for years. It’s taken hits from lawnmowers, weather, and the odd mail truck bumper. Before you buy a new mailbox or call a contractor, check what your base can handle first. Some bases just need a new post attached. Others have cracks that run deeper than they look. This guide covers how to check your base, what repair options you have, and when to call a pro instead of guessing.

Evaluating the Existing Masonry Base Before Choosing a Mailbox Upgrade

Start with the base, not the mailbox on top of it. Look for cracks in the brick or stone, and check the mortar joints for gaps. See if the base leans compared to how it used to sit. A base that’s solid but just looks worn is a much easier job. A base that’s shifting in the ground is not. Measure the spot where the mailbox attaches too. New mailboxes don’t always match the holes or post size of older ones. That mismatch can turn a fast swap into a bigger job. Also think about what’s under the base. If it was never set on a real footing, repairs on top won’t last long. A base with strong footing and only surface wear is usually worth repairing. A base with cracks down to the ground usually isn’t.

Mailbox Replacement Options That Preserve Existing Masonry Features

You don’t need to tear out a good brick base just because the mailbox is dented or rusty. Most masonry bases have a standard mounting plate or bracket. Many new mailboxes fit those same setups with a few small changes. A mailbox with a locking door or better weatherproofing can update the whole look. You won’t need to touch the brick or stone underneath. Some homeowners just replace the post arm or the hardware, since that’s often what actually broke. If the attachment points have worn down or rusted, a new bracket kit can fix that. No demolition needed. This route is usually faster and cheaper than starting over, and it keeps the look of the original base.

Repair Approaches for Masonry Mailbox Bases Without Full Reconstruction

Not every problem means starting from scratch. Small cracks in mortar joints can often be repointed. That means a mason removes the old mortar and adds new mortar in its place. Chipped corners or small surface damage can sometimes be patched with matching mortar, especially if the damage hasn’t spread deeper into the base. A slight lean caused by soft soil, not a broken footing, can sometimes be fixed by resetting the base instead of rebuilding it. Loose bricks near the top, where the mailbox attaches, can often be reset and secured. The lower bricks stay untouched. The real question is always how deep the damage goes. Surface problems usually respond well to small repairs. Cracks running through several rows of brick usually don’t.

Updating Older Masonry Mailboxes to Match Modern Home Exteriors

An old masonry mailbox can look out of place next to a newer home. Matching brick that’s no longer made is often too hard to pull off. Most homeowners work with contrast instead of an exact match. A stone cap added to the top of an old brick base can update the look fast. You won’t need to replace the brick underneath. Repainting or resealing worn stone can also brighten a base that’s simply dulled with age, not damaged. If the yard around it has changed, a new cap or trim course can help the base fit in. This works well with updated walkways or garden beds. None of this touches the structural brick. It’s mostly about new finishes and small touches that match the mailbox to the rest of the house.

When a Masonry Mailbox Base Needs Professional Assessment

Some problems are easy to spot from the driveway, but others aren’t. That’s when a pro should take a look. Cracks running through the whole base are a warning sign. So are gaps where the base meets the ground, or any visible lean. Get these checked before you attach a new mailbox. Material choice matters just as much. The wrong mortar mixed with old brick can cause more cracks later, not fewer. A mason can also check the footing below ground. That isn’t something you can judge just by looking. If a base has been patched more than once and keeps failing in the same spot, the real problem is likely never fixed.

Frequently Asked Questions

Can an existing masonry mailbox base be repaired instead of replaced? 

Often, yes. If the footing is solid and the damage is limited to surface cracks, chipped corners, or worn mortar, repair is usually the better option. Bases with deep cracks, major shifting, or damage below ground are harder to fix. Those may need a rebuild instead.

Can a new mailbox be installed on an existing brick or stone base? 

In most cases, yes. Check that the mounting hardware matches, that the attachment points are still solid, and that the new mailbox fits the space. A size or bracket mismatch can often be solved with an adapter or a new mounting plate.

How do you update an older masonry mailbox without changing the entire structure? 

Small changes go a long way. Replace the mailbox, add a new cap or trim piece, or refresh the finish on the stone or brick. Each of these updates the look while keeping the original base in place. None of them need a rebuild.

When should a masonry mailbox base be rebuilt instead of repaired? 

Rebuilding makes sense when the footing has failed, when cracks run through several rows of brick, or when the base has been patched many times and keeps failing. It’s also worth doing if you’re planning a bigger landscaping change that the current base won’t fit into.

Brick Masonry Repointing for Warehouse Conversions

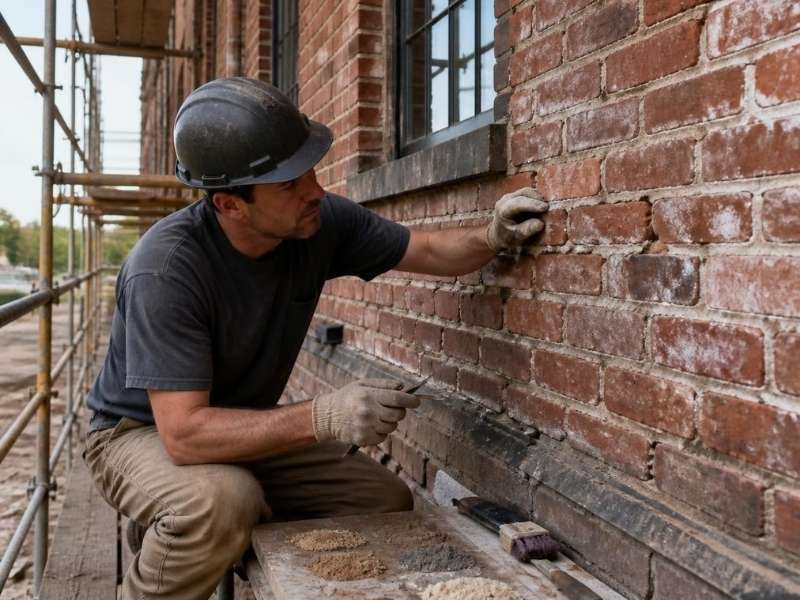
Mason repointing deteriorated mortar joints on a historic brick warehouse in Birmingham, Alabama.

Brick masonry repointing decides whether a warehouse conversion holds up or starts crumbling within a few years. Birmingham has a real supply of old industrial buildings ready for adaptive reuse, from the Lakeview district to pockets of Avondale and the old Sloss-area warehouses. Most of them share the same problem: a century of mortar joints that were never built to handle a new life as apartments, offices, or retail.

This guide walks developers through what repointing actually involves and where warehouse conversions tend to go wrong.

What Repointing Actually Means

Repointing is the process of removing damaged mortar from between bricks and replacing it with new mortar. It’s not the same as tuckpointing, which is a decorative finish technique, and it’s not the same as sealing or coating a wall.

Done right, repointing restores the wall’s ability to shed water and stay structurally sound. Done wrong, it traps moisture inside the brick and speeds up failure instead of stopping it.

Why Warehouse Walls Need Extra Attention

Industrial brick walls in Birmingham are often thicker than typical residential brick, sometimes two or three wythes deep. That thickness hides problems. A mason can’t always tell how deep the mortar damage goes just by looking at the surface, and interior wythes can be crumbling even when the outer face looks fine.

Reading the Warehouse Before You Bid the Job

Before pricing repointing work, get a mason on site to assess the actual condition of the brick and mortar, not just the visible face.

What to Look For

  • Mortar that’s soft enough to scrape out with a fingernail
  • Vertical cracking running through multiple brick courses
  • Efflorescence, the white powdery residue left by water moving through the wall
  • Spalling brick, where the face has cracked off and fallen away
  • Gaps at window and door openings where movement has occurred

Any of these signs point to repointing needs beyond a cosmetic touch-up.

Check for Structural Movement First

Some warehouse walls have shifted over the decades, especially near old loading dock openings or where floor loads changed. Repointing won’t fix a structural movement problem. If cracks are wider at the top than the bottom, or if a wall bulges outward, bring in a structural engineer before the mason starts any repair.

Matching Mortar to a Century-Old Building

This is where most warehouse conversions go wrong. Contractors show up with standard Portland cement mortar because it’s cheap and available. On old bricks, that’s a mistake.

Soft Brick Needs Soft Mortar

Warehouses built before the 1930s often used softer, more porous brick than what’s manufactured today. That brick needs a mortar that’s softer than the brick itself, so the mortar wears down over time instead of the brick.

Hard Portland cement mortar reverses that relationship. It becomes the strongest part of the wall, which forces the brick to crack and spall as the building moves and expands with temperature changes. This is one of the most common causes of brick face damage on old warehouse conversions.

Get the Original Mix Tested

A lab analysis of existing, undamaged mortar gives you the lime-to-sand ratio and any additives from the original build. Matching that mix keeps the new mortar compatible with the brick around it.

Sequencing Repointing on a Conversion Project

Repointing needs to happen at the right point in the construction schedule, not whenever it’s convenient.

The Right Order

  1. Complete structural assessment and any needed repairs first
  2. Repoint exterior walls before interior finishes go in
  3. Address roof and flashing issues before repointing, since active leaks will undo the repair
  4. Finish window and door installation after repointing around those openings
  5. Apply any approved sealant, if used, only after mortar has fully cured

Repointing before fixing an active roof leak is a common and expensive mistake. New mortar needs weeks to cure properly, and ongoing water intrusion can ruin the work before it sets.

Cutting Out Old Mortar Without Damaging the Brick

The removal process matters as much as the new mortar mix. Grinders and power tools can chip brick edges and widen joints beyond repair if the crew isn’t careful.

Hand Tools Over Grinders

Experienced masons use hand chisels or specialized grinding tools with depth guides on historic and older brick. This takes longer, but it protects the brick edges that a power grinder can easily chip. For a warehouse with hundreds of linear feet of joints, this adds real time and cost to the project, so it needs to be priced in from the start.

Cost Factors for Warehouse Conversions

Repointing costs vary by wall condition, wythe count, and access difficulty. A warehouse with scaffolding-only access or tight interior clearances will cost more per square foot than a simple single-story exterior wall. Budgeting a wall-by-wall assessment before the final bid helps avoid mid-project cost surprises once crews expose more of the wall.

Timing the Work Around Birmingham’s Weather

Mortar needs a set temperature range to cure properly, generally above 40 degrees Fahrenheit and below extreme heat. Birmingham’s summer heat and occasional winter cold snaps both affect scheduling. Late spring and fall tend to give masons the most workable conditions for repointing on an exposed exterior wall.

Frequently Asked Questions

What’s the difference between repointing and tuckpointing? 

Repointing replaces deteriorated mortar to restore a wall’s structural performance. Tuckpointing is a decorative technique that creates the look of fine, precise joints, often applied over existing mortar for appearance rather than repair.

How do I know if a warehouse needs repointing before conversion? 

Look for soft or crumbling mortar, vertical cracks across multiple brick courses, efflorescence, and spalling brick. A mason should assess the wall in person, since damage can run deeper than what’s visible on the surface.

Can repointing fix a bulging or leaning warehouse wall?

No. Repointing addresses mortar conditions, not structural movement. A wall that bulges or shows widening cracks needs a structural engineer’s assessment before any repointing work begins.

Why does mortar mix matter so much on old warehouse brick? 

Old brick is often softer than modern brick and needs mortar that’s softer too. Standard Portland cement mortar is too hard, which forces the brick itself to crack instead of the mortar joint absorbing movement.

When is the best time of year to repoint brick in Birmingham? 

Late spring and fall usually offer the most stable temperatures for proper mortar curing. Extreme summer heat and winter cold snaps can both interfere with how well new mortar sets.

Brick Pavers for Permeable Entry Courtyards

Permeable brick paver entry courtyard with open joints after rainfall in Birmingham, Alabama.

Brick pavers do more than dress up an entryway. In Birmingham, Alabama, where red clay soil sheds water fast and summer storms hit hard, brick pavers can turn a courtyard into a working part of your drainage plan. For developers, that’s a real advantage. You get curb appeal and stormwater performance in one system.

This guide breaks down how permeable brick paver courtyards work, why they fit Birmingham’s soil and climate, and what to check before you build.

Why Permeable Pavers Make Sense in Birmingham

Birmingham sits on clay-heavy soil. Clay doesn’t drain well on its own. Add the region’s heavy spring and summer rainfall, and standard concrete or solid pavers can send water straight into the street or pool at your front door.

Permeable brick pavers change that. Water moves through the joints between pavers and into a gravel base below. From there, it filters into the ground slowly instead of rushing off the site.

Local Stormwater Rules Matter

Jefferson County and the City of Birmingham both enforce stormwater management standards for new development. Many projects now need to show how they’ll handle runoff before a permit gets approved. A permeable entry courtyard can help meet those requirements without eating up extra land for a retention pond.

How a Permeable Brick Paver System Works

A permeable courtyard isn’t just brick on sand. It’s a layered system built to move and store water.

The Layers, From Top to Bottom

  1. Brick pavers with open joints, spaced wider than a standard patio
  2. Bedding layer of small, clean stone that lets water pass through fast
  3. Base layer of larger crushed stone that stores water temporarily
  4. Subbase that connects to native soil or a drainage outlet

Each layer has a job. The pavers handle foot and light vehicle traffic. The stone layers hold water until the ground can absorb it. Skip a layer or use the wrong stone size, and the whole system backs up.

Joint Material Matters

Standard sand joints don’t work for permeable design. Use open-graded, angular stone in the joints instead. It locks the pavers in place while still letting water pass through.

Choosing the Right Brick Pavers for the Job

Permeable brick pavers being installed over a layered gravel base in Birmingham, Alabama.

Not every brick paver is rated for permeable use. Look for pavers built with spacer bars or lugs on the sides. These create consistent gaps between units so water has somewhere to go.

Load Rating

Entry courtyards often carry more than foot traffic. Delivery trucks, moving vans, and the occasional car need a paver rated for vehicle loads, not just pedestrian use. Ask your supplier for the load rating before you order.

Color and Finish

Birmingham’s older neighborhoods, from Forest Park to Mountain Brook, tend to favor traditional red and clay-tone brick. A tumbled or worn finish blends into historic districts better than a sharp, factory-new look. Match the finish to the surrounding architecture, not just the building itself.

Site Prep: Where Most Projects Go Wrong

A permeable courtyard fails when the ground underneath isn’t ready for it, not when the pavers are bad.

Test the Soil First

Birmingham clay compacts hard and drains slowly. Before design work starts, run an infiltration test on the site. This tells you how fast water actually moves through the soil, not just how it looks on a map. Skipping this step is the top reason permeable systems clog or pond within a year or two.

Grade Away From the Building

Even a permeable surface needs a slight slope, usually 1 to 2 percent, moving water away from the foundation. Permeable pavers slow water down. They don’t replace good grading.

Avoid Compacting the Subsoil

Heavy equipment driving over the future courtyard area before construction can compress the soil underneath. Compressed soil won’t absorb water, even with a perfect paver system on top. Mark off the area early and keep equipment out.

Maintenance Developers Should Plan For

Permeable pavers need more upkeep than solid concrete, but less than people expect.

  • Vacuum sweep the joints twice a year to clear dirt and debris
  • Avoid sealing the joints with sand or caulk after installation
  • Keep landscaping mulch and soil from washing onto the pavers
  • Check for standing water after heavy rain and address low spots early

Build a maintenance plan into the property management contract before handoff. A neglected permeable system clogs within a few years and stops working the way it was designed to.

Cost Considerations for Birmingham Projects

Permeable brick paver courtyards cost more upfront than asphalt or standard concrete, often 20 to 40 percent more depending on the base depth required. But they can lower long-term costs by reducing the size of stormwater detention infrastructure elsewhere on the site. For infill lots with limited space, that trade-off often pencils out in favor of pavers.

Bringing in a Civil Engineer Early

Permeable paver design isn’t just a landscaping decision. Base depth, soil infiltration rates, and stormwater compliance all need engineering input. Bringing a civil engineer in during early site planning, not after the permit gets rejected, saves time and redesign costs.

Frequently Asked Questions

Do permeable brick pavers work in Birmingham’s clay soil? 

Yes, but the base layer needs to account for slow infiltration. A deeper gravel base or a connection to a drainage outlet often works better than relying on the clay soil alone to absorb water.

How much do permeable brick paver courtyards cost compared to concrete? 

Expect to pay 20 to 40 percent more upfront than standard concrete. The added cost comes from the layered stone base and specialized pavers, not the labor.

Can permeable pavers handle vehicle traffic? 

Yes, if you choose pavers with a vehicle load rating and build the base to the correct depth. Pedestrian-rated pavers will crack or shift under regular car traffic.

How often do permeable paver joints need cleaning? 

Twice a year is standard. Vacuum sweeping removes dirt and debris before it clogs the joints and slows drainage.

Do permeable pavers help meet Birmingham stormwater requirements? 

They can. Many projects use permeable paver areas to offset runoff calculations required by Jefferson County and City of Birmingham stormwater codes. Check current local requirements before finalizing your drainage plan.

Painted Brick Prep for Adaptive Refuse Projects

 Painted brick prep for adaptive reuse projects with a masonry professional inspecting an exposed test area

Painted brick is a common feature in older buildings being converted for new uses, but it deserves careful evaluation before renovation begins. Layers of paint can conceal masonry deterioration, affect how moisture moves through the wall, and influence the best approach for repairs or refinishing. Proper preparation helps assess the condition of the brick, mortar, and existing coatings while guiding decisions about cleaning, repairs, or paint removal. Addressing these conditions early supports a more successful adaptive reuse project and helps reduce the risk of unexpected masonry issues during construction. 

Why Painted Brick Needs Special Attention

Painted brick behaves differently than bare brick. Brick is meant to breathe, letting small amounts of moisture pass in and out. Paint can seal that surface and trap water inside the brick, where it does damage over freeze and thaw cycles. On an old building, decades of paint may have already caused harm you can’t see from the street. The wall can look fine and still be quietly failing underneath.

For a reuse project, this matters because you’re planning to keep the building for a long time. The paint decision affects whether the walls stay dry and sound for years to come. It also affects the look you can achieve, since exposed brick and painted brick send very different messages. Understanding what the paint is doing to the brick is the first step before you choose how to handle it. Skip that understanding and you may lock in a moisture problem for the life of the building.

Checking the Condition Under the Paint

Before deciding anything, you need to know what’s beneath the paint. A close inspection checks whether the brick under the coating is solid or already crumbling. Paint can mask soft, spalling brick and failing mortar, so the surface tells you little on its own. Finding this early keeps you from building a new interior against a wall that’s quietly falling apart.

Moisture is the key thing to check. Damp spots, bubbling paint and white mineral stains all hint at water trapped in the wall. That white residue, called efflorescence, is a clear sign that water is moving through the masonry. A reuse project should sort out any moisture problem before the finish work starts, because water trapped behind new walls causes rot and mold. Knowing the true condition lets you plan repairs into the budget instead of hitting them as surprises mid-project.

Deciding to Strip, Keep, or Repaint

The big choice is what to do with the paint, and there’s no single right answer. Stripping the paint can bring back the natural brick look many reuse projects want. It also lets the brick breathe again, which helps the wall shed moisture. The catch is that stripping is slow, costly and can harm soft old brick if done with the wrong method. On some historic brick, aggressive stripping does more damage than the paint ever did.

Keeping the paint is sometimes the smarter call. If the paint is sound and the brick under it is stable, leaving it alone avoids damage and cost. Repainting with a breathable masonry paint is a middle path that refreshes the look while letting some moisture escape. The right choice depends on the brick’s condition, the look the project needs and the budget you have. A good plan weighs all three instead of defaulting to a full strip because bare brick is in style.

Removing Paint Safely

If you decide to strip, the method matters as much as the goal. Harsh methods like heavy sandblasting can tear the hard outer face off old brick, leaving it soft and open to water. That damage is permanent and turns a cosmetic job into a decay problem. Gentler methods, such as chemical strippers made for masonry, remove paint while sparing the brick. The goal is clean brick, not damaged brick.

Old paint brings a safety concern too. Buildings painted decades ago may have lead paint, which is hazardous when disturbed. Removing it kicks up dust and chips that are dangerous to workers and anyone nearby. It calls for the right safety steps and often a trained crew that follows lead-safe rules. Planning for safe, careful removal protects both the workers and the brick you’re trying to save, and it keeps the project clear of health and legal trouble.

Prepping the Surface for Its New Life

Once the paint question is settled, the brick needs prep for whatever comes next. This usually means repairing damaged brick and mortar so the wall is sound. Repointing failed joints seals the wall against water and brings back its strength. Clean, solid masonry is the base for any finish you add, so this step can’t be rushed.

The final prep depends on the plan for the wall. Bare brick that will stay exposed needs cleaning and sometimes a breathable sealer to shed water without trapping it. Brick that will be painted or coated needs a surface the new finish can grip. Matching the prep to the end use makes the finish last and keeps the old wall working for years to come. Done right, the prep is what lets a century-old wall serve a brand new purpose.

Frequently Asked Questions

Should painted brick be stripped during adaptive reuse?

It depends on the brick’s condition and the look you want. Stripping restores the natural brick and lets it breathe, but it’s costly and can harm soft old brick. If the paint is sound, keeping or repainting it is often the safer and cheaper choice.

Why is painted brick a problem on old buildings?

Paint can seal the brick and trap moisture inside, which leads to damage through freeze and thaw. Brick is meant to breathe. When paint blocks that, water stays in the wall and slowly breaks the brick down from within.

How do I know what condition the brick is in under the paint?

A close inspection looks for soft or crumbling brick, failing mortar and signs of trapped moisture like bubbling paint or stains. This check tells you whether the wall needs repair before the reuse work goes forward, so you can budget for it.

What is the safest way to remove paint from old brick?

Gentle methods work best. Chemical strippers made for masonry remove paint while sparing the brick face. Harsh methods like sandblasting can destroy the hard outer surface. Old paint may also contain lead, so safe handling is a must for the crew.

Can painted brick be repainted instead of stripped?

Yes. If the brick is stable, repainting with a breathable masonry paint refreshes the look while still letting some moisture escape. This is often cheaper and gentler than a full strip, and it avoids the risk of damaging soft brick.

Why a Brick Mason Can Save You Money on Future Home Repairs

Brick mason inspecting cracked brickwork and deteriorating mortar joints to prevent water damage and costly future home repairs.

Most brick problems start small and cheap to fix. A thin crack shows up, or a mortar joint goes soft, or a single brick works loose. Left alone, those small issues let water in, and water is what turns a minor repair into an expensive one. A good brick mason earns their fee by catching that early, before the trouble spreads to walls, chimneys, steps and foundations. The savings come from timing more than from the repair itself.

Spot Small Brick Problems Before They Get Expensive

The signs of brick trouble aren’t hard to see. Knowing which ones matter is the hard part. A hairline crack might be nothing, or it might mean the wall is moving. That’s the difference a brick mason brings: they spot the crack, then read what caused it.

Each common sign tells a story. Soft or missing mortar means the seal between bricks has started to fail. A brick that shifts under light pressure has lost its grip. Water stains near the base of a wall point to moisture already getting in. A section that bulges or leans is the most serious, since it usually signals movement behind the brick. A homeowner paints over a crack, while a mason checks how deep it runs and what sits behind it.

Behind almost every costly brick repair is water. Damaged mortar, open joints and poor drainage all give it a way in, and once it moves behind the wall it can bring rot, mold and interior leaks. The full breakdown lives in how water damage spreads behind brick walls. A mason who stops water early saves you the repairs it causes.

Repair Mortar Before Full Brick Replacement Is Needed

The good news about brick is that the bricks usually outlast the mortar around them. Clay brick can last a century, while mortar joints tend to wear out every 25 to 30 years. So when mortar starts crumbling, the fix is often repointing rather than replacement. Repointing means raking out the failing mortar and replacing it, which reseals the wall and adds decades to brickwork with solid bricks.

Why Matching Mortar Matters

Matching mortar is trickier than it looks. The new mortar has to match the old in strength, color and joint shape, or the repair stands out and can even cause harm. Mortar that’s harder than the brick won’t flex with the wall, so the brick faces crack instead. A mason picks a mix that protects the brick and blends into the existing joints, since the wrong mortar can quietly crack the brick face.

Protect High-Wear Areas Around the Home

Some parts of a home take more abuse than the rest, and that’s often why they’re brick to begin with. Steps soak up rain and sun and take daily foot traffic. Walkways shift with the ground through freeze cycles. Chimneys sit high and exposed on every side, and porches and garden walls fight constant moisture. All of them wear faster than a sheltered wall.

A brick mason keeps these spots ahead of the damage. On steps and walkways, that means resetting loose units and refreshing joints before water works under them. On a chimney, it means checking the crown and the mortar up top, where failure lets water run straight down inside. On porches and walls, it means catching lean or bulge while a reset still works instead of a rebuild. Small, regular fixes save the most here, since damage in these spots spreads fast.

Avoid Costly DIY Masonry Mistakes

Plenty of brick repairs look simple enough to handle yourself, and some are. But a few common DIY moves cause more harm than the original problem, and they land on the repair bill later.

The first is using the wrong mortar. Pack a general-purpose mix into an old wall, and you can crack the very brick you meant to save. The second is sealing brick that’s already damp or damaged, which traps water inside, where it keeps working on the brick and speeds up flaking. The third, and most common, is patching a crack without asking what caused it. Fill a crack that’s still moving, and it comes right back, because the pressure behind it never left. A mason’s real value here is diagnosis: they fix the cause, so the repair holds.

Frequently Asked Questions

What does a brick mason notice that homeowners usually miss?

A mason reads the cause behind a problem, not only the problem itself. They can tell whether a crack runs through the brick or along the mortar, whether it’s still moving and what’s pushing on it. That read points to the real fix and keeps a small repair from growing.

Can a mason repair failing mortar without replacing the brick?

Usually, yes. If the bricks are still solid and only the mortar has worn out, repointing restores the wall without touching the brick. The mason rakes out the old joints and packs in fresh mortar, which seals the joints and adds years of life.

Is fixing brick early really cheaper than waiting?

Usually, yes. Early repairs deal with mortar and small cracks, which are quick and low cost. Waiting lets water get behind the wall, and that brings rot, loose brick and rebuilds that cost many times more.

Which brick repairs should you leave to a mason instead of DIY?

Anything tied to structure or water. Repointing, resetting loose steps, chimney work and leaning walls all need the right mortar and a read on the cause. A wrong fix on these often traps moisture or hides movement, which makes the next repair worse.

How often should someone have their brickwork checked?

A quick look once or twice a year catches most trouble early, and high-wear spots like chimneys and steps deserve a closer eye. Rather than waiting a set number of years, call a mason when joints start to look sandy or crumbly, the sign the seal is going.

Brick Mailbox Repair: Signs It Needs More Than a Quick Patch

Brick mason inspecting a damaged brick mailbox with cracked mortar, missing bricks, and weathered masonry before repair in Birmingham, Alabama.

A brick mailbox takes a beating most homeowners never think about. Mail carriers bump it. Lawn mowers clip the base. Rain soaks the brick year after year. Brick mailbox repair often starts as a small fix, but some damage signals a bigger problem hiding underneath.

In Birmingham, where humidity and heavy rain are part of the yearly routine, catching these signs early saves you from a full rebuild later.

A few cracked bricks or loose mortar can often be patched. Leaning posts, widespread crumbling, or repeated cracking in the same spot usually mean the mailbox needs more than a surface fix.

Small Damage vs. Deeper Structural Trouble

Most brick mailbox issues start small. A chipped corner. A hairline crack. Loose mortar between a few bricks. These are usually easy fixes that a mason can patch in an afternoon.

The bigger question is whether that small damage is isolated or a symptom of something happening underneath. A single cracked brick from an accidental bump is not the same as cracking that keeps returning in the same spot every few months.

Signs a Quick Patch Will Actually Hold

Some damage really is simple. You can usually patch and move on if you see:

  • One or two cracked bricks with no cracking nearby
  • Small chips or scrapes from mower or vehicle contact
  • Minor mortar wear on the surface, without deep gaps
  • Cosmetic staining that hasn’t affected the brick’s strength

These issues rarely point to a deeper problem. A mason can replace the damaged bricks or repoint the mortar, and the mailbox holds up fine for years afterward.

Signs That Point to a Bigger Problem

Other damage patterns mean the patch job won’t last. Watch for these warning signs:

  • The mailbox leans or tilts, even slightly, compared to how it originally stood
  • Cracks run through multiple bricks in a line, rather than staying isolated
  • Mortar crumbles easily when you press a finger into it
  • The base feels loose or shifts when you push against the post
  • Cracking keeps reappearing in the same spot after previous repairs

Any of these usually means the foundation or core structure has a problem that a surface patch won’t fix.

Why Leaning Is the Most Serious Warning Sign

A mailbox that leans is telling you something moved underneath it. This usually points to one of a few causes:

  • A weak or shallow foundation that never fully supported the weight
  • Soil erosion around the base from years of rain runoff
  • Frost heave pushing the ground unevenly, though this is less common in Birmingham than in colder climates
  • Root growth from a nearby tree disturbing the base

Patching the visible brick without addressing what’s happening below ground means the lean will likely return, and probably get worse.

What Causes Repeated Cracking in the Same Spot

If a crack keeps showing up in the same location after being patched, that’s rarely bad luck. It usually means there’s ongoing movement or stress at that exact point.

Common causes include:

  • A structural joint that was never properly reinforced during original construction
  • Water infiltration that keeps softening the same section
  • Vibration from nearby traffic or a driveway that shifts the ground slightly over time

A mason checking this kind of repeat damage will often look past the crack itself and investigate what’s causing the movement in the first place.

How Water Damage Shows Up Differently on a Mailbox

A brick mailbox takes on rain from every angle, since it usually sits fully exposed without any roof overhang for protection. This makes water damage progress faster than it might on a house wall.

Watch for:

  • Efflorescence, the white powdery residue that forms when water moves through brick and evaporates at the surface
  • Soft, crumbly mortar near the base, where water tends to pool longest
  • Discoloration that spreads wider each rainy season

Catching water damage early, before it reaches the base or foundation, keeps the repair simple instead of turning into a full rebuild.

When Full Rebuild Beats Another Patch

Sometimes the smartest move is stripping the mailbox down and rebuilding it properly, rather than patching around a problem that keeps coming back.

This usually makes sense when:

  • The base or foundation shows clear signs of failure
  • Multiple past patches have already failed in the same areas
  • The lean has progressed enough that the mailbox looks visibly crooked
  • More than a third of the brick face shows cracking or crumbling

A full rebuild costs more upfront but saves you from repeating a patch job every year or two on a structure that was never going to hold long term.

Questions to Ask Before Hiring Someone for Mailbox Repair

  • Is this damage isolated, or does it point to a foundation issue?
  • Will a patch actually hold, or is this heading toward repeat failure?
  • What caused the lean or cracking in the first place?
  • Should we rebuild the base, or is the current foundation solid enough to keep?
  • What’s the expected lifespan of a patch repair versus a full rebuild here?

Frequently Asked Questions

How much does brick mailbox repair cost compared to a full rebuild?

Minor repairs typically cost much less than rebuilding the entire mailbox. A full rebuild requires removing the existing structure, repairing or replacing the foundation if needed, and constructing a new mailbox from the ground up.

Can a leaning brick mailbox be repaired without rebuilding it?

Sometimes. If the lean is slight and the foundation remains stable, repairs may be enough. A mailbox with significant movement or a failing base often requires a complete rebuild for lasting stability.

Why do cracks keep coming back in the same area of a brick mailbox?

Recurring cracks often indicate an underlying issue such as foundation movement, moisture intrusion, or a structural weakness. Addressing the root cause is essential before making permanent repairs.

Does white residue on a brick mailbox mean there is a problem?

White residue, known as efflorescence, is a sign that moisture is moving through the masonry. While the residue itself is not harmful, ongoing moisture can gradually weaken mortar joints and brick if left untreated.

How long should a brick mailbox last before major repairs are needed?

A properly built brick mailbox can last for decades. Its lifespan depends on construction quality, weather exposure, moisture conditions, and protection from accidental impacts by vehicles or lawn equipment.

Brick Patio Layouts That Make Outdoor Spaces Shine

Brick patio layouts featuring a herringbone brick design with dining, fire pit, seating areas, and outdoor kitchen for a functional backyard.

A brick patio has to do more than look nice from the kitchen window. It has to hold up under foot traffic. It has to drain water the right way. It also has to guide people through the space in a way that feels natural. A good brick patio layout does all of that while still looking like the best spot in the yard.

Function Comes First in a Great Patio Layout

Plenty of patios get planned around one question: what will it look like once it’s done. That question matters, but it leaves out how the space actually gets used. A patio near a grill needs a different layout than one built for quiet morning coffee.

A strong layout starts with movement. Where do people walk from the door to the seating area? Where does a grill or fire pit need open space around it? Answering those questions before laying a single brick keeps the finished patio from feeling cramped once the furniture goes in.

Pattern Choices That Change How a Patio Feels

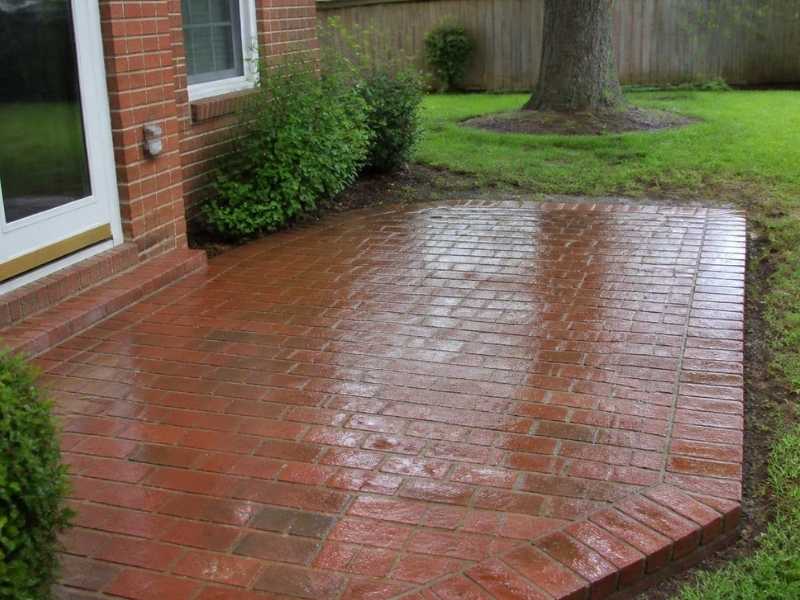
The pattern a patio is laid in changes how the whole space feels to walk through. It’s not just about how it looks from above. A running bond pattern lays bricks in simple offset rows. It creates a clean path that pulls the eye forward. It works well for a walkway or a long, narrow patio.

Herringbone patterns add more visual pop. The bricks angle in a zigzag that catches the light in different ways across the surface. That makes herringbone a strong pick for a patio meant to feel like a destination, not just a spot you pass through.

Basket weave patterns group bricks in small squares. This gives a patio a more structured, tiled look. This pattern works well for marking off one zone within a bigger space, like a dining area set apart from the rest of the yard.

Layouts That Handle Rain Without Trouble

Water has to go somewhere once it hits a patio. A good layout plans for that from the start. Brick patios need a slight slope built into the base. It usually angles away from the house, so rain runs off instead of pooling near the foundation.

Skipping this step causes real problems. A flat or poorly sloped patio can trap standing water after every storm. That trapped water softens the base under the brick over time. That softening leads to uneven settling. An uneven patio is both a trip hazard and an eyesore.

Good drainage planning also thinks about where water goes once it leaves the patio. Sending runoff toward a lawn, a drain, or a gravel bed instead of a neighbor’s yard keeps the whole layout working right for years.

Zoning a Backyard With Brick Borders and Transitions

A patio rarely serves just one job. It might need to handle dining, lounging, and a fire pit, all in the same footprint. Brick borders offer a simple way to mark these zones. There’s no need to build actual walls or fences between them.

A change in brick pattern, or a border of bricks laid in a different direction, can visually split a dining area from a lounge space. This works even when both sit on the same patio. This soft split helps a small backyard feel like it has several distinct areas instead of one flat slab.

Transition lines also help guide movement in a natural way. A slightly different brick look where a patio meets a lawn or garden bed shows where one space ends and another begins. This works without needing a physical step or barrier.

Small Finishing Touches That Elevate a Patio Layout

The small choices at the edges make a patio layout feel finished, not unplanned. A clean brick border along the edge keeps grass and mulch from creeping onto the patio. It also gives the whole layout a crisp, sharp look.

Mixing brick with another material, like gravel or wood decking, can add contrast without taking over the space. A brick patio bordered by a gravel path, or paired with a wood pergola, tends to feel more layered and thought out than brick used alone.

Lighting tucked along the edges or between pattern sections can stretch how a patio gets used well past sunset. Even a few small lights placed along a border or a step can turn a daytime patio into a space that works for evening gatherings too.

Furniture placement matters just as much as the brick itself. A layout with a bit more room near the main seating area gives chairs and tables space without crowding the edges. Cramped furniture can make even a well laid patio feel smaller than it really is.

Frequently Asked Questions

What is a brick patio?

A brick patio is an outdoor surface built from brick pavers or bricks set in a chosen pattern. It’s built to handle foot traffic, weather, and daily outdoor use while adding a tough, textured look to a backyard space.

Which brick pattern works best for a patio?

Running bond works well for high traffic areas and narrow spaces, since it creates a clear visual path. Herringbone suits spaces meant to stand out, and basket weave works well for marking off a specific zone within a larger patio.

Do brick patios need special drainage planning?

Yes. Brick patios need a slight slope built into the base so water drains away from the house instead of pooling on the surface. Skipping this step can lead to standing water and an uneven patio over time.

Can brick patios be combined with other materials?

Yes. Brick pairs well with materials like gravel, wood decking, and stone, which can add contrast and help mark off different zones within the same outdoor space.

How long does a brick patio typically last?

A well built brick patio can last decades with basic upkeep. Brick resists fading, cracking, and general wear better than many other paving materials when it’s installed the right way.