Outdoor Kitchen Service Openings Make Future Appliance Repairs Easier

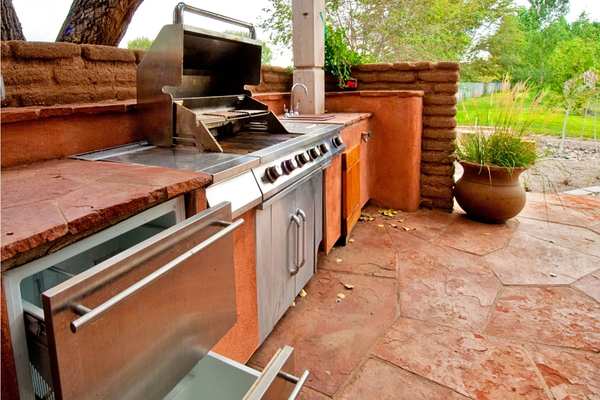
Outdoor kitchen in Birmingham with an accessible service opening for easier appliance repairs and utility maintenance.

Building an outdoor kitchen is one of the biggest upgrades a homeowner can make to a backyard. But before the first block goes down, a good contractor should walk the site like a construction survey, checking where pipes, wires, and gas lines will run. That early planning step decides whether a broken grill igniter costs you fifty dollars or an entire weekend of demolition. This is where service openings come in. They are small, planned gaps built into the masonry that let a technician reach the parts hiding behind the stone.

Most homeowners never think about this until something breaks. By then, the outdoor kitchen looks perfect from the outside, but nobody can get to the gas valve without tearing into the counter. A little planning up front avoids that headache for years to come.

Planning Service Openings Around Appliances

Every appliance in an outdoor kitchen needs its own plan for access. A built-in grill has an igniter, a gas line, and sometimes a rotisserie motor tucked behind the front panel. A refrigerator needs airflow and a spot to reach the compressor. A sink needs room for a shutoff valve and a trap.

Birmingham’s humid summers and occasional freezes put extra strain on these components, so repairs happen more often than people expect. If the layout skips access points, a plumber or appliance tech has to guess where to cut. That guesswork almost always means more damage than the original repair required.

A better approach starts at the design table. The builder maps out where each appliance sits, then decides where a panel or opening needs to go so a person can actually reach the parts. It sounds simple, but a lot of outdoor kitchens skip this step entirely.

Sizing Openings for Real Repair Access

A tiny slot is not the same as a working service opening. Some contractors leave a small gap just to hide a wire or hose, and that gap does nothing when the whole appliance needs to come out for repair or replacement.

The right size depends on the actual equipment. A grill’s spec sheet usually lists the clearance needed to pull the burner tray or unscrew the control panel. A fridge needs enough room around it for a tech to slide it forward without cracking the surrounding tile. Sinks need space below for hands and tools, not just for the pipe itself.

Pulling these measurements from the manufacturer before construction starts saves a lot of frustration later. It also means the opening works for the appliance you have now and for a similar model down the road, not just for the one narrow task the builder had in mind.

Keeping Gas, Electrical, and Plumbing Connections Reachable

Shutoff valves, outlets, and plumbing joints all need a clear path, not just an opening somewhere nearby. If the gas shutoff sits two feet behind a solid stone wall, it does not matter how nice the opening looks elsewhere. Nobody can turn off the gas quickly in an emergency.

This part of the process has to happen before the masonry enclosure gets sealed up. Once stone or stucco covers the frame, moving a valve or outlet means cutting into finished work. Coordinating the gas line, electrical run, and water supply with the mason ahead of time keeps everything reachable without a single crack in the finish.

A good rule of thumb: any connection point that a technician or inspector might need to touch should sit within reach of an opening, not buried behind a permanent wall.

Designing Removable Panels Without Disrupting the Finished Look

Nobody wants an outdoor kitchen that looks like a utility closet. The good news is that access does not have to fight with style. Removable panels can match the surrounding stone, tile, or stucco so closely that guests never notice them.

Magnetic panels, hinged doors, and stainless access doors all work well in outdoor settings. The trick is placing them in spots that make sense, like below a grill or beside a fridge, rather than wherever is easiest to build. A panel on the front of an island stands out. One built into a side wall or a low kick panel blends right in.

Good design treats access as part of the plan from day one. That is a very different result than cutting a hole into finished stone after something breaks.

Preparing the Outdoor Kitchen for Future Appliance Replacement

Appliances do not last forever. Grills, fridges, and ice makers all wear out eventually, and when that day comes, the space around them matters as much as the opening itself. If a fridge cabinet is built exactly to the millimeter for one model, a slightly larger replacement may not fit at all.

Leaving a bit of extra clearance around major appliances, and keeping their rough dimensions on file, makes future swaps far less painful. A contractor who confirms appliance specs early, rather than guessing, sets the whole project up for smoother repairs and replacements years down the line.

Thinking ahead this way protects the investment. Nobody wants to knock out a stone counter just because a new grill is two inches wider than the old one.

Frequently Asked Questions

Why does an outdoor kitchen need service openings?

Service openings give a technician a direct path to utilities, connections, and appliance parts that may need attention later. Without them, routine maintenance can turn into a much bigger repair job.

Where should service openings be placed in an outdoor kitchen?

They should sit wherever real work needs to happen, close to valves, outlets, and appliance backs. Their placement should match the appliance layout and still fit the overall look of the finished structure.

Can access panels be incorporated into a masonry outdoor kitchen?

Yes. Access doors and removable panels can be built into the masonry so a tech can reach what’s needed while the outdoor kitchen still looks clean and finished from every angle.

Should appliance models be selected before building the outdoor kitchen?

It helps a lot. Knowing the exact appliance specs ahead of time lets the builder size openings, plan utility placement, and set clearances correctly the first time.

Can poor service access make outdoor kitchen repairs more expensive?

Yes, often significantly. When utilities or appliances are hard to reach, a repair crew may need to remove extra stone or tile just to get to the problem, adding cost and time that proper planning would have avoided.
Outdoor Fireplace Ash Cleanouts Need Access After Construction Ends

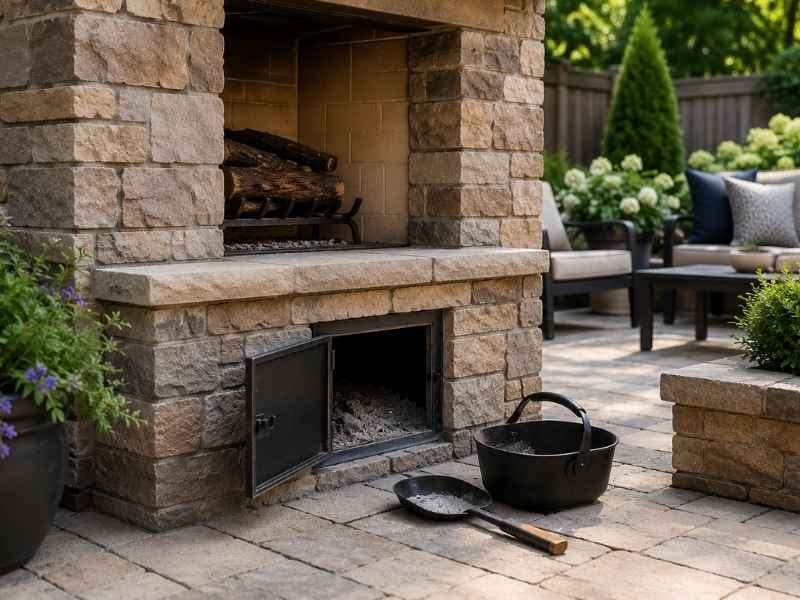
Outdoor fireplace with accessible ash cleanout in a Birmingham, Alabama backyard

A backyard fire feels great right up until the day you have to clean it out. An outdoor fireplace burns real wood, and every fire leaves behind ash that has to go somewhere. Most built-in models handle this with an ash cleanout, a small door near the base that lets you scoop out what’s left after the flames die down. The trouble usually shows up later. Once the masonry is finished and the patio fills up with furniture and plants, that little door can end up boxed in.

Why Ash Cleanout Access Matters After an Outdoor Fireplace Is Finished

Ash piles up fast when you burn wood, and it has to come out somewhere. The cleanout is the door you’ll use for that job every few weeks, so it needs to stay open and reachable. When it doesn’t, ash builds up inside, blocks airflow under the fire, and holds moisture against the firebrick. That mix wears down mortar and brick faster than most people expect.

There’s a safety side too. Fire safety guidance warns that wood ash can stay hot enough to start a fire for several days after a burn. If you can’t get to the cleanout easily, that hot ash sits longer than it should. A finished stone surround looks like the end of the project, but the cleanout is the part you actually live with for years. When furniture, planters or a fresh patio crowd it, a simple chore turns into a headache.

Where to Position an Ash Cleanout for Easy Backyard Access

The best time to decide where the cleanout goes is before the fireplace is built, while you can still picture how the yard will really be used. Think about your walking paths, your seating area and the spots where people gather when you entertain. Then put the cleanout door on a side you can walk straight up to, ideally facing an open path instead of a wall or a planting bed.

Leave enough room in front to kneel down with a shovel and a metal bucket. If the door opens toward the main seating, you’ll be reaching across chairs every time, so aim it somewhere clear instead. A small paver pad in front helps too, since you won’t be kneeling in mud or mulch. These little choices cost nothing during planning, and they save you real trouble once the space is finished.

How Finished Masonry Can Make Ash Removal More Difficult

Stone veneer and thick surrounds add width to a fireplace base, and that extra bulk can leave the cleanout door with almost no room to swing open. When a raised bed, a built-in bench or a side counter sits right against the opening, you lose the space you need to work. Some of these features get added late, after the fireplace already looks done, so nobody notices the conflict until the first cleanup.

The catch with masonry is that it’s hard to undo. Once the mortar has cured and the veneer is set, moving a cleanout means cutting into finished work, and that gets expensive. Checking clearance before the last courses go up is far cheaper than fixing it after. A good habit is to open the door fully during the build and confirm a shovel and bucket still fit with room to spare.

Planning Ash Removal Around Frequent Outdoor Fireplace Use

Birmingham’s mild winters mean plenty of folks burn outdoor fires through much of the year, not just a few weekends. More fires mean more ash, and it adds up quicker than a once-a-season fireplace ever would. A firebox that hosts a weekly gathering fills up fast, so the cleanout gets a real workout.

Manufacturer guidance commonly says to leave a thin layer of ash, about an inch, under a wood fire for insulation, then clear out the rest so air can move properly. If reaching the cleanout is a pain, people put it off, and packed ash starts trapping damp against the masonry. Over time that moisture is rough on firebrick and mortar joints. A cleanout that stays convenient is the difference between a two-minute chore and a job you keep avoiding.

What to Check Before the Backyard Fireplace Project Is Considered Complete

Before you call the project done, run one simple access test. Open the cleanout door all the way, kneel in front of it, and reach inside with a shovel the way you would on a real cleanup day. Make sure a bucket fits under or beside the opening without bumping into anything permanent.

A few things worth confirming while you’re there:

  • Nothing fixed blocks the door, such as a set stone bench, a built planter or an irrigation line.
  • Movable items like chairs and pots can shift aside easily.
  • The door swings open fully without hitting veneer, edging or a wall.
  • You have solid, dry footing to kneel on.

If something permanent is in the way now, it’s far simpler to adjust before the final landscaping goes in. Once the plants are established and the last stone is set, small fixes turn into big ones.

Frequently Asked Questions

Why does an outdoor fireplace need an ash cleanout?

Burning wood always leaves ash behind, and you have to clear it so the firebox stays open. When too much builds up, it chokes the airflow under the fire and traps moisture against the masonry. A cleanout gives you a simple way to pull that ash out and keep the fireplace working the way it should.

Where should an outdoor fireplace ash cleanout be located?

It should sit somewhere you can still reach after the patio, plants and seating are all in place. A door facing an open path or clear area works far better than one tucked behind a bench or a raised bed. Planning that spot early keeps the cleanout usable once the yard is finished.

Can landscaping block access to an outdoor fireplace cleanout?

Yes, and it happens more than people think. Shrubs, planters, decorative stone or a new patio surface can all crowd the door and leave you no room to work. That’s why the area right around the cleanout should stay clear when the landscaping plan comes together.

How often should ash be removed from an outdoor fireplace?

It depends on how often you burn and how your fireplace is built. Frequent use calls for more frequent cleanouts, while an occasional fire can go longer between them. The main thing is to not let ash pile up, since a thin layer is fine but a packed firebox is not.

Should ash cleanout access be checked before construction is finished?

Checking access before the masonry and landscaping wrap up can save you money and frustration later. It’s easy to adjust a tight spot while the crew is still on site and the finishes aren’t set. Once everything is complete, fixing a blocked cleanout usually means cutting into work you already paid for.

Outdoor Kitchen Masonry for Covered Patios

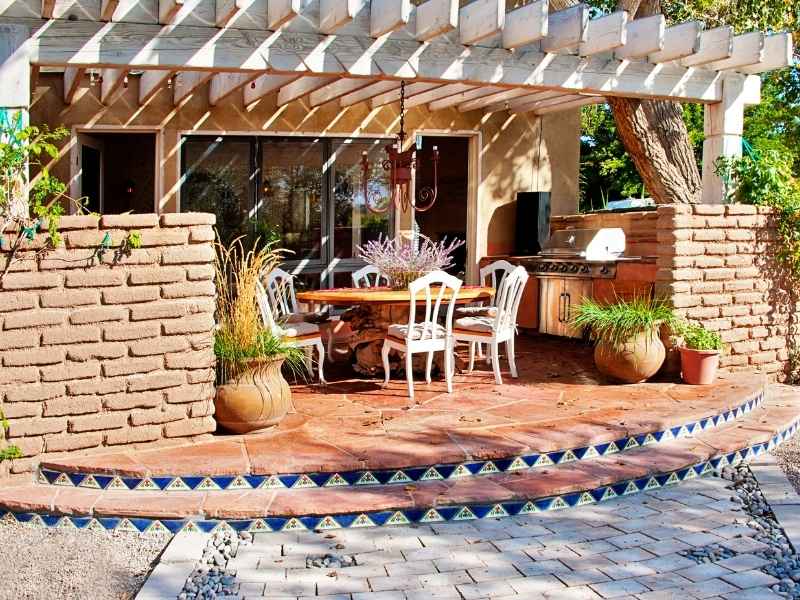
Outdoor kitchen masonry with brick and stone construction under a covered patio in Birmingham Alabama

An outdoor kitchen on a covered patio needs more than a grill and a countertop. The materials holding it together matter just as much as the appliances inside it. Brick, stone, and block all handle rain, heat, and daily wear in different ways, and choosing the wrong one can mean cracks, stains, or a rebuild in just a few years. This guide looks at how masonry gets picked and built for outdoor kitchens under a roof, what conditions to watch for, and where homeowners tend to go wrong. If you’re planning a covered patio kitchen, the choices you make now decide how it looks and holds up ten years from now.

Outdoor Kitchen Masonry Materials That Hold Up in Covered Patio Environments

A covered patio blocks direct rain and sun, but it doesn’t block humidity, splashing water, or the heat coming off the grill. That changes which materials make sense. Fire brick works well right around the cooking area because it can take repeat heat cycles without cracking. Natural stone like granite or bluestone handles grease and spills better than softer stones, which stain and pit over time. Concrete block is common for the base structure since it’s cheap and stable. It then gets covered with a veneer that matches the rest of the kitchen. Mortar type matters too. A patio with open sides still gets wind-driven rain, so the mortar needs to resist water without trapping it inside the wall. Skip the softer mortars sold for indoor jobs. They break down fast outside.

Designing Masonry Bases for Built-In Outdoor Kitchen Features

Professional outdoor kitchen masonry installation with brick and stone details for a covered patio in Birmingham Alabama

Every built-in grill, sink, or fridge needs a masonry base sized to fit it exactly, not close enough. Manufacturers list cutout dimensions for a reason, and skipping that step leads to gaps, exposed wiring, or a grill that won’t vent properly. The base has to carry real weight too. A stone countertop alone can run over 300 pounds, and once you add a grill, drawers, and stored dishes, the structure underneath needs steel support or solid block, not just stacked brick. Storage cabinets built into the masonry should sit a few inches off the ground to avoid pooling water. Plan the layout on paper first, marking grill placement, counter height, and walking space around the station. Fixing a masonry base after it’s built costs far more than getting the measurements right the first time.

How Covered Patio Conditions Affect Outdoor Kitchen Masonry Planning

A roof over the patio creates its own set of conditions. Less direct sun means masonry stays damp longer after rain, since sunlight isn’t drying it out the way it would in an open yard. That extra moisture can lead to mold on grout lines or, in cold climates, cracking from freeze and thaw cycles inside the brick. Airflow matters just as much. A covered kitchen with low ceilings and closed sides traps heat and smoke near the grill, which speeds up wear on nearby stone and stains the ceiling above it. Drainage needs attention before any masonry goes in. Water has to slope away from the base, not toward it, or you’ll end up with standing puddles under the counters. A slight pitch in the patio floor, paired with proper grout sealing, keeps most of these problems from starting in the first place.

Integrating Brick and Stone Details Into Outdoor Kitchen Designs

Once the structure is sound, the look of the masonry is what people actually notice. Matching the outdoor kitchen to the house exterior makes the whole backyard feel planned rather than added on later. If the home has red brick, a running bond pattern in the same tone ties the kitchen into the property instead of standing apart from it. Stone veneer works well for a more textured look, especially paired with a wood or metal countertop edge. Homeowners often mix materials: brick for the lower base, stone accents around the grill face, and a smooth cap on the countertop edge. That contrast adds interest without looking busy. Grout color counts too. Dark grout hides grease splatter better than white, which is worth thinking about before the tile goes in, not after.

Professional Masonry Installation Considerations for Outdoor Kitchen Projects

Masonry work for an outdoor kitchen isn’t a weekend project, and hiring the wrong crew shows up fast in cracked joints and uneven counters. Site prep comes first. The ground under the structure needs to be level and firm, or the whole base will shift within a year or two. Ask any contractor how they handle gas, water, and electrical lines before masonry work starts, since running them after the fact means cutting into finished brick. Experience with outdoor-specific materials matters more than general masonry skill. A mason who mostly builds indoor fireplaces may not know which mortar and sealant hold up outside in your climate. Ask for references from past outdoor kitchen jobs specifically, and find out how those projects have held up after a few years of weather.

Frequently Asked Questions

What type of masonry is best for an outdoor kitchen? 

Brick offers a classic look and handles heat well near the grill. Natural stone like granite resists stains and scratches, making it a strong pick for countertops. Concrete block works for hidden structural walls since it’s affordable and stable. The best choice usually comes down to budget, local climate, and how much upkeep you’re willing to do.

Can a masonry outdoor kitchen be built on an existing covered patio? 

Yes, but the existing patio needs a close look first. Check whether the foundation can support the added weight of masonry and appliances, whether drainage already works well, and whether there’s enough space for a comfortable layout. Some older patios need extra footing before construction can start safely.

How long does a masonry outdoor kitchen typically last? 

A well-built masonry outdoor kitchen can last 20 years or more. Quality materials, proper mortar, and correct drainage all stretch that lifespan out. Regular cleaning and resealing grout every few years help too. Cheap materials or rushed installation can cut that lifespan down to a fraction of that.

Does an outdoor kitchen need special masonry planning for weather protection? 

Yes. Moisture control is one of the biggest factors in how long masonry lasts outside. Proper ventilation around the grill area prevents heat and smoke damage, while sealed grout and sloped drainage keep water from soaking into the structure. Skipping these steps often leads to cracking or staining within a few years.

Outdoor Fireplace Planning Tips for Backyards

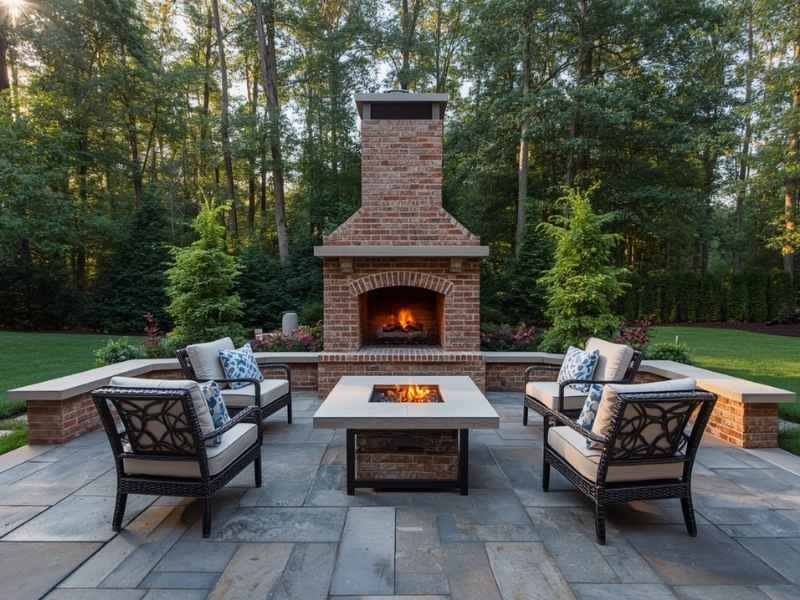
Brick outdoor fireplace with stone patio seating area in a landscaped Birmingham backyard, showing a finished outdoor living space with proper spacing and masonry design.

An outdoor fireplace can turn a plain backyard into the spot where everyone wants to hang out. But a lot of Birmingham homeowners jump straight to picking a design before working through the details that actually make an outdoor fireplace safe and functional.

Get the planning right first, and the design part becomes the easy half.

Before you pick a style, nail down placement, clearance rules, and drainage. These decisions affect safety and long-term durability far more than the look of the stone or brick.

Start With Placement, Not Design

Most homeowners start by picturing the finished fireplace. Start with location instead. Where the fireplace sits affects everything else, from safety to how much you’ll actually use it.

Good placement usually means:

  • Enough distance from the house, fence lines, and any overhanging trees
  • A spot sheltered from prevailing wind, so smoke doesn’t blow straight into your seating area
  • Easy access from the kitchen or main living space, since nobody wants to carry drinks and food across the whole yard
  • A flat, stable section of the yard, or one that can be leveled without major excavation

Pick the wrong spot and even a beautifully built fireplace becomes something nobody wants to use.

Clearance Rules You Cannot Skip

Birmingham follows building codes that set minimum clearance distances between an outdoor fireplace and nearby structures. These rules exist for a real reason. Heat and sparks travel farther than most people expect.

Before finalizing a location, confirm:

  • Minimum distance required from your house or any other structure
  • Clearance from fences, especially wood fencing
  • Distance from low-hanging tree branches
  • Any setback requirement from your property line

Skipping this step can mean a failed inspection or a forced rebuild after the fireplace is already finished. Check with your local permitting office before construction starts, not after.

Why Drainage Matters More Than Most People Expect

An outdoor fireplace sits exposed to Birmingham’s full range of weather, including heavy rain and humidity. Water that pools around the base can undermine the foundation over time, leading to cracking or shifting years down the road.

Plan for drainage by:

  • Grading the ground so water flows away from the fireplace base
  • Using a gravel or sand sub-base under the foundation to help water drain instead of collecting
  • Avoiding low spots in the yard where water naturally pools after storms

This step rarely shows up in design photos, but it’s one of the biggest factors in how long the structure actually lasts.

Choosing Between Wood-Burning and Gas

This decision affects both the construction and the ongoing maintenance of your outdoor fireplace.

Wood-burning fireplaces need:

  • A properly sized firebox and flue for good airflow
  • Storage space nearby for firewood
  • Regular cleaning to remove ash and creosote buildup

Gas fireplaces need:

  • A gas line run to the fireplace location, which affects where you can realistically place it
  • Less ongoing cleaning, but professional inspection of the gas components periodically
  • A slightly higher upfront cost in many cases, offset by lower long-term maintenance

Neither option is better across the board. It depends on how you plan to use the space and how much maintenance you’re willing to take on.

Matching the Fireplace to Your Yard’s Layout

An outdoor fireplace works best when it fits naturally into how your yard already flows.

Think through:

  • Whether the fireplace will anchor a seating area, or serve as more of a visual feature from a distance
  • How much seating you actually want around it, since this affects the overall footprint needed
  • Whether you’ll want it visible from indoors, which might change where on the property it makes sense to build

A fireplace planned around how the space gets used tends to get used a lot more than one placed just for looks.

Foundation Depth and Why It Matters in Alabama Clay

Alabama’s clay-heavy soil expands and contracts more than sandy or rocky ground, especially through wet and dry seasons. A shallow foundation might look fine at first, then start cracking or shifting within a few years.

A mason experienced with local soil conditions will typically:

  • Dig deeper than the minimum for a stable footing
  • Use a base material designed to handle some ground movement without transferring stress to the fireplace structure
  • Reinforce the foundation with rebar or similar material for added strength

This step costs more upfront than a shortcut foundation, but it’s the difference between a fireplace that lasts decades and one that needs early repair.

Questions to Ask Before Construction Begins

  • What is the required clearance distance from my house, fence, and property line?
  • How will you handle drainage around the fireplace base?
  • Do you recommend wood-burning or gas based on how I plan to use this space?
  • How deep will the foundation go, and how will it handle our clay soil?
  • Will this project need a permit, and who handles that paperwork?

Frequently Asked Questions

Do you need a permit to build an outdoor fireplace?

Many permanent outdoor fireplaces require a building permit, especially if they include a gas line or exceed certain size limits. Check with your local building department before construction begins.

How far should an outdoor fireplace be from a house?

The required distance depends on local building codes and the fireplace design. Many installations are placed between 10 and 25 feet from a home, but always verify the required clearance before building.

Should you choose a gas or wood-burning outdoor fireplace?

The best option depends on your needs. Gas fireplaces provide convenient operation and minimal cleanup, while wood-burning fireplaces offer a traditional fire experience but require more maintenance and fuel storage.

Why is a strong foundation important for an outdoor fireplace?

A stable foundation helps prevent settling and cracking over time. In areas with expanding and contracting clay soils, proper footing depth is essential for long-term structural performance.

Can poor drainage shorten the life of an outdoor fireplace?

Yes. Standing water around the foundation can weaken the supporting base and contribute to movement or cracking. Proper grading and drainage help protect the fireplace from long-term moisture damage.