
Retaining Wall Steps for Better Access Between Garden Levels
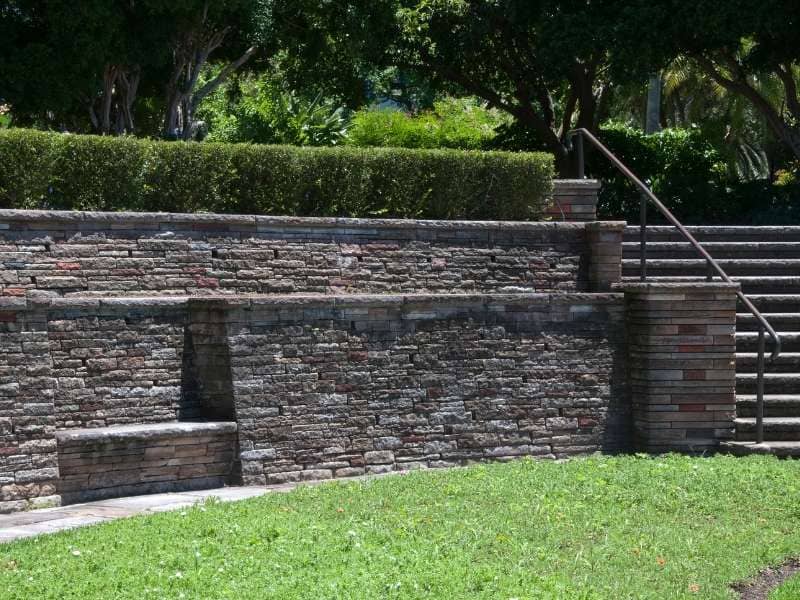
A tiered garden looks great from the patio, but it can be a pain to actually use. Without good steps, people cut across planting beds, slip on wet slopes, or skip the upper level entirely. Steps built into a retaining wall fix that by turning each terrace into usable space you can reach safely.
The key is treating the steps and the wall as one structure. They share the same soil, the same water, and the same base, so they have to be planned together. This guide covers where to place steps, which materials work, how to size them, how to handle drainage, and how to finish the edges so they last.
Planning Step Locations Along a Tiered Garden
Put steps where people already want to walk. Watch the worn paths in the grass and the routes between the back door, patio, garden beds, and any outdoor kitchen or seating area. A step placed off that natural line usually gets ignored while a muddy shortcut forms beside it.
Steps can sit in a few spots along a retaining wall. They can cut straight through the wall, sit at one end where the wall steps down, or run alongside the wall as a separate flight. Cutting through the middle looks strong but means the wall has to turn and return on both sides of the opening, which adds work.
Before anything is built, check a few things on site:
- Where the wall’s highest and lowest points fall
- Whether the steps will land on level ground at top and bottom
- How the steps connect to an existing brick patio, stone patio, or walkway
- Where utilities, irrigation lines, and tree roots sit
Leave a flat landing at the top and bottom of each flight. A landing gives people a safe place to stop and turn. It also makes the connection to paths and patios look intentional instead of squeezed in.
Choosing Retaining Wall Materials for Integrated Garden Steps
The best material is usually the one that matches the wall and the rest of the yard. Steps that look different from the wall they pass through can feel tacked on. Most homeowners choose between brick masonry, natural stone, and segmental concrete block.
Brick suits homes with brick exteriors and pairs well with brick pavers on paths and patios. It gives crisp, even lines and a classic look. Brick steps usually sit on a poured concrete base, and the mortar joints need care over time.
Natural stone masonry fits informal gardens and sloped lots. Large stone slabs make solid treads with very few joints, while stacked or mortared stone builds the step faces and wall. Stone pavers can also serve as treads on a block or concrete base.
Segmental block systems often include matching step units and caps, which can simplify the build. Neither brick nor stone is always the better choice. The right pick depends on appearance, foot traffic, upkeep, budget, and the masonry already on your property.
Setting Step Dimensions for Comfortable Movement Between Levels
Outdoor steps should be shallower and deeper than indoor stairs. People walk them in garden shoes, carry tools or plants, and often look around instead of down. Many outdoor designs use risers around 5 to 7 inches tall and treads of 12 to 16 inches deep or more.
A common rule of thumb is that two risers plus one tread should equal roughly 26 to 27 inches. That ratio tends to match a natural walking stride. Keep every riser in a flight the same height, because even a half-inch difference can cause trips.
Width matters as much as height. A single person can use a narrow flight, but 4 to 5 feet feels more comfortable and lets two people pass or walk side by side. Wider steps also look better in proportion to a long retaining wall.
Long slopes may need several short flights with landings between them. Handrail and lighting needs can depend on step count, height, and local code. Confirm those details with your contractor or building department before you settle on a design.
Managing Drainage Where Garden Steps Meet Retaining Walls
Water is the biggest threat to retaining wall steps. Rain runs down the slope, collects behind the wall, and looks for the easiest way out, which is often right through the step opening. If it has nowhere to go, it washes out the base and pushes on the wall.
Good drainage starts behind the wall. Most retaining walls need free-draining gravel behind them and, in many cases, a perforated drain pipe at the base to carry water away. Mortared walls may also need weep holes, which are small openings that let trapped water escape.
The steps themselves need a slight forward pitch so water sheds off each tread instead of pooling. Grade the soil at the top of the flight so runoff moves away from the steps. If the yard sees heavy runoff, a swale or drain at the top can redirect water before it reaches the wall.
Taller walls, heavy clay, and steep slopes can change what the wall needs. Some retaining walls require engineering or permits depending on height, load, and local rules. Ask about this early, since drainage and base work are hard to fix after the stone is set.
Finishing Step Edges and Transitions for Long-Term Durability
The edges and joints decide how long steps look good. Treads should overhang the riser slightly, often about an inch, to cast a shadow line that makes each step easier to see. A rounded or eased edge also chips less than a sharp one.
Pay attention to where steps meet the wall. The wall should wrap or return cleanly along the sides of the flight so soil can’t spill onto the treads. Caps on the wall ends give a finished look and protect the top course from water.
Transitions at the top and bottom need the same care. Where steps meet a patio, path, or lawn, keep the surfaces level and supported on a compacted base. Edge restraints hold brick pavers and stone pavers in place so they don’t creep away from the steps.
Plan for simple upkeep. Sweep debris, pull weeds from joints, and repoint loose mortar before water gets in. Catching a shifting tread or cracked joint early costs far less than rebuilding a flight later.
Frequently Asked Questions
Can steps be added to an existing retaining wall?
Steps can often be added, but it depends on how the wall was built and its condition. Cutting into a wall can weaken it if the sides of the opening aren’t rebuilt properly. Some walls are better served by a flight that runs beside them instead. A mason should inspect the wall before any cutting starts.
What is the best material for retaining wall steps?
No single material is best for every yard. Brick works well with brick homes and patios, while natural stone suits informal gardens. Block systems offer matching step units that simplify the build. Your choice should reflect appearance, traffic, maintenance, and budget.
How deep should outdoor garden steps be?
Many outdoor steps use treads around 12 to 16 inches deep. Deeper treads paired with shorter risers make for an easy, relaxed stride. The exact size depends on the slope and available space. Keep every step in a flight consistent to reduce trips.
Why do retaining wall steps settle or shift?
Most settling comes from water and a weak base. Poor drainage can wash out soil under the treads or push on the wall behind them. Loose fill that wasn’t compacted will also sink over time. A solid base and planned drainage prevent most of these problems.
Do retaining wall steps need much maintenance?
They need less care than many outdoor features, but they aren’t maintenance-free. Clear leaves and debris so water drains freely. Watch for loose treads, cracked mortar, and blocked weep holes. Small repairs made early keep the steps safe and the wall stable.
