7 Signs Your Home May Need Professional Brick Repair

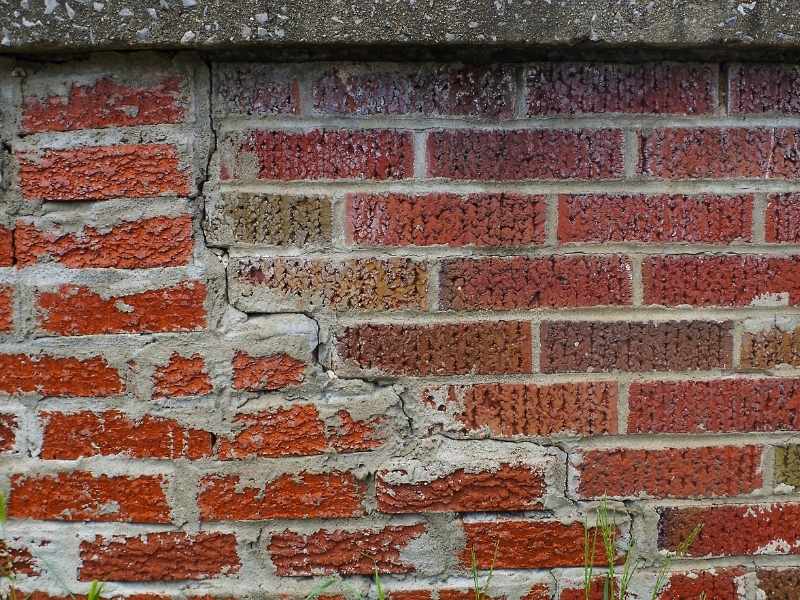
Close-up of a residential brick wall with stair-step cracks and deteriorating mortar, indicating the need for professional brick repair.

Brick is known for its strength and durability, but even well-built masonry can develop problems over time. Small cracks, damaged mortar, and moisture issues may seem minor at first, but they can lead to bigger and more costly repairs if left untreated. Knowing the warning signs can help homeowners address problems early and protect the long-term condition of their property.

Cracks Appearing in Brick Walls or Mortar Joints

Not all cracks are equal. A hairline crack in a single brick is usually cosmetic. A crack running through multiple bricks and mortar joints is a different story.

Stair-step cracks are the ones to watch. They follow the mortar joints in a diagonal line. This pattern often points to foundation movement or shifting soil. Birmingham’s clay-heavy soil moves with moisture changes. That movement puts pressure on masonry walls over time.

Horizontal cracks across a wall are even more serious. They can mean the wall is taking on lateral pressure it wasn’t designed to handle.

Any crack that’s getting wider over weeks or months needs a professional eye. Mark the ends with a pencil and check it again in 30 days. If it grows, that’s a clear sign you need brick repair before the damage spreads.

Loose, Broken, or Missing Bricks Around the Home

A single loose brick might seem minor. It rarely is. Once a brick shifts out of position, the bricks around it lose support. Water gets into the gap. The problem spreads fast.

Broken bricks happen for several reasons. Physical impact is one. But water damage is far more common in Alabama’s climate. Water soaks into porous brick, then expands when temperatures drop. That freeze-thaw cycle chips, splits, and cracks brick over multiple winters.

Missing bricks leave an open hole in the wall. That hole lets in water, insects, and wind. The mortar around the gap dries out and starts to fail faster too. When you spot loose or missing bricks, brick repair is the only way to stop the damage from getting worse.

Crumbling Mortar Between the Bricks

Mortar holds everything together. When it starts to crumble, the whole wall weakens.

Mortar has a lifespan. Most standard mortar lasts 25 to 30 years before it starts to break down. Older homes in Birmingham often have mortar that’s well past that point. You can spot deteriorating mortar by running your finger along a joint. If it comes away as powder or small chunks, it needs attention.

This is where tuckpointing comes in. A mason removes the damaged mortar to about three-quarters of an inch deep, then packs in fresh mortar. Done right, it restores the strength and water resistance of the wall.

Skipping this repair is a mistake. Worn mortar joints are open channels for water. Once water gets behind the brick, the cost of brick repair goes up fast.

White Stains and Moisture Problems on Brick Surfaces

White chalky stains on brick are called efflorescence. It happens when water moves through the masonry and pulls salts to the surface. On its own, efflorescence isn’t structural damage. But it’s a clear sign that water is getting into the wall.

Left alone, that moisture causes real problems. It softens the brick face, weakens mortar joints, and can lead to mold inside the wall cavity. In Birmingham’s humid summers, moisture problems get worse fast if repairs are delayed.

Dark stains or streaks below window sills and above door frames often point to flashing failures. Flashing is the metal barrier that directs water away from openings. When it fails, water runs straight into the masonry.

If you’re seeing white stains, wet spots after rain, or interior moisture near an exterior brick wall, don’t ignore it. That’s a sign brick repair and a full inspection are overdue.

Leaning Walls, Bulging Bricks, and Other Structural Warning Signs

A wall that bows outward is not a cosmetic problem. It’s a structural failure in progress.

Bulging brickwork happens when wall ties corrode or fail. Wall ties are metal connectors between the brick veneer and the structure behind it. Without them, the outer layer of brick starts to separate from the wall. It looks like a gentle curve at first. Over time, sections can collapse.

Leaning chimneys are a specific version of this. A chimney pulling away from the house has lost its footing or its mortar base. This is a safety issue, not just a repair issue.

Separated bricks at corners, sections that look uneven from the side, or doors and windows that suddenly stick are all signs the masonry is moving. Any of these call for brick repair right away. Early action keeps a repair job from turning into a full rebuild.

Frequently Asked Questions

What Are the Most Common Signs That a Home Needs Brick Repair?

The most common signs include cracks in the brick or mortar, crumbling joints, loose or missing bricks, white staining on the wall surface, and brickwork that bows or leans. Any of these mean it’s time for a professional inspection.

Can Cracked Bricks Be Repaired, or Do They Need to Be Replaced?

Small cracks can often be repaired with mortar or a flexible masonry sealant. Bricks with deeper structural cracks, missing sections, or spalling surfaces usually need to be replaced. A mason can determine the best solution based on the extent of the damage.

Why Does Mortar Between Bricks Begin to Crumble?

Age is one of the biggest factors. Standard mortar naturally wears down over time, while water infiltration and freeze-thaw cycles can accelerate deterioration. As mortar weakens, gaps form and allow more moisture to enter the wall.

How Long Does Professional Brick Repair Usually Last?

Tuckpointing and brick replacement performed by an experienced mason can last 20 to 30 years or more when quality materials and proper installation methods are used. Lifespan also depends on climate and drainage conditions around the home.

When Should You Call a Masonry Contractor for Brick Repair?

Homeowners should contact a masonry contractor when they notice widening cracks, loose bricks, deteriorating mortar, or sections of the wall that bow or lean. Addressing these issues early can help prevent more extensive and expensive repairs later.

How to Choose the Best Stone Patio Material for Your Home

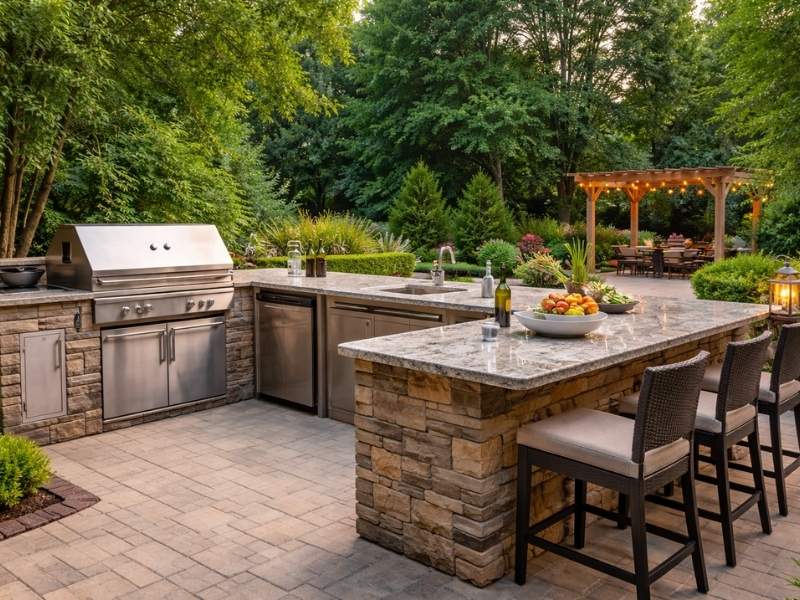
Natural stone patio with an outdoor kitchen, bar seating, and landscaped backyard designed for residential outdoor living.

A stone patio can add beauty, function, and value to your outdoor space. With several materials available, choosing the right one depends on factors such as durability, appearance, maintenance, and cost. Understanding your options can help you select a stone patio material that fits your home and lifestyle.

Understanding the Most Popular Stone Patio Materials

There are five stone types you’ll see most often. Here’s what each one looks like and where it works best.

Flagstone is cut from sandstone, limestone, or slate. The pieces come in irregular shapes. It gives a natural, relaxed look. It’s a popular choice for walkways and casual backyard patios.

Bluestone is a dense, blue-gray stone. It has a clean, consistent color. You can get it with a rough texture or a smooth cut finish. It works well in both casual and formal outdoor spaces.

Limestone is light in color. Most pieces are cream or tan. It pairs well with brick homes, which are common across Birmingham. It absorbs less heat than darker stones, so it stays cooler underfoot.

Slate has a dark, layered look. It does well in shaded areas. Too much direct sun over the years can cause it to flake apart.

Travertine is smooth and elegant. It’s often used around pools and covered patios. It stays cooler than most stones even in full sun.

Each stone feels different underfoot. Each one has different care needs and costs. Knowing the basics before you shop saves time and money.

Comparing Durability and Weather Resistance

Birmingham summers are hot and humid. Winters bring cold snaps and occasional ice. Your stone has to hold up through both.

Here’s how each option performs in this climate.

Flagstone is strong under foot traffic. But some types are porous. Water gets in. When it freezes, the surface can crack. Sealing helps. It adds to your yearly upkeep though.

Bluestone is one of the better options for Birmingham. It’s dense. It resists moisture well. It handles freeze-thaw cycles without cracking. It holds up under heavy use year after year.

Limestone is softer than bluestone. It wears down faster in busy areas. Humidity and acid rain can slowly etch the surface. It still works well in shaded or low-traffic spots.

Slate struggles when temperatures swing between hot and cold. In full sun, it can split along its natural layers over time. It’s better suited for covered patios here.

Travertine is porous. Without sealing, moisture gets in. That leads to staining and cracking. With proper sealing, it holds up well in Alabama’s summers.

For most open patios in Birmingham, bluestone and sealed flagstone are the safest bets.

Matching Stone Colors and Styles to Your Home

Stone color shapes the whole look of your yard. A mismatch stands out right away.

Many homes in Birmingham have red brick exteriors. Lighter stones like limestone and travertine go well with brick. They add warmth without clashing. Bluestone also works against brick if you want a modern look.

Darker homes pair well with slate or dark flagstone. These stones add contrast without competing.

Finishing also matters. A smooth (honed) finish looks formal. A rough or tumbled finish looks casual. Think about the rest of your yard. If it’s relaxed and informal, rough-cut flagstone fits. If you have a pool or a neat garden, a smooth cut stone looks better.

Shape plays a role too. Irregular flagstone has a loose, natural feel. Square-cut bluestone or travertine tiles look more structured and clean.

One tip: grab a sample before you order. Look at it outside next to your home. Colors look different under natural light than they do in a showroom.

What Factors Affect the Cost of a Stone Patio Material?

Several things affect what you’ll pay for a stone patio.

Stone type is the biggest factor. Travertine and natural bluestone cost more than basic flagstone. There are manufactured versions of most stones. They cost less but don’t always last as long.

Local availability makes a difference. Stone shipped from far away costs more. Some limestone and flagstone options come from quarries closer to Alabama. That can lower the material cost.

Thickness affects price and strength. Thin slabs cost less but crack more easily. For a busy patio, thicker stone is worth the extra cost.

Installation complexity affects labor costs. Irregular flagstone takes more time to fit than uniform tile. Curved edges or multi-level designs add to the labor bill.

Maintenance is a cost people often forget. Porous stones need sealing every one to two years. That adds up over time. Dense stones like bluestone need far less upkeep.

A low upfront price doesn’t always mean a low total cost. A stone that needs frequent repairs can end up costing more in the long run.

Questions to Ask Before Choosing a Stone Patio Material

These questions help narrow down your best option.

How will you use the patio? Heavy foot traffic needs a harder stone. A quiet garden seating area can work with softer options.

How much sun does the area get? Full Alabama sun gets very hot. Light-colored stones like travertine and limestone stay cooler underfoot. Dark slate gets uncomfortably hot.

Do you need a slip-resistant surface? Smooth finishes look great but get slippery when wet. If kids or older adults will use the space, choose a textured or rough surface.

How does the area drain? Poor drainage causes water to pool. That speeds up damage on porous stones. Make sure your mason grades the patio to drain properly.

How much maintenance will you actually do? Be honest. If you won’t reseal every year, don’t pick a stone that needs it. Bluestone is a solid low-maintenance choice.

How long do you want it to last? A properly installed natural stone patio can last 25 to 50 years. Manufactured stone products don’t always last as long outdoors.

Ask your mason these questions before you commit. A good contractor will match the material to your lifestyle, not just to what looks nice in a photo.

Frequently Asked Questions

What Is the Best Type of Stone for a Patio?

Bluestone and flagstone are strong choices for Birmingham. They handle heat, humidity, and cold well. The best pick depends on your design goals, budget, and maintenance preference.

Which Stone Patio Material Is the Most Durable?

Bluestone is one of the most durable options. It’s dense, resists moisture, and holds up under heavy use. Granite is harder but costs more and is less common for home patio projects.

Do Natural Stone Patios Require a Lot of Maintenance?

It depends on the stone. Bluestone needs very little care. Porous stones like travertine need sealing every one to two years to prevent staining and water damage.

What Factors Affect the Cost of a Stone Patio?

Stone type, thickness, local availability, installation complexity, and long-term maintenance all affect cost. A cheaper stone with high upkeep can end up costing more over time.

How Long Does a Natural Stone Patio Typically Last?

A well-installed natural stone patio can last 25 to 50 years or more. Lifespan depends on the stone type, installation quality, and ongoing maintenance.

What Is Stone Masonry? A Simple Guide for Homeowners

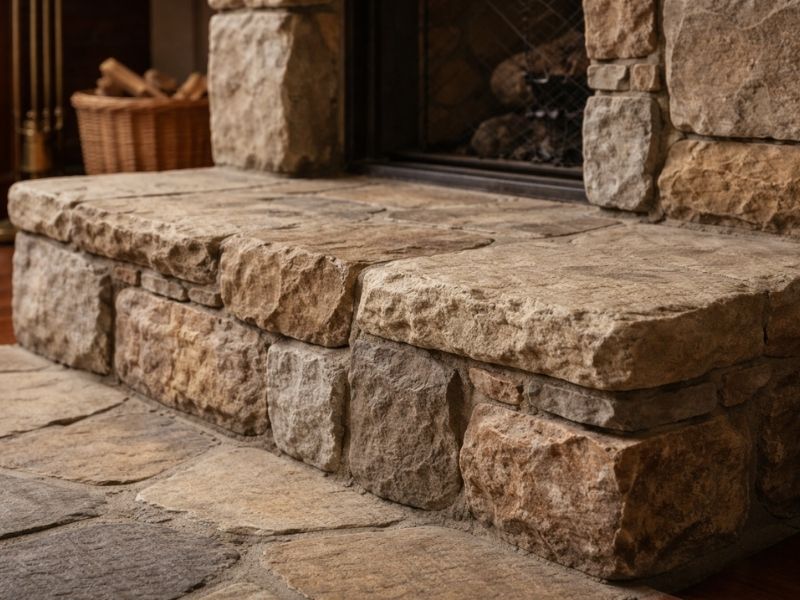
Natural stone masonry fireplace with stacked stone construction and detailed stonework used in residential interior design

Stone masonry is one of the oldest building methods around. It’s also one of the most misunderstood. Most homeowners know stone looks great, but have no idea what goes into building it or what to watch for when something goes wrong. This guide covers the basics so you’re not walking into a project blind. 

What Stone Masonry Actually Means

Stone masonry is the process of placing and securing natural or manufactured stone to build walls, steps, foundations and other structures. The stones are held together with mortar or, in some older methods, dry-stacked without any mortar at all.

Two broad categories cover most of what you’ll see.

Rubble Masonry

Rubble masonry uses rough, uncut stones. They’re laid with mortar and fitted together without much shaping. It looks rugged and natural. Older garden walls and field fences often use this method. It’s lower cost but less precise.

Ashlar Masonry

Ashlar masonry uses stones that are cut and dressed to uniform sizes. The joints are tight and clean. It looks sharp and is more common in formal construction, feature walls and high-end residential builds. It takes more time and skill to do right.

Knowing which type you’re looking at helps when you need repairs. Matching rubble is different from matching ashlar, and the wrong mason for the job shows fast.

The Materials Involved

Not all stone performs the same way outdoors or in wet conditions.

Common Stone Types

  • Granite is dense and very hard. It handles weather well and resists staining. Good for high-traffic areas and exterior walls.
  • Limestone is softer and easier to cut. It looks great but absorbs more water than granite. Needs sealing in wet climates.
  • Sandstone is porous. It’s attractive but needs careful maintenance. Prone to spalling in freeze-thaw conditions.
  • Slate splits into flat layers naturally. Common for flooring, cladding and roofing. Durable when installed correctly.
  • Fieldstone is whatever stone is pulled from local land. It varies a lot in hardness and durability depending on where it comes from.

Picking the wrong stone for the climate or the application is a mistake that shows up years later. A mason who knows local conditions is worth asking before you commit to a material.

How Stone Masonry Gets Built

The process depends on the type of structure, but the core steps follow a similar path.

A solid footing goes in first. Stone is heavy, much heavier than brick, so the base has to carry the load without settling. Then the mason lays the first course, fitting stones together so weight distributes evenly. Each course above that overlaps the joints below, just like brick, so the wall ties itself together as it rises.

Mortar fills the gaps and locks everything in place. For dry-stack work, the fit of each stone does that job instead. Dry-stack walls take longer to build well because every stone has to sit right without any help from mortar.

Coping stones go on top of freestanding walls to shed water. Without them, water sits on the top course, works into the joints and causes damage over time.

Problems to Watch for in Stone Masonry

Stone feels indestructible. It’s not.

Failing Mortar Joints

Mortar between stones breaks down over time. Crumbling joints, gaps or soft spots let water in. Left alone, water freezes in winter, expands and pushes the stones apart. Repointing the joints early is a small job. Waiting turns it into a big one.

Efflorescence

White mineral deposits on the stone face mean water is moving through the wall. The stone itself may be fine, but the moisture source needs finding and fixing. Wiping off the white streaks without fixing the water problem means they’ll be back.

Spalling and Surface Damage

Porous stones like sandstone and limestone can spall when water gets in and freezes. The face chips or flakes off. Once it’s gone, it’s gone. Matching replacement stones is harder than most people expect, especially on older builds.

Settlement Cracks

A crack running through multiple stones and joints usually means the footing has shifted. Small cracks from normal settling aren’t always serious. A crack that’s growing or widening is. Get a mason to look at it before it gets worse.

Maintaining Stone Masonry Without Overdoing It

Stone needs less maintenance than most materials, but it does need some.

Check mortar joints every few years. Soft or crumbling spots need repointing before water gets a foothold. Keep soil and plant growth away from the base of stone walls. Roots work into joints over time and slowly pull them apart.

Seal porous stones in wet climates. Limestone and sandstone benefit from a breathable sealer that keeps water out but lets the stone dry from the inside. Avoid film-forming sealers that trap moisture behind them.

Don’t pressure wash stone masonry. High pressure strips mortar from joints and can pit softer stones. A low-pressure rinse and a stiff brush handle most cleaning jobs without causing damage.

Quick Maintenance Checklist

  • Inspect mortar joints every two to three years
  • Repoint any soft or crumbling spots before winter
  • Keep mulch and soil away from the base of stone walls
  • Seal porous stone every three to five years
  • Avoid pressure washing

Frequently Asked Questions

How long does stone masonry last? 

Stone itself can last centuries. The mortar joints are the weak point and typically need attention every 25 to 50 years depending on weather exposure and the original mortar mix used. Dry-stack walls last as long as the stones hold their position, which with a good base can be a very long time.

Is stone masonry more expensive than brick? 

Yes, usually. Stone costs more as a material and takes longer to lay because each piece is irregular. Ashlar masonry with cut stone is the most expensive. Rubble masonry with local fieldstone can be more affordable, but labor still runs higher than brick in most cases.

Can stone masonry be repaired without replacing the whole wall? 

Most of the time, yes. Failed mortar gets repointed. Damaged stones get replaced individually if a match can be found. Full wall replacement is rare and usually only happens after serious structural failure or years of ignored water damage.

What’s the best stone for an exterior wall in a wet climate? 

Granite is the strongest choice for wet conditions. It’s dense, absorbs very little water and holds up in freeze-thaw cycles. Limestone and sandstone can work but need sealing and more regular maintenance in high-moisture areas.

Do I need a permit for stone masonry work? 

It depends on the scope. Repointing and minor repairs usually don’t need a permit. New walls, structural work or anything attached to the home typically does. Check with your local building department before starting any significant project.

Brick Masonry 101: Why Expansion Joints Matter

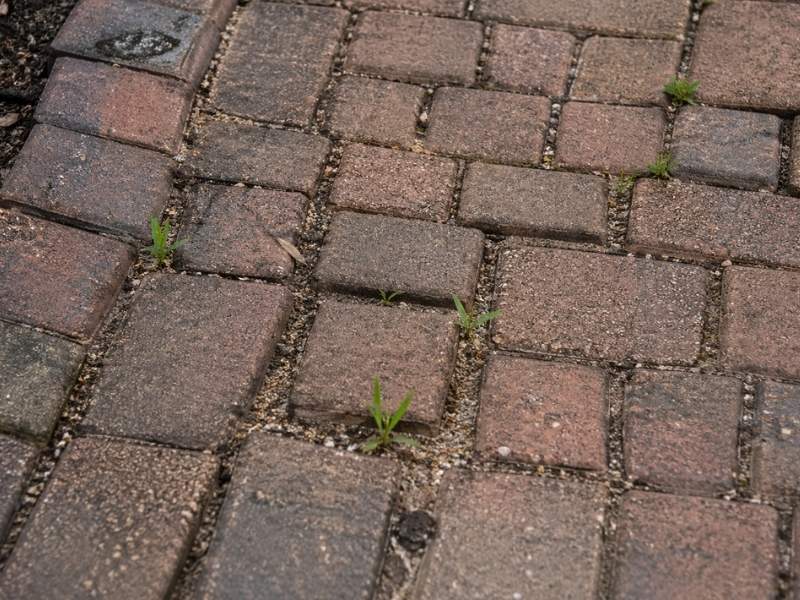
Uneven brick pavers with visible shifting and gaps showing movement caused by settling and expansion over time

Brick masonry looks solid. It feels permanent. But brick moves, and if you build a wall without giving it room to move, the wall cracks. That’s the short version. Expansion joints are the gaps that let brick grow and shrink without tearing itself apart. Skip them, and you pay for it later.

This matters for developers more than most people. You’re not fixing one house. You’re putting up dozens of units, and one bad detail repeats across every wall on the site.

What an Expansion Joint Actually Does

A brick wall is not still. It expands when it’s hot. It pulls in moisture and swells. Over years, fired clay brick keeps growing a tiny bit on its own. None of this stops.

An expansion joint is a planned gap in the brickwork. The gap gets filled with a soft material that squishes. When the brick pushes out, the joint closes a little. When the brick pulls back, the joint opens. The wall stays whole.

Think of it like the gaps in a sidewalk. Concrete moves too, so we cut lines into it. Brick needs the same mercy.

What Happens Without Them

No joint means no place for the pressure to go. So the brick finds its own way out. You get:

  • Stair-step cracks running through the mortar
  • Brick faces popping off or bowing outward
  • Cracked lintels above windows and doors
  • Mortar crumbling at the corners

These show up two to five years after the build, often. Right around the time the warranty talk gets awkward.

Heat and Humidity Make It Worse

Brick swelling depends a lot on weather. Warm, damp regions are rough on brick walls. The heat drives expansion. The moisture feeds it.

In a place with long hot summers and heavy rain, a brick wall works harder every single day. The freeze stays mild, but the wet and the heat don’t quit. So joints aren’t a nice-to-have here. They’re the thing standing between a clean wall and a callback.

If your build sites sit in that kind of climate, plan joints tighter and check them more.

Where Brick Masonry Joints Belong

You can’t just toss a few in and hope. Placement follows rules. Get these spots right:

Near Corners

Walls meeting at a corner fight each other when they move. Put a joint close to the corner, not on it. A common range is two to ten feet from the corner, depending on the wall.

Along Long Runs

A long wall builds up more force as it grows. The longer the run, the more often you need a joint. Many walls need one every 20 to 30 feet. Hot, wet sites push that number lower.

At Openings and Shape Changes

Windows, doors, and spots where the wall changes height or thickness are weak points. Stress piles up there. A joint nearby gives it an out.

Where Brick Meets Other Stuff

Brick moves one way. Concrete, steel, and wood all move their own way. Where two materials meet, they need a soft joint between them so they can move apart in peace.

The Brick Masonry Mistakes That Cost the Most

Most joint failures aren’t fancy. They’re sloppy. Watch for these:

Wrong filler. Hard mortar in an expansion joint does nothing. The gap has to stay soft. Use the right backer rod and sealant.

Joints too far apart. Saving a few joints to save a few dollars is a bad trade. The repair costs ten times more than the joint.

Painted-over joints. A joint smeared with the wrong sealant or paint can’t flex. It might as well not be there.

Bad maintenance. Sealant dries out and shrinks over the years. Somebody has to check it and redo it. Plan for that.

Why Developers Should Care Early

Here’s the money part. A skipped or botched joint is cheap to prevent and brutal to fix.

Adding a joint during the build costs a small amount per linear foot. Cutting one into a finished wall later means tearing into brick, matching old material, and dealing with an unhappy owner. The cost gap is huge.

Spread that across a whole project and the math gets loud. One repeated detail flaw can eat a real chunk of your budget in repair calls.

So bake it into the plans. Have your experienced masons mark joint locations before the first brick goes up. Inspect the sealant work, not just the brick face. A wall that looks great on closing day can still fail if the joints behind the pretty face were rushed.

A Quick Checklist Before You Build

  • Confirm joint spacing on the drawings, not just on site
  • Match spacing to your local heat and moisture, tighter where it’s hot and wet
  • Specify the right soft filler, not hard mortar
  • Add a maintenance note to the owner’s handover
  • Inspect joints during the build, not after complaints roll in

The Takeaway

Brick moves. Joints give it room. That’s the whole idea, and it protects your timeline, your budget, and your name on the project. The cheapest fix is the one you draw on the plans before anyone lifts a trowel.

Frequently Asked Questions

How often do brick expansion joints need replacing? 

The brick stays. The soft sealant inside the joint does not. Most sealant needs a check every few years and full replacement somewhere around 10 to 20 years, sooner in hot, wet weather.

Can I add expansion joints to an existing brick wall? 

Yes, but it costs more. A mason cuts a clean vertical line into the brick and fills it with backer rod and sealant. It works, though it’s far cheaper to plan joints from the start.

What’s the difference between an expansion joint and a control joint? 

An expansion joint handles brick growing and pushing out. A control joint handles materials like concrete block shrinking and pulling in. Brick veneer uses expansion joints. Don’t mix them up.

Are expansion joints required by code? 

Most building codes and brick standards call for movement joints in brick walls. Your local inspector will look for them. Skipping them can fail an inspection and void some warranties.

Will an expansion joint look ugly on my wall? 

No, if it’s done right. Joints can be tucked near corners and lined up with windows so they blend in. A good mason places them where the eye doesn’t catch them.