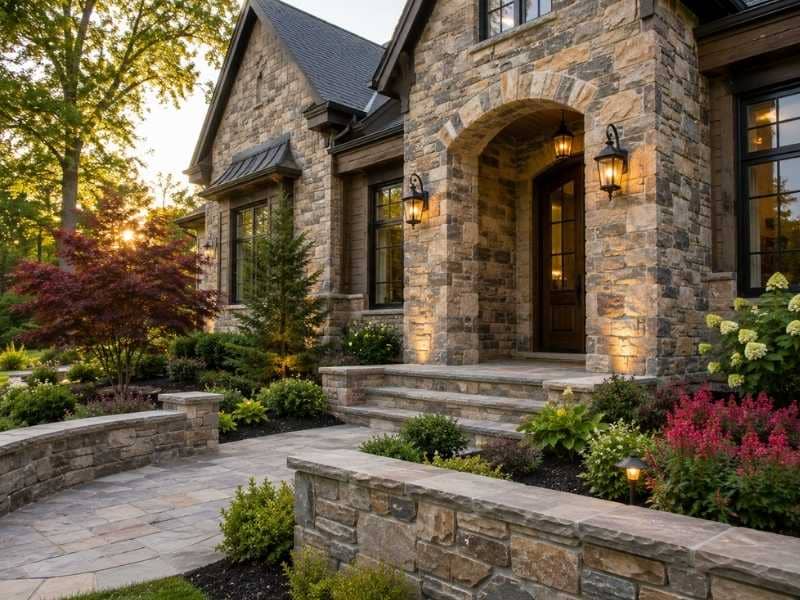
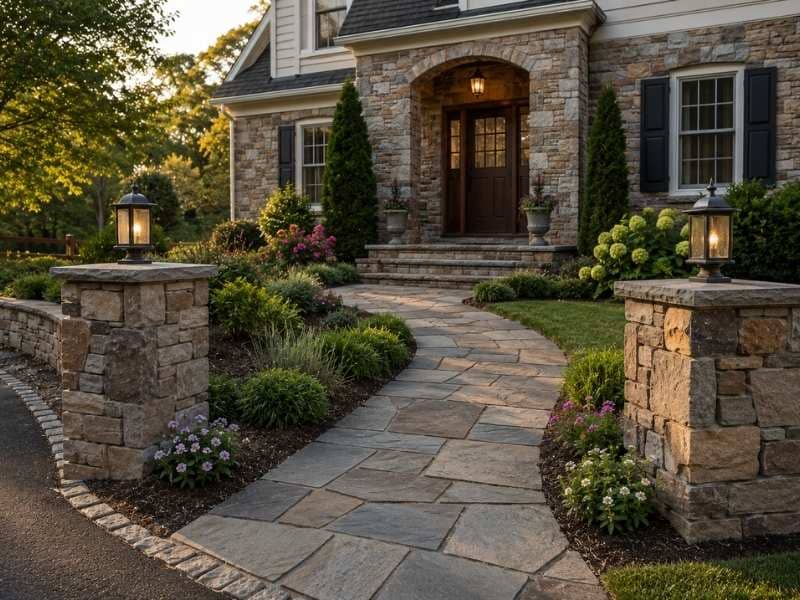
Stone Masonry Around Basement Window Wells Needs Careful Grading

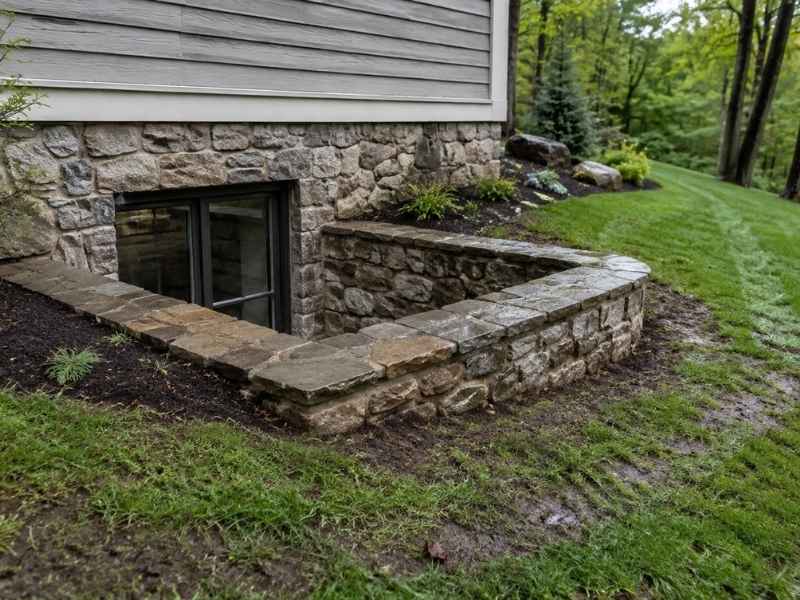
Stone masonry around a basement window well on a sloped hillside home in Birmingham, Alabama

Stone masonry does more than look good outside. Around a basement window well, it works as a small wall that holds back soil and keeps water from creeping toward the glass. A lot of homeowners never think about the ground around that stonework until water shows up where it shouldn’t. That is usually where a construction survey earns its keep. It shows how the yard actually slopes, not how it looks to the eye, and that difference matters more than most people expect.

It sits on plenty of hillside lots, and those slopes push rainwater in whatever direction gravity points it. If the grading near a window well is off, even by an inch or two, water finds the low spot. Sometimes that low spot is right next to the stone. 

Why Basement Window Wells Need Controlled Water Flow

A window well sits lower than the yard around it. That’s the whole point. It lets light into a basement room. But it also means the well is sitting in a natural catch basin unless the ground around it is shaped to send water somewhere else.

Think about what happens during a normal rainstorm. Water hits the yard and moves downhill. If the stonework around the well isn’t paired with the right grade, that water rolls straight toward the opening instead of past it. The stone itself isn’t the problem here. Stone is sturdy and handles moisture fine on its own. The trouble starts when the soil grade funnels water against it again and again.

Over time, repeated water contact softens the ground beneath and behind the stone. That’s not a drainage system failure. It’s a grading failure right at the point where earth meets masonry. Homeowners often notice water stains or a musty basement smell long before they think to check the yard’s slope, which is why this connection gets missed so often.

Grading Considerations Where Stone Meets a Sloped Yard

Birmingham’s hills make grading trickier than it would be on flat ground. A yard that slopes toward the house creates constant pressure for water to travel downward and inward, right past the stonework surrounding a window well.

The finished grade around that stone needs to do one job well: push water away from the opening, not toward it. That usually means the ground should slope down and away from the house for several feet before it levels off. When a lawn or landscaped bed sits higher than the stonework, or when the grade tilts even slightly toward the well, water has an easy path in.

This is where it gets tricky for homeowners doing their own yard work. A slope can look fine standing up and still be wrong. A few feet of drop over a long stretch is hard to spot with your eyes. That’s exactly the kind of detail a proper survey catches, because it measures elevation instead of guessing at it. Skipping that step is how small grading mistakes turn into recurring water problems.

Preventing Soil From Pressing Against Stone Window-Well Structures

Soil doesn’t stay put. Mulch settles, dirt washes downhill after storms, and landscaping projects add new material without anyone tracking how it changes the grade. Over a few seasons, that buildup can creep higher against the stonework than it was ever meant to sit.

When soil piles up against the stone, two things happen. First, it adds pressure the structure wasn’t built to handle at that height. Second, it can bury the low point that used to let water drain away from the well. The stonework starts holding back more than it should, and drainage patterns that used to work stop working.

Keeping a clear gap between the soil line and the top of the stone protects both the grading and the masonry. This isn’t about digging a trench or adding new hardware. It’s about paying attention when the yard changes, whether from a landscaping project, erosion, or just years of leaves and dirt settling in the same spot. Left unchecked, that slow soil creep is one of the most common reasons window-well stonework starts to fail.

How Heavy Rain Can Test Basement Window-Well Grading

Birmingham gets its share of intense rain, especially in spring. A heavy storm doesn’t create new problems in the grading. It exposes ones that were already there. Small mistakes that never mattered during light rain suddenly show up when the ground gets soaked fast.

Watch for pooling water near the base of the stonework after a storm. That’s usually the clearest sign something is off. Muddy soil that stays wet for days after everyone else’s yard has dried out is another red flag. So is a patch of grass that always looks a little greener or a little soggier than the rest of the lawn, since standing water tends to feed plants unevenly.

These signs don’t always mean disaster is coming. But they do mean the grading isn’t doing its job the way it should. Catching this after a storm, while the evidence is still fresh, makes it much easier to trace the water’s actual path than trying to guess weeks later on a dry day.

When a Mason Should Evaluate Stonework Around a Lower-Level Window

Not every yard needs a mason’s opinion every year. But certain changes are worth a second look, and putting that inspection off usually costs more later.

If the grading around the house has changed recently, whether from new landscaping, a driveway project, or just years of soil movement, it’s worth having someone check whether the stonework is still protected the way it was originally designed. The same goes for any sign of settlement near the well, like stones that seem slightly shifted or gaps that weren’t there before.

Persistent runoff is another clear signal. If water keeps finding its way toward the same spot no matter what small fixes get tried, the issue is probably bigger than surface-level maintenance. A mason who understands how grading interacts with stonework can look at the whole picture, not just the stone itself, and figure out where the real problem is sitting.

Frequently Asked Questions

How should the ground slope around a basement window well? 

The ground should slope down and away from the window well for several feet, guiding surface water past the stonework instead of letting it collect beside it.

Why does grading matter around basement window wells on hillside properties? 

Sloped lots naturally send runoff toward the lowest point on the property, which is often right where a basement window sits, so the surrounding grade needs careful planning to redirect that flow.

Can poor grading cause water to collect around a basement window well? 

Yes. Low spots or soil that’s shaped incorrectly can concentrate runoff right next to the stonework, raising the risk of water reaching the window itself.

Should soil touch the stone around a basement window well? 

Soil shouldn’t build up against the stone to the point where it covers the intended drainage path or adds pressure the structure wasn’t designed to hold.

When should stone masonry around a basement window be inspected? 

An inspection makes sense after repeated water pooling, noticeable shifts in the surrounding grade, stones that look displaced, or drainage patterns that changed following a landscaping project.

When a Stone Mason Should Reset Loose Caps on Porch Walls

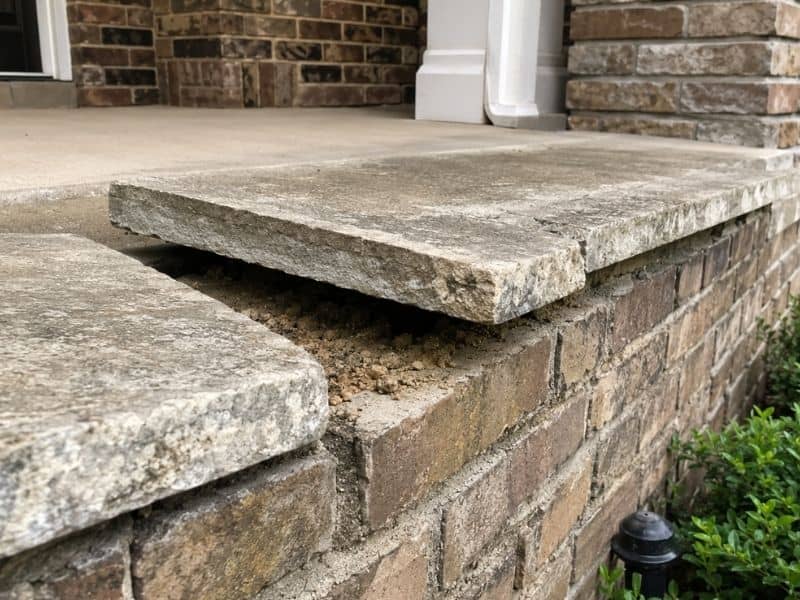
Loose stone cap lifted from a brick porch wall on an older Birmingham, Alabama home

A loose cap on a porch wall is not something to ignore. If you own an older home, you may have noticed a stone or brick cap that wobbles or looks out of place. A stone mason can check the wall and tell you if the cap needs to be reset. This kind of check often starts with a simple construction survey of the porch wall, the caps, and the ground nearby. Many homes built with brick and stone in this area show wear after years of rain, heat, and shifting soil. 

How to Tell When a Porch Wall Cap Has Become Loose

A loose cap does not always look broken. Sometimes it just feels wrong under your hand. If you press down on a cap and it rocks or wiggles, that is a clear sign it has come loose from the wall below it.

Look closely at the joints between the cap and the wall. A tight joint should be even all the way around. If you see a gap on one side, or the joint looks wider than it used to be, the cap has likely shifted.

Some caps pull away from the wall in small steps. You might notice a thin line of space where the stone no longer sits flush against the brick or block underneath. This kind of separation often happens slowly, so it is easy to miss until the movement becomes obvious.

A loose cap can also shift sideways, so it no longer lines up with the caps next to it. Once you spot uneven spacing or a cap that sticks out further than its neighbors, it is worth a closer look. Loose coping like this can create a falling-masonry concern, especially when the movement is easy to see or feel by hand.

Why Older Porch Walls on Sloped Lots Put More Stress on Stone Caps

Many porch walls in older Birmingham neighborhoods sit on ground that is not flat. Homes built decades ago often used whatever grade the lot offered, and builders did not always plan for how the soil would move over time.

On a sloped lot, water drains unevenly around the base of a wall. This uneven drainage can lead to slow settlement, where one section of the wall sinks slightly while another stays put. That kind of movement travels upward through the wall and often shows up first at the top, right where the caps sit.

Older mortar also tends to lose strength faster than newer mixes. Combine weaker mortar with a wall built on a slope, and the upper courses take on more stress than they were designed to handle. This is a common pattern in this region’s older homes, and it explains why so many porch caps loosen with age rather than failing all at once.

What Happens When Water Gets Beneath a Loose Wall Cap

Once a cap loosens, even a small gap can let rainwater slip underneath it. That water does not just sit there. It works its way down into the wall, soaking into the mortar joints and the stone or brick below.

Over time, this trapped moisture weakens the material that holds the wall together. In colder months, water that freezes inside these gaps can expand and push the joints apart even further. That cycle of freezing and thawing tends to speed up existing damage.

A properly set cap is meant to shed water away from the wall surface, not let it soak in. When a cap sits flush and tight, rain simply runs off the edge and drips clear of the masonry below. A loose cap breaks that protection, turning a small crack into an entry point for ongoing water damage.

When a Brick Stone Mason Should Reset the Existing Cap Instead of Replacing It

Not every loose cap needs to be thrown out and replaced. If the stone itself is still solid, with no deep cracks or crumbling edges, a brick stone mason can often remove it, clean off the old bedding material, and set it back in place with fresh mortar.

This approach only works when the cap has held up well over the years and the problem is really about what is underneath it, not the stone itself. Failed bedding material is one of the most common reasons a sound cap starts to rock or shift.

Before resetting anything, a mason should check the cap closely, along with the surface it sits on and the masonry right next to it. This kind of inspection is standard practice in masonry repair, where a loose but otherwise intact capstone is usually treated as a good candidate for removal, cleaning, and reinstallation rather than full replacement.

Why Loose Porch Wall Caps Should Be Addressed Before More Stones Shift

One loose cap rarely stays a problem on its own. As it continues to rock or shift, it puts uneven pressure on the caps beside it. Over time, that pressure can loosen stones that were once solid.

A wall’s upper section depends on each cap fitting tightly against the next one. Once that connection breaks down in one spot, the whole row loses some of its strength and its ability to keep water out.

Catching a loose cap early gives you a much simpler repair. It also means the original stone can often be saved and reused, which matters on older porches where matching stone can be hard to find. Waiting until several caps have shifted, or until the masonry underneath starts to show damage, usually turns a small fix into a much bigger project.

Frequently Asked Questions

How do I know if a porch wall cap needs to be reset? 

Some wear is normal on an older porch. A cap that needs attention will actually move when you press on it, show a clear gap along one edge, or have joints that have visibly widened compared to the caps around it.

Can a loose stone cap be reset without replacing it? 

Yes, in many cases. If the stone is still structurally sound and the problem is failed bedding material underneath, a mason can usually clean it, reset it, and reuse the original stone. Caps that are badly cracked or crumbling often need to be replaced instead.

Why do stone caps become loose on older porch walls? 

The most common causes are worn-out bedding material, years of weather exposure, small amounts of movement within the wall itself, and general aging of the mortar. This is separate from larger issues like retaining wall failure or drainage problems elsewhere on the property.

Does a sloped lot make loose porch wall caps more concerning?

It can. Uneven ground often leads to slow settlement, and older masonry on a slope tends to show that movement first at the top of the wall. An inspection is especially useful on sloped properties for this reason.

Can a loose wall cap allow water into the masonry? 

Yes. Gaps beneath or between coping stones give rainwater a direct path into the wall. Caps that are set correctly are positioned to shed that water away from the surface instead of letting it soak in.

Stone Mason Planning for Historic Facade Restoration

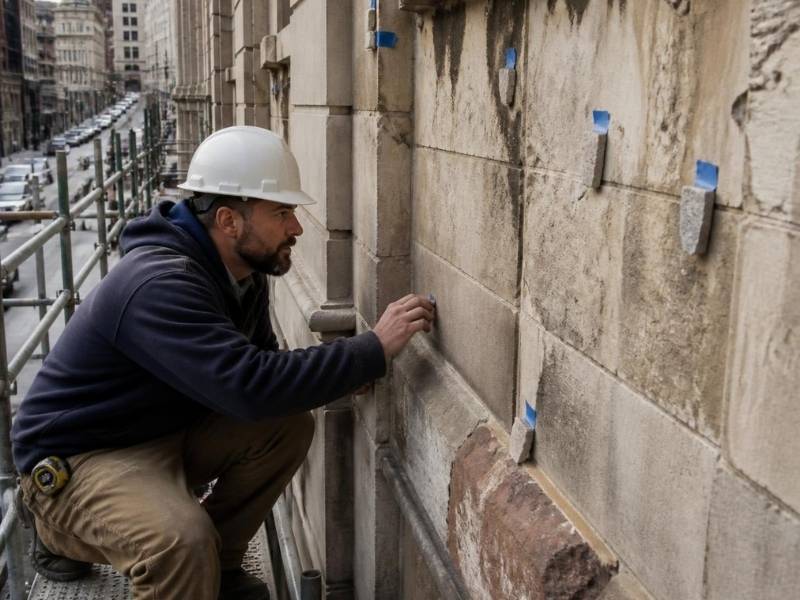
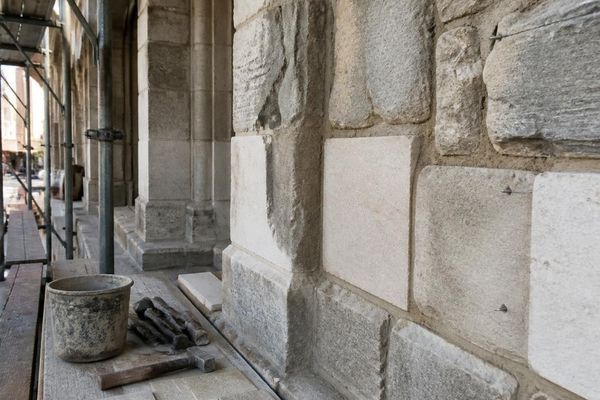
Stone mason inspecting weathered masonry and mortar damage on a historic building facade in Birmingham, Alabama.

Stone mason planning can make or break a historic facade project. Birmingham has blocks of limestone, sandstone, and terra cotta buildings from the early 1900s, and most of them weren’t built with today’s construction methods in mind. Bring in a stone mason too late, and you end up with mismatched repairs, code violations, or a redesign that costs more than the original bid.

This guide covers what developers need to line up before restoration work starts on a historic facade in Birmingham.

Why Stone Mason Input Comes Before the Architect’s Final Drawings

Most developers bring in an architect first and a mason later. On a historic facade, that order causes problems.

A stone mason can tell you which stone is original, which is a past repair, and how the material behaves after a century of weather. That information changes what an architect can safely design around. Skip this step, and you risk drawings that call for details the existing stone can’t support.

Stone Assessment Comes First

Before any design work starts, a mason should walk the building and document:

  • Stone type and source, if it can be identified
  • Cracking patterns and their likely cause
  • Mortar joint condition and mortar type
  • Areas of past repair, including mismatched patching
  • Water damage and staining patterns

This assessment becomes the reference point for every decision that follows.

Matching Historic Mortar Is Harder Than It Sounds

Modern Portland cement mortar is too hard for most historic stone and brick. It doesn’t flex the way older lime-based mortar does. Over time, hard mortar forces the surrounding stone to crack instead of the joint absorbing the movement.

Get a Mortar Analysis Done

A lab analysis of the original mortar tells you the lime-to-sand ratio and any additives used at the time. Matching that mix, not guessing at it, keeps new repairs from damaging the stone around them. Skipping this step is one of the most common and expensive mistakes on Birmingham restoration projects.

Birmingham’s Building Age Matters

Downtown Birmingham has structures dating back to the 1880s through the 1920s, built during the city’s rise as an industrial center. Mortar formulas changed across those decades. A mason working on a 1905 building needs a different mix than one working on a 1925 structure, even if the buildings sit two blocks apart.

Working With Historic Preservation Requirements

Historic stone facade restoration with matched replacement stone, repointed mortar joints, and masonry tools in Birmingham, Alabama.

Birmingham has several designated historic districts, and buildings inside them often fall under design review before a permit gets issued. Developers who skip this check find out the hard way, usually after a contractor has already started work.

Know Which Reviews Apply

Depending on the property, a project might need sign-off from local historic preservation staff, and in some cases a state or federal review if tax credits are involved. Each review has different documentation requirements. A stone mason familiar with Birmingham’s preservation process can flag what’s needed before design work locks in.

Tax Credit Projects Have Extra Rules

If the project uses federal or state historic tax credits, the restoration has to follow the Secretary of the Interior’s Standards for Rehabilitation. That means repair over replacement whenever possible, and it means documenting every change with photos and material specs. A mason who has worked on tax credit projects before will already know this drill.

Choosing Repair Over Replacement

Replacing damaged stone is often more expensive and less appropriate than repairing it. A skilled mason can patch, pin, or consolidate damaged stone instead of pulling it out.

When Replacement Is Actually Necessary

Full replacement makes sense when:

  1. The stone has lost more than half its original thickness to erosion
  2. Structural cracking threatens the stability of the wall above it
  3. The original stone type is no longer available and a close match exists
  4. Water infiltration has damaged the stone beyond what patching can fix

Outside of those situations, repair usually costs less and keeps more of the building’s original material intact.

Sequencing the Work on Site

Facade restoration doesn’t happen in one pass. Getting the order wrong adds cost and rework.

A Practical Sequence

  • Stabilize any loose or falling stone first, for safety
  • Complete water intrusion repairs before cosmetic work
  • Clean the facade using a method suited to the stone type
  • Repair mortar joints
  • Patch or replace damaged stone sections
  • Apply any approved sealants or coatings last

Cleaning before repair matters. It’s hard to match repair color and texture to a dirty facade, and the cleaning process itself can reveal damage that wasn’t visible before.

Budgeting for the Unknowns

Historic facade projects almost always turn up surprises once scaffolding goes up. Hidden water damage, deteriorated anchors, and structural cracks behind decorative stone don’t show up in a street-level walkthrough.

Build a contingency of at least 15 to 20 percent into the restoration budget. Developers who skip this often face a stalled project when the first unexpected repair eats through the entire allowance.

Frequently Asked Questions

When should a stone mason get involved in a historic facade project? 

Before the architect finalizes drawings. A mason’s stone assessment shapes what repairs and design details are realistic, so bringing one in early avoids costly redesigns later.

Why can’t I just use standard mortar for historic stone repair? 

Modern Portland cement mortar is harder than historic lime-based mortar. It doesn’t flex with the building, which forces cracking into the original stone instead of the joint.

Do all historic buildings in Birmingham need preservation review before restoration? 

Not all, but many inside designated historic districts do. Check with local preservation staff before finalizing a permit application, especially if tax credits are part of the project.

Is it better to repair or replace damaged historic stone? 

Repair is usually the better option, both for cost and for keeping the building’s original material. Replacement makes sense only when the stone is structurally compromised or too eroded to patch.

How much contingency budget should a facade restoration project include?

Plan for 15 to 20 percent above the base estimate. Hidden damage behind the facade is common once work begins, and a thin contingency can stall a project midway through.

Retaining Wall Drainage for Hillside Landscapes

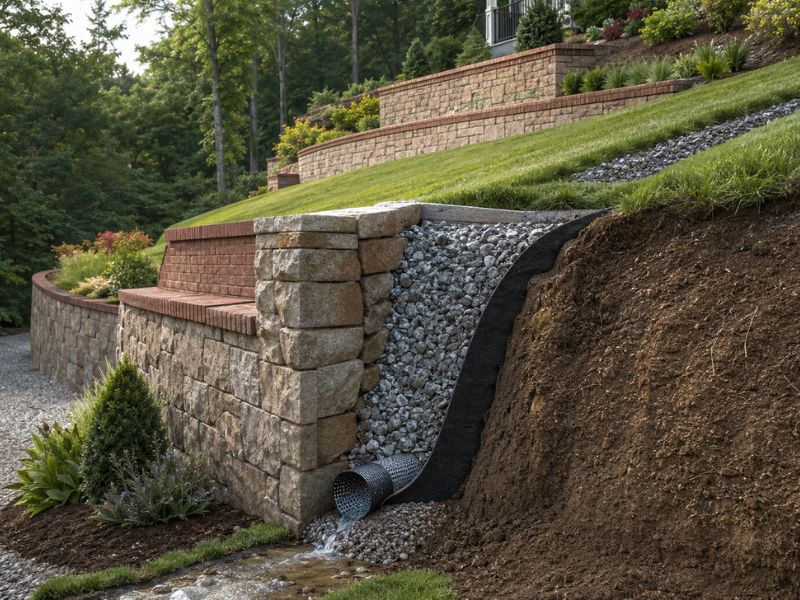
Cutaway view of retaining wall drainage on a hillside with crushed stone, filter fabric, and a perforated drainpipe directing water away.

A retaining wall holds back soil on a slope. But soil isn’t the only thing pushing against it. Water is too, and water causes most of the damage that shows up years later. A retaining wall without good drainage can bulge, crack, or lean over time. This can happen even when the wall itself was built well, using solid brick and stone retaining wall materials and a proper footing. The fix isn’t just a bigger wall or thicker blocks. It’s a full drainage plan. That plan keeps water moving away from the soil instead of trapped behind it. Here’s what that plan actually needs to include on a hillside property.

Stopping Runoff Before It Reaches the Wall

Rain moving downhill picks up speed and volume as it goes. By the time it reaches a retaining wall, it can carry a lot of force. Many people assume the wall’s own drain will handle all of this water. That’s asking too much of one small pipe.

Swales, berms, and simple grading changes can catch this runoff higher up the slope. A surface drain can do the same job in a spot where water tends to collect. These tools redirect water around the retained soil instead of through it. Handling water before it ever reaches the wall takes a lot of pressure off everything built behind it. A well-placed swale near the top of a slope can do more for a wall’s long-term health than any upgrade made to the wall itself.

Building a Layer That Lets Water Move

Even with good surface drainage, some water will still reach the wall. This is where the drainage zone behind the wall comes in. Builders place clean, crushed stone directly against the back of the wall, from the base almost to the top.

This stone layer gives water a fast, open path straight down. Instead of soaking sideways into the soil, it drains quickly toward the base. Without it, water builds up and turns the soil behind the wall into a heavy, saturated mass. That wet soil pushes hard against the wall face, whether the wall itself is made of brick and stone, poured concrete, or engineered blocks. Over months and years, that pressure is often what causes a wall to bow outward or crack.

Placing the Drainpipe in the Right Spot

Water that moves down through the stone layer needs somewhere to go. That’s the job of the toe drain. This is a perforated pipe set near the base of the wall. It has to sit low enough to catch water arriving at the bottom of that drainage zone.

Getting this placement right matters more on some sites than others. A steep slope raises the stakes. So does soil that drains poorly, a reinforced wall, or a taller wall. These conditions often call for a more detailed drainage plan than a standard toe drain alone. A brick and stone retaining wall that looks simple from the front can still need careful planning behind it. This becomes even more true once the slope above it gets steep enough to send a real volume of water toward the base.

Giving the Water Somewhere Safe to Go

A drainpipe only works if it actually leads somewhere useful. Water collected behind the wall needs to discharge into a lower area, a stormwater system, or another approved outlet. A pipe that just ends at the base of a slope can create a new problem instead of solving the old one.

The discharge point needs some protection too. Erosion can eat away at the outlet over time. Nearby landscaping work can accidentally bury or crush the pipe. Soil can shift and block the opening. Small animals sometimes build nests right at the outlet. That blocks the flow just as effectively as a pile of dirt would. Checking this spot occasionally keeps the whole drainage system working the way it was designed to.

Handling Water Between Stacked Walls

Hillside properties often use two or more brick and stone retaining walls stacked in tiers rather than one very tall wall. This spreads the load across several shorter structures. But it also means water from the upper level has to go somewhere before it reaches the lower wall.

Runoff from an upper terrace shouldn’t just flow straight down onto the wall below it. That water needs to be caught and redirected at each level. Left alone, it will saturate the narrow strip of soil between the tiers. That soil is already under pressure from both walls, so extra water there raises the risk for the whole system, not just one section.

Frequently Asked Questions

Does every hillside retaining wall need a drainpipe? 

Not every small wall uses the same setup, but brick and stone retaining walls on slopes, walls in poorly draining soil, reinforced walls, and many walls over four feet tall commonly need a toe drain or a full drainage plan.

Can surface grading replace drainage behind the wall? 

No. Surface grading redirects runoff before it reaches the retained soil. The drainage layer and pipe handle water that still gets through. Both systems work toward the same goal in different ways.

Where should retaining wall drainage water discharge? 

The outlet should lead to a safe lower area, an approved stormwater connection, or another spot built to receive the flow without causing erosion or new water problems nearby.

Why is filter fabric used in retaining wall drainage? 

Filter fabric keeps fine soil particles separate from the drainage stone. It also helps protect weep holes, lowering the chance that soil will work its way into the drainage path and clog it.

Should downspouts empty behind a hillside retaining wall? 

No. Roof runoff needs to be routed away from the retained soil instead of dumped behind the wall. Any concentrated water source like this should be identified and handled as part of the full site drainage plan.

Stone Pavers for Pedestrian-Friendly Courtyards

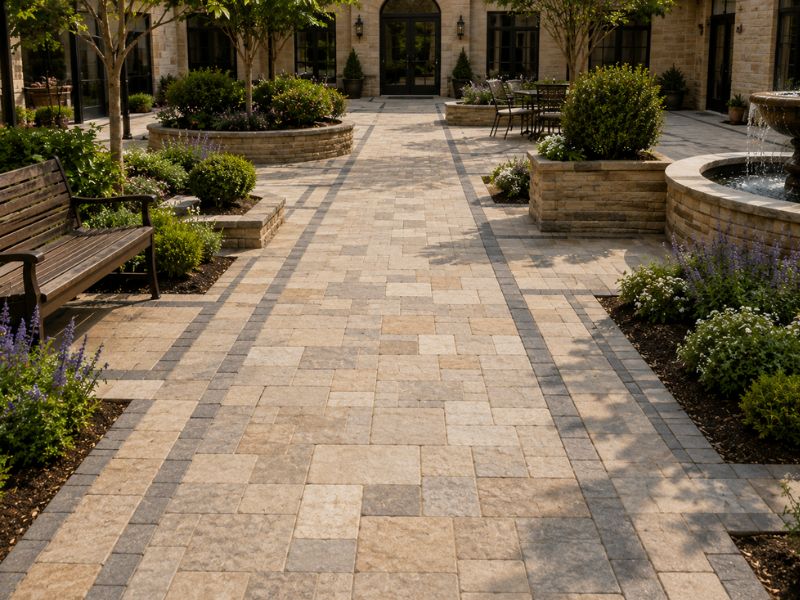
Stone pavers forming a wide pedestrian-friendly courtyard with smooth walkways, seating, landscaped planters, and a fountain.

Stone pavers do more than look nice in a courtyard. They shape how people actually move through space. A good layout guides feet naturally from one spot to the next. A poor layout creates awkward turns and tight squeezes. It also creates spots where people bump into each other. Get the paver design right, and a courtyard feels easy to walk through, even during busy hours. Get it wrong, and small problems pile up fast. Uneven joints are one example. Pavers that shift underfoot are another. Here’s what matters most when stone pavers need to carry steady foot traffic every day, in every kind of weather.

Building Clear Paths Between Every Entrance

A courtyard often connects several places at once. There’s the building door, the parking area, and maybe a garden. There are also shared spaces where people gather. Stone pavers can link all of these points with direct, simple paths.

The goal is a route that doesn’t force people to backtrack. It shouldn’t send them on a strange detour either. Sharp turns and dead ends cause slowdowns. They also create spots where people walking from different directions run into each other. A well-planned paver layout avoids this. It keeps paths straight where it can. It curves only when there’s a real reason to.

Think about a courtyard with three entrances feeding into one central space. If the paver layout treats each entrance as its own island, people end up crossing paths at odd angles near the middle. Laying out the route as one connected system instead solves that problem before it starts. Everyone gets a clear, direct line to where they’re going.

Setting Joint Widths for Steady Footing

Joints are the small gaps between each paver. They seem minor, but they matter a lot for safety. Wide, sunken, or uneven joints can catch a narrow heel. They can also snag a cane tip. A stroller wheel or a wheelchair caster can get stuck too.

Keeping joints consistent and closely spaced makes the whole surface feel smoother underfoot. This isn’t just about comfort. A joint that’s too wide in one busy spot can turn into a real tripping risk over time. This is especially true where people move quickly or carry something in their hands.

Making Smooth Transitions at Doors and Walkways

A stone-paved courtyard rarely exists on its own. It connects to door thresholds, sidewalks, and ramps. It also meets other paved areas nearby. These connection points need just as much attention as the courtyard itself.

A sudden height change at a doorway can trip someone up before they even notice the courtyard beyond it. The same goes for a raised edge where the pavers meet a sidewalk. An awkward little step tucked into a walkway causes the same problem. Smooth transitions keep the whole path feeling like one continuous surface. Nobody wants it to feel like a series of separate pieces stitched together.

Keeping Pavers From Shifting Under Daily Use

Pavers near a busy entrance or gathering spot take a beating. Constant foot traffic pushes and pulls at the joints over time. Without the right support underneath, pavers can start to spread apart. They can also shift out of place.

A stable setting bed and solid edge restraints hold everything together. Edge restraints work like a frame around the paved area. They keep the outer pavers from creeping outward as people walk across them day after day. This matters most at entrances and crossing points. Anywhere a lot of people gather at once will see the heaviest wear.

A weak edge restraint might not cause trouble right away. The real damage tends to show up months later, once joints have widened enough to loosen the pavers next to them. Checking the perimeter construction before installation is far easier than pulling up a section of finished courtyard to fix a problem that started underground.

Placing Seating and Features Off the Main Path

Benches, planters, fountains, and bike racks add character to a courtyard. But if they sit too close to the main walking route, they can turn a wide, easy path into a tight squeeze.

Keeping these features clear of primary walking zones matters more during busy times. That’s when several people might be moving through the courtyard at once. It also matters for anyone using a wheelchair, walker, or stroller. A narrow gap that works fine for one person on foot might not work at all for someone who needs more room to pass. Planning enough clearance around these features keeps the courtyard comfortable, no matter how many people are using it.

Frequently Asked Questions

Are stone pavers suitable for heavily used courtyards? 

Yes. Properly installed stone pavers can handle frequent foot traffic well. The base, joints, edges, and transitions all need to stay stable and even over time.

How wide should a pedestrian route through a courtyard be? 

The right width depends on the property and any accessibility rules that apply. The route needs enough clear space for people, wheelchairs, strollers, and mobility aids to pass through safely.

Can uneven courtyard pavers be repaired individually? 

Often, yes. A few pavers can usually be lifted and reset if the settlement is limited to a small area. Widespread shifting across a larger section may point to a deeper issue with the base or the edge restraints.

Why do courtyard pavers begin separating? 

Separation usually comes from weak edge restraints or movement in the base. Lost joint material and steady pressure along a busy route can cause it too. Fixing the actual cause helps stop the problem from coming back.

Should stone pavers be level with adjoining sidewalks? 

The two surfaces should meet through a smooth, well-planned transition. A sudden lip or a change in height can create a tripping hazard. It also makes the courtyard harder to move through.

Stone Mailbox Design for Sloped Front Yards

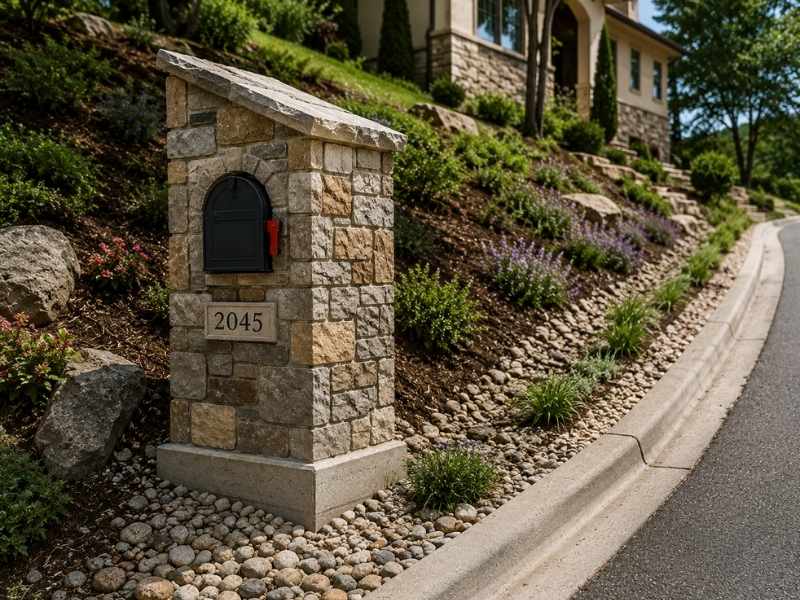
Stone mailbox design for sloped front yards with a level masonry base and gravel drainage beside the road

Stone mailbox design for a sloped front yard requires careful planning to create a stable, long-lasting installation. Changes in elevation affect foundation design, drainage, and the finished appearance, making proper site preparation an important part of the project. A properly designed base helps support the weight of the masonry, while grading and drainage features help manage water around the installation. Planning these elements before construction begins can improve long-term performance and reduce the likelihood of settlement, cracking, or other maintenance issues. 

Why a Slope Changes the Plan

A flat yard lets a mailbox sit on simple, even ground. A slope removes that easy footing. Gravity and water both work against a heavy structure on a hill, pulling and pushing it downhill over time. A stone mailbox weighs a lot, so these forces have real effect. The design has to account for them from the start, not treat them as an afterthought.

Water is the bigger enemy on a slope. Rain runs downhill and can wash out the soil around and under a mailbox base. Once that soil moves, the structure loses support and starts to shift. A mailbox that was straight in spring can lean by fall if water is left to run under it. Planning for both the slope and the water is what keeps a stone mailbox standing straight for years instead of months.

Building a Base That Holds on a Slope

The foundation is where a sloped mailbox succeeds or fails. On a hill, the base has to be deeper and stronger than one on flat ground. A concrete footing set below the frost line gives the mailbox a stable anchor that resists both settling and frost heave. This footing is the single most important part of the whole build, since everything above it depends on a base that won’t move.

The footing also has to be level even though the ground isn’t. Builders create a level base by digging into the slope and forming a flat footing, sometimes with a small retaining edge on the uphill side. This gives the stone a true, level surface to rest on. A level base is what keeps the finished mailbox from leaning downhill. Cutting into the slope also removes loose surface soil and sets the footing on firmer ground below, which adds to its strength.

Managing Water Around the Mailbox

Water control is a must on a sloped site. Without it, runoff will slowly undermine even a strong base. The design should guide water around the mailbox instead of letting it pool against or under the structure. Simple grading that directs flow to the sides does a lot of the work and costs very little to include.

Drainage under the base helps too. A bed of compacted gravel beneath the footing lets water pass through instead of collecting and freezing. On the uphill side, a small swale or channel can catch runoff and route it around the mailbox. These steps keep the soil around the mailbox firm, which keeps the mailbox where you put it. Water that’s managed well flows past the structure and does no harm. Water that’s ignored finds its way under the base and causes the very leaning you’re trying to prevent.

Placing the Mailbox for Access and Safety

A sloped yard makes placement a real design question. The mailbox still has to meet the postal service’s height and reach rules, measured from the road surface. On a slope, hitting those numbers takes some planning, since the ground by the curb may sit above or below the road. The design has to work with the road level, not the yard level, or the box ends up too high or too low to use.

Safety and access matter as well. The carrier and the homeowner both need to reach the box without scrambling on a steep bank. A small leveled area or a step at the base can make access safe and easy. Placing the mailbox where a car can pull up and where sight lines stay clear keeps it both usable and safe. A mailbox that forces a carrier onto a slippery slope is a problem waiting to happen, so good placement is part of a good design.

Choosing Stone and Finishes That Last

The stone choice affects how well the mailbox handles a slope’s wear. Dense, hard stone stands up to weather and the constant push of water on a hill. The mortar matters too, since good joints keep water out of the structure. Weak mortar on a slope invites the very water damage you’re trying to avoid, so it’s worth using a quality mix and solid workmanship.

Finishes should match the exposure. A sealer can help the stone and mortar shed water, which is worth more on a slope than on flat ground. Matching the stone to the home’s exterior ties the look together, but on a hill, durability comes first. A mailbox that looks great and fails in two winters helps no one. A well-built stone mailbox becomes a lasting feature instead of a repair waiting to happen, and on a slope that comes down to smart choices in stone, mortar and finish.

Frequently Asked Questions

How deep should the foundation be for a stone mailbox on a slope?

Deep enough to reach below the frost line and sit on stable ground. A concrete footing at that depth resists settling and frost heave. On a slope, this footing is the key to keeping the mailbox from leaning or shifting over time.

How do I keep a stone mailbox from leaning on a hill?

Start with a deep, level footing and control the water around it. Most leaning comes from a weak base or soil washed out by runoff. A strong foundation and good drainage together keep the mailbox straight for the long haul.

Does a stone mailbox on a slope need drainage?

Yes. Water running downhill can wash out the soil that supports the base. A gravel bed under the footing and grading that routes water around the mailbox keep the ground firm and the structure stable through wet seasons.

How do I meet mailbox height rules on a sloped yard?

Measure from the road surface, not the yard. Postal rules set the height and reach from the road, so the design has to match the road level even when the yard sits higher or lower. Planning this early avoids a rebuild later.

What stone works best for a mailbox on a slope?

Dense, hard stone paired with strong mortar holds up best. It resists weather and water, which hit harder on a slope. A water-shedding sealer adds another layer of protection for a mailbox exposed to constant runoff.

How Stone Masonry Improves Durability Without Sacrificing Curb Appeal

Stone masonry improving durability and curb appeal on a residential exterior with natural stone walls and a professionally finished entryway.

Stone masonry gives a home both strength and natural beauty at the same time. Its tough surface stands up to weather, while its look adds warmth that many owners love. That mix makes it a strong choice for facades, walls, entryways, stone hearths, fireplaces, and outdoor living spaces.

Few building choices manage to be this practical and this attractive. Stone holds its shape and its charm across many seasons of use. The right design lets a home enjoy lasting protection without giving up its good looks.

Stone Masonry Stands Up to Weather and Daily Wear

Well-built stone masonry handles the rough side of the outdoors with ease. Rain, heat, wind and the odd hard knock all wear on an exterior over time. Quality stone and sound mortar joints help these features keep their strength through it all.

This toughness is a big part of the appeal. A wall or facade built the right way resists the slow damage that weather brings. That staying power means fewer repairs and a look that holds up year after year.

Material Choices That Balance Strength and Appearance

The type of stone shapes both the look and the lifespan of a project. Natural and manufactured stone differ in color, texture, shape, density and how well they shrug off weather. Each option brings its own blend of beauty and toughness.

The best choice fits both the design and the setting. A stone that suits a dry, mild spot may struggle in heavy rain or strong sun. Picking the material with the local weather in mind helps the finished work last as long as it looks good.

Proper Installation Makes Stone Masonry Last Longer

Even the best stone falls short without skilled installation. A stable base, correct mortar work, good drainage and secure placement all play a part. Well-finished joints round out a job that can stand the test of time.

Careful work at this stage prevents trouble down the road. Poor drainage or loose placement can lead to movement, moisture and loose stones. A skilled crew heads off these issues, so the masonry stays strong for decades.

Maintaining Stone Masonry Without Losing Its Natural Character

A little upkeep keeps stone looking its best without changing its charm. Simple habits protect both the surface and the joints over the years.

Helpful maintenance steps include:

  • Checking the stone and mortar during routine inspections
  • Cleaning gently rather than with harsh scrubbing
  • Keeping vines and heavy plants off the surface
  • Repairing open mortar joints before they widen

A few cautions matter as much as the steps above. Strong chemicals, aggressive pressure washing and the wrong repair materials can all harm the stone. Gentle care preserves the natural character that makes stonework special.

Long-Term Value of Stone Masonry for Residential Exteriors

Durable stone features pay off over many years of ownership. They cut down on the frequent repairs that lesser materials often need. At the same time, they add character and curb appeal that buyers notice.

This blend of function and beauty gives stone its lasting worth. A well-designed, well-kept feature can stay both attractive and useful for generations. That kind of return is rare among exterior choices.

Frequently Asked Questions

How Long Does Stone Masonry Typically Last?

Well-built stone masonry can last for decades and often serves for generations. Its lifespan rests on the stone type, the quality of the install and the drainage. Local climate and steady upkeep also play a part.

Does Stone Masonry Require a Lot of Maintenance?

Not much, though it should still get a regular check. Look for open mortar joints, loose stones, staining and signs of moisture. Handling small issues early keeps them from growing into major repairs.

Can Damaged Stone Masonry Be Repaired?

Yes. Many problems respond to repointing joints, resetting loose stones or swapping out damaged pieces. Fixing the source of any moisture is part of a lasting repair. The right method depends on the cause and the extent of the damage.

Is Stone Masonry a Good Choice for Hot, Humid Climates?

Yes. Stone masonry performs well in hot, humid areas when it uses proper drainage and materials suited to the weather. Heat, humidity, heavy rain and shifting conditions all test a wall over time. Skilled installation is key to strong long-term results.

How a Stone Mason Creates Lasting Curb Appeal

A well-kept front yard tells a story before anyone reaches the door. One of the most reliable ways to improve that first impression is to hire a stone mason. A stone mason shapes and places natural or cut stone to build features that look sharp and hold up through years of weather. Whether the goal is a new walkway, a low garden wall, or a cleaner entry, stone delivers results that other materials rarely match. The National Association of Realtors reports that quality exterior masonry can return up to 80% of its cost at resale.

Start with the Right Stone

The best stone for any project depends on three things: the home’s architectural style, the local climate, and the available budget. A stone mason evaluates all three before recommending any material.

A modern home often suits smooth slate or clean-cut pavers. A cottage or traditional home usually calls for rough fieldstone or stacked limestone. Color matters just as much as shape. Stone should complement the siding, roof, and driveway rather than compete with them.

Some stones cut and shape more easily, which affects labor costs. Others are heavier and need a stronger base. Getting this decision right from the start prevents expensive corrections later. Natural stone installations last an average of 50 to 100 years when properly placed and maintained, far longer than timber or composite alternatives.

Add Features That Catch the Eye

Stone features don’t have to be large to make a real difference. A flat-stone walkway from the sidewalk to the front door changes how a home reads from the street immediately. A few low steps leading to the entry make the whole approach feel more deliberate.

Low stone walls along garden beds separate plants from lawn without looking harsh. A stone border around the base of the house, called a foundation surround, ties the whole exterior together. Even a single stone pillar at the end of a driveway adds structure and presence that’s hard to ignore.

These are not major construction projects, but they all need precise, experienced hands. A stone mason knows how to set each piece so it stays stable through rain, freeze-thaw cycles, and regular foot traffic.

Make Every Detail Look Neat

The difference between a decent stone job and a great one usually comes down to the small stuff. Straight lines, consistent joint spacing, and tight mortar work make everything look finished and intentional.

Uneven stones or wide, sloppy joints make a project look rushed regardless of how good the stone is. A skilled mason levels each piece carefully, checks spacing as they go, and fills gaps with mortar or compacted gravel correctly. They also cut stone cleanly at corners and edges so nothing looks jagged or improvised.

Good stone work doesn’t look added on. It looks like it was always there.

Match Stone with the Rest of the Yard

Stone works best as part of a complete outdoor design. Plants, driveways, fences, and lighting all shape how the space feels as a whole.

A gravel driveway with stone edging along the sides feels more finished and intentional. Plants near a stone wall soften the hard edges and bring in seasonal color. A wooden fence next to a stone pillar looks planned rather than accidental.

A mason who understands outdoor design helps connect each element to the next. The goal is one unified outdoor look, not a collection of separate projects placed near each other.

Protect the Look for Years

Stone is tough, but it benefits from routine attention. Dirt, moss, and algae build up over time and make even quality stone look dull. A rinse with a garden hose every few months handles most of it. For heavier buildup, mild soap and a stiff brush clean most stone surfaces without damage.

Check for loose stones once or twice a year, especially after winter. Freeze-thaw cycles shift stones and crack mortar over time. A loose piece caught early is a quick, inexpensive fix. Left alone, it turns into a larger and costlier repair. Crumbling mortar joints should be refilled before water gets underneath and causes structural damage below the surface.

Frequently Asked Questions

How do I choose the best stone for my project?

Consider the home’s style, the local climate, and the available budget. A stone mason can walk through the options and recommend materials that match the look you want while holding up to outdoor conditions year-round.

Can a stone feature be added to an older home?

Yes. Stone suits homes of all ages. It often works especially well with older homes because natural stone has a timeless, classic quality that complements traditional architecture.

What makes stone a good choice for outdoor projects?

Stone is dense, weather-resistant, and durable. It handles heat, cold, heavy foot traffic, and moisture better than wood, plastic, or composite materials. With basic care, it lasts 50 years or more.

How can I keep stone looking clean?

Rinse it with water every few months. For stains or moss, scrub with a soft brush and mild soap. Skip harsh chemical cleaners since they can strip the surface color or break down mortar over time.

When should damaged stone be repaired?

As soon as a problem appears. Loose stones and cracked mortar allow water in, which leads to structural damage underneath. A small repair done promptly costs far less than replacing a whole section later.

Does stone increase home resale value?

Yes. The National Association of Realtors consistently lists exterior stone features among the improvements with the strongest return on investment, particularly at the front of a home where buyer first impressions are formed.