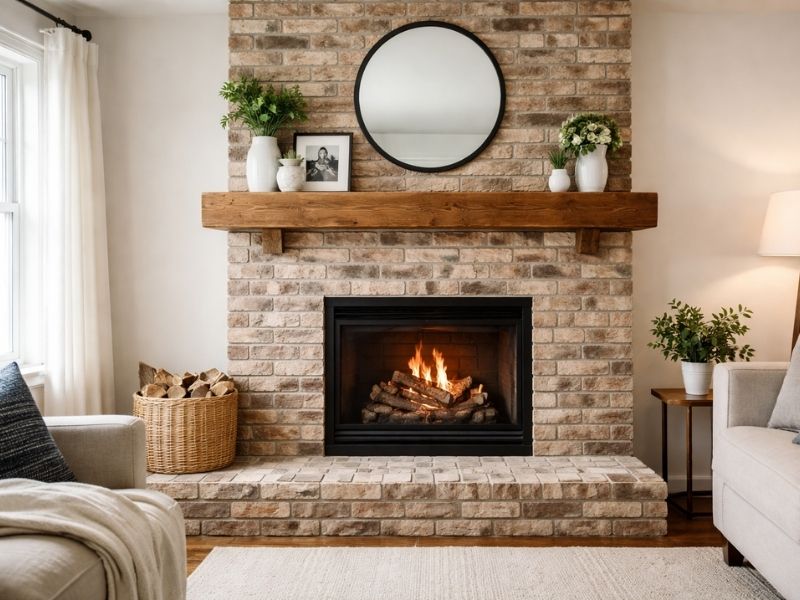
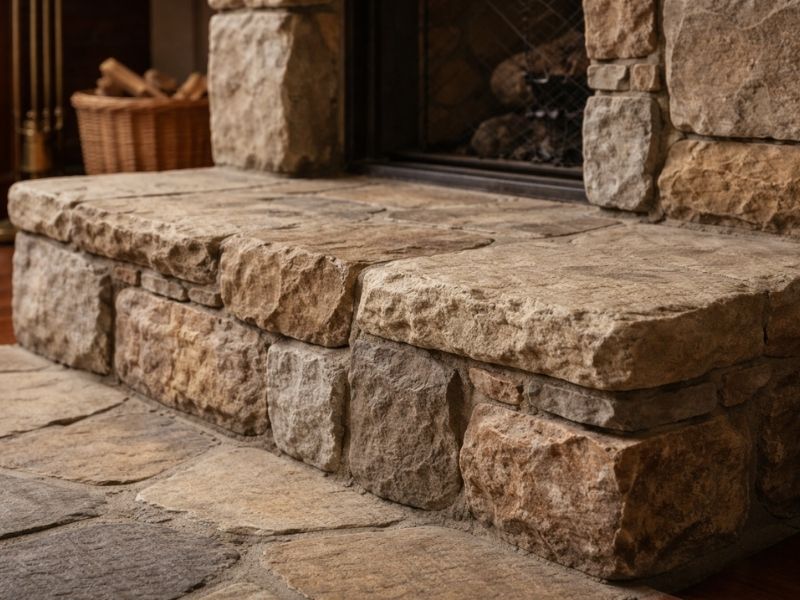
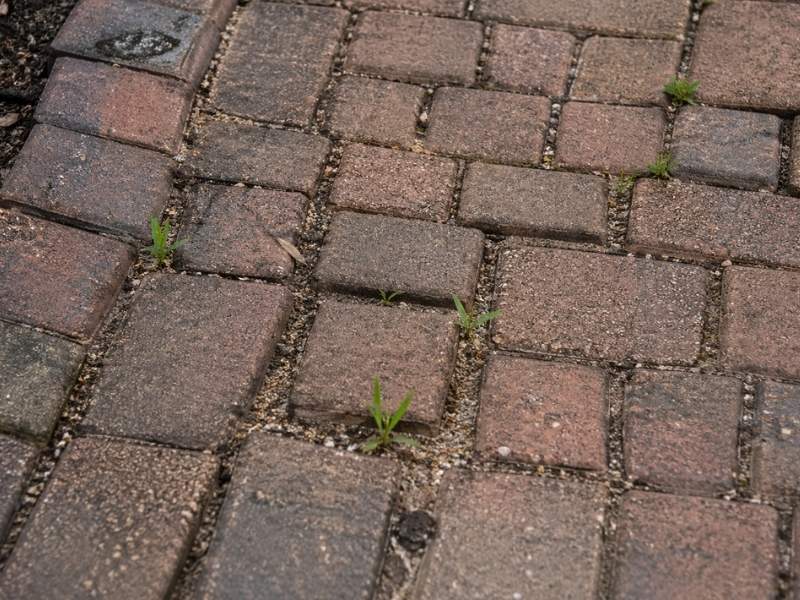
Brick Hearth Designs That Blend Style and Function
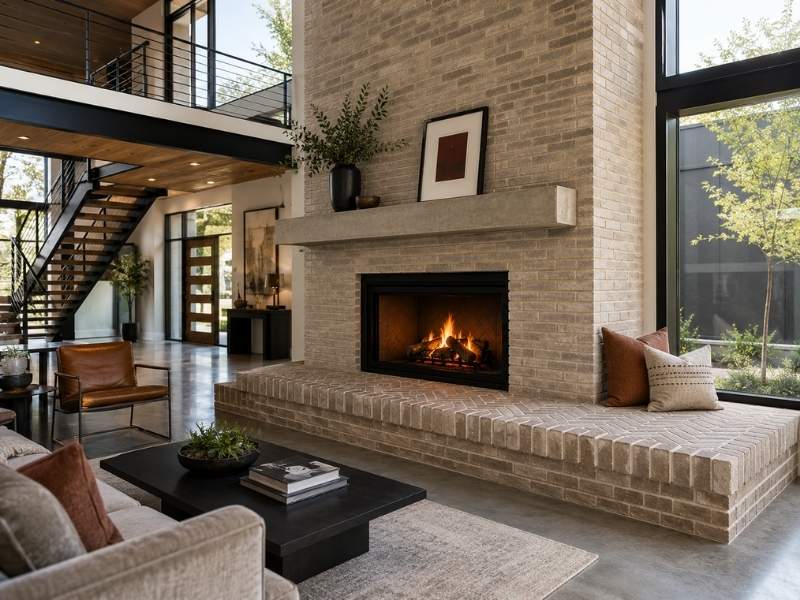
Brick hearth designs in a contemporary living room featuring a raised brick hearth, modern fireplace, and functional built-in seating.

A brick hearth does two jobs at once. It has to look good enough to anchor a room. It also has to hold up to real heat and daily use without cracking or fading. The best brick hearth designs never make you choose between the two.

A Hearth Has to Earn Its Place in the Room

A hearth sits at the center of a room, whether that room gets used every day or just on cold nights. Brick brings texture and warmth other materials can’t match. But it only works if the design fits how the space actually gets used.

A hearth that looks great in photos but scorches easily or collects soot in the wrong spots turns into a headache fast. Good brick hearth design starts with function first. The style choices get built on top of that solid base.

A well planned hearth also fits the room’s daily rhythm. Some hearths need to double as extra seating during a party. Others just need to look sharp behind a quiet fireplace on a cold night. Either way, the plan should start with how people will use the space.

Classic Brick Patterns That Never Go Out of Style

Classic brick patterns have stayed popular for a reason. Running bond, herringbone, and basket weave patterns each bring a different kind of texture to a hearth. Each one has proven itself over decades of use. These patterns mix visual interest with a surface that’s easy to clean.

A classic pattern also tends to age well. Trends in tile and stone can look dated within a decade. A well laid brick hearth with a traditional pattern still looks right years later. That staying power matters for a feature that isn’t cheap or easy to redo.

Hearths Built to Handle Real Heat and Daily Use

A hearth built for style but not for heat rarely lasts. Brick near an active fireplace has to handle real heat swings, day after day, without cracking or losing its color. That means picking the right brick type and the right mortar, not just what matches the room.

Fire-rated brick and heat-resistant mortar cost more up front. But they hold up where plain materials fail. A hearth that cracks after a few winters of use ends up costing more in repairs than picking the right materials would have cost at the start.

Daily use matters too, not just fire heat. A hearth gets walked past, leaned against, and sometimes used as extra seating. The brick and the joints between them need to handle that wear without chipping or wearing down at the edges.

Matching a New Hearth to a Home’s Existing Character

A new hearth rarely gets built on its own. It has to sit inside a home that already has its own look, whether that home is decades old or built last year. Hearth upgrades work best when they respect that existing look instead of fighting against it.

Older homes often call for a hearth that echoes the brick or stonework already in the house, like a matching color tone or a similar pattern. Newer homes have more room to try a fresh look. But even then, a hearth that feels totally cut off from the rest of the space rarely looks right.

This balance between old and new is part of what makes brick such a flexible material for a hearth. It can lean classic in an older home. It can also take on a cleaner, more modern shape in a newer build. Either way, it keeps the same tough core.

A hearth doesn’t have to match every detail of a home to feel right. It just has to speak the same visual language. A slightly warmer brick tone or a familiar pattern is often enough to tie a new hearth to a home built decades earlier.

Small Design Details That Make a Hearth Feel Custom

The details separate a good hearth from a forgettable one. A slightly raised hearth platform changes how a fireplace feels in a room. It gives the space more presence without needing a large footprint. A clean brick edge, cut and finished well, makes the whole feature look custom.

Small choices, like how the mortar joints get finished or how the brick wraps around a corner, add up fast. None of these details cost much extra on their own. But together, they turn a basic hearth into one that looks built just for the room it sits in.

Lighting plays a role too, even though it isn’t part of the brickwork itself. A small light aimed at the hearth can bring out the brick’s texture at night. It adds depth to a feature that might otherwise blend into the wall behind it.

Frequently Asked Questions

What is a brick hearth?

A brick hearth is the base and area around a fireplace, built from brick to handle heat safely while adding character to a room. It combines a fire-resistant surface with a design feature that anchors the space around it.

Can a brick hearth work with a modern fireplace?

Yes. Brick pairs well with both wood-burning and gas fireplace inserts, as long as the brick and mortar used can handle the heat output of the fireplace installed.

Do brick hearths need special maintenance?

Brick hearths need some cleaning to remove soot and ash, along with regular checks of the mortar joints for cracking. Well-built hearths with good materials usually need only light upkeep over the years.

How do I match a brick hearth to my home’s style?

Matching starts with looking at the brick tones and patterns already in the home, then picking a hearth style that either echoes those details or contrasts with them in a way that still feels planned rather than random.

Is brick hearth installation different from a regular brick wall?

Yes, in some ways. A hearth has to meet fire safety rules that a regular brick wall doesn’t, including proper clearance from anything flammable and the use of fire-rated brick and mortar near the firebox.
Stone Patio Design Features That Improve Outdoor Living

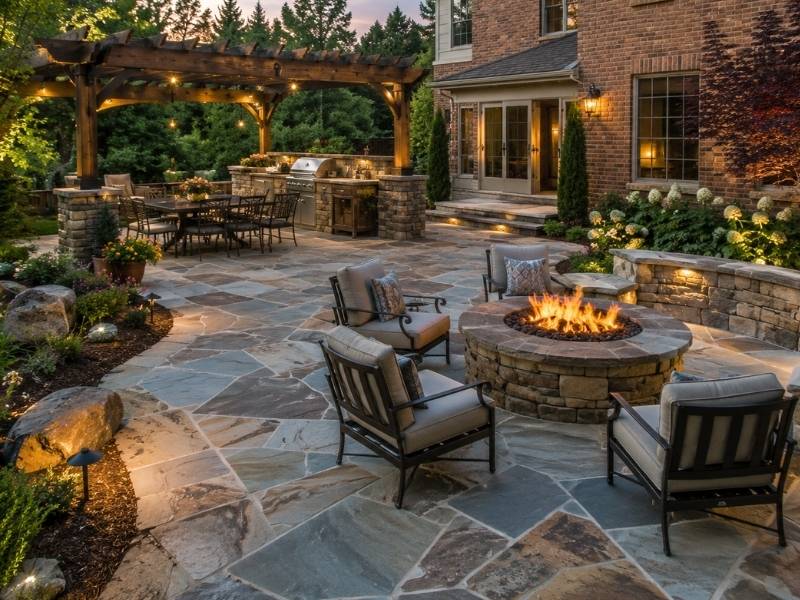
Natural stone patio with a fire pit, pergola, outdoor kitchen, and seating area designed to improve outdoor living behind a brick home.

A stone patio can change how you use your backyard. It adds space for grilling, sitting, and relaxing outside. In Birmingham, Alabama, homeowners want patios that handle hot summers, heavy rain, and red clay soil. The right design makes that happen. This guide walks through five things that matter most when planning a stone patio that lasts.

Choosing the Right Location for a Stone Patio

Location decides almost everything else about your patio. Pick the wrong spot and you’ll fight drainage, shade, and access problems for years.

Start by watching your yard for a few days. Notice where water pools after rain. Notice where the sun hits hardest in July. Birmingham summers run hot, so afternoon shade matters.

Things to check before you choose a spot:

  • Distance from the house (closer means easier utility and furniture access)
  • Slope of the land (gentle slopes drain better than flat ground)
  • Existing trees (roots can crack stone over time)
  • Privacy from neighbors
  • Sun exposure during peak use hours

A patio near the back door works well for daily use. A patio tucked further into the yard feels more like a retreat. Both can work. It depends on how you plan to use the space.

Designing a Stone Patio for Comfort and Function

A patio needs more than good looks. It needs room to move, sit, and gather without feeling cramped.

Size the Space for Real Use

Most small patios fail because they’re too tight for furniture and walking room. A table for four needs roughly 10 feet by 10 feet of open space. Add a grill or fire pit and you’ll want closer to 12 by 14 feet.

Plan Traffic Flow

Leave at least 3 feet of clear walking space around furniture. This keeps the patio from feeling like an obstacle course. Think about how people will move from the door to the seating area, and from the seating area to the yard.

Match the Shape to the Yard

Square and rectangular patios are simple to build and furnish. Curved patios soften a yard but cost more in labor since stone has to be cut to fit the edges.

Selecting Stone Materials That Complement Your Home

Stone choice affects cost, durability, and how well the patio matches your house.

Common options used in Birmingham area homes:

  • Flagstone – Irregular shapes, natural look, and a popular choice for homeowners considering flagstone patio installation for casual outdoor spaces.
  • Fieldstone – Rugged texture, works well with rustic or farmhouse homes
  • Travertine – Smooth surface, stays cooler underfoot in summer heat
  • Limestone – Light color, pairs well with brick exteriors common in the South

Match the stone tone to your siding or brick. A warm-toned stone next to red brick creates a connected look. A cool gray stone can clash with warm brick if you’re not careful.

Texture matters too. Smoother stones look more formal. Rougher stones fit casual backyard spaces better and hide dirt longer between cleanings.

Why Proper Drainage Improves Stone Patio Performance

Drainage is the part homeowners skip and regret later. Without it, water sits under the stone, freezes in winter, and pushes the patio out of level.

A patio should slope away from the house at about a quarter inch per foot. This small grade moves water off the surface instead of letting it pool.

Base Layer Matters

A compacted gravel base under the stone allows water to drain through instead of collecting underneath. Skipping this step is the top reason patios sink or shift within a few years.

Joint Material Affects Drainage Too

Sand-filled joints let some water pass through. Polymeric sand locks joints in place while still allowing drainage, which helps stop weeds and ants from moving in.

Alabama clay soil holds water longer than sandy soil. That makes proper grading and a solid gravel base even more important here than in drier regions.

Adding Features That Enhance Outdoor Living Spaces

Once the base patio is solid, added features turn it into a true outdoor room.

Popular additions include:

  • Built-in seating walls (saves space, doubles as a planter edge)
  • Outdoor kitchens (grills, counters, and storage built into the stone layout)
  • Fire features (a stone fire pit or fireplace extends use into cooler months)
  • Lighting (path lights or recessed step lights improve safety after dark)
  • Pergolas or shade structures (cuts direct sun during peak afternoon heat)

These additions don’t need to happen all at once. Many homeowners build the patio first, then add a fire pit or kitchen in a later phase. Planning the layout early makes it easier to add these features without redoing the whole patio.

Frequently Asked Questions

How long does a stone patio last?

A properly built stone patio with good drainage can last 25 years or more. Poor base preparation can significantly shorten its lifespan, often leading to major repairs within 5 to 10 years.

What is the best stone for a patio in Birmingham, Alabama?

Limestone and flagstone are both excellent choices for Alabama’s climate. They handle heat and humidity well, and their lighter colors help reflect sunlight instead of absorbing it.

Does a stone patio increase home value?

Yes. Outdoor living spaces, including stone patios, are often viewed as desirable features that can improve curb appeal and increase resale value, especially in areas where outdoor entertaining is common.

How thick should the gravel base be under a stone patio?

Most stone patios require a compacted gravel base that is 4 to 6 inches thick. Areas with heavy foot traffic or clay-rich soil may require a deeper base for long-term stability.

Can a stone patio be built on a slope?

Yes. A slight slope helps direct water away from the patio, but steeper slopes may require retaining walls or additional grading to prevent erosion and movement over time.

How a Stone Mason Creates Lasting Curb Appeal

A well-kept front yard tells a story before anyone reaches the door. One of the most reliable ways to improve that first impression is to hire a stone mason. A stone mason shapes and places natural or cut stone to build features that look sharp and hold up through years of weather. Whether the goal is a new walkway, a low garden wall, or a cleaner entry, stone delivers results that other materials rarely match. The National Association of Realtors reports that quality exterior masonry can return up to 80% of its cost at resale.

Start with the Right Stone

The best stone for any project depends on three things: the home’s architectural style, the local climate, and the available budget. A stone mason evaluates all three before recommending any material.

A modern home often suits smooth slate or clean-cut pavers. A cottage or traditional home usually calls for rough fieldstone or stacked limestone. Color matters just as much as shape. Stone should complement the siding, roof, and driveway rather than compete with them.

Some stones cut and shape more easily, which affects labor costs. Others are heavier and need a stronger base. Getting this decision right from the start prevents expensive corrections later. Natural stone installations last an average of 50 to 100 years when properly placed and maintained, far longer than timber or composite alternatives.

Add Features That Catch the Eye

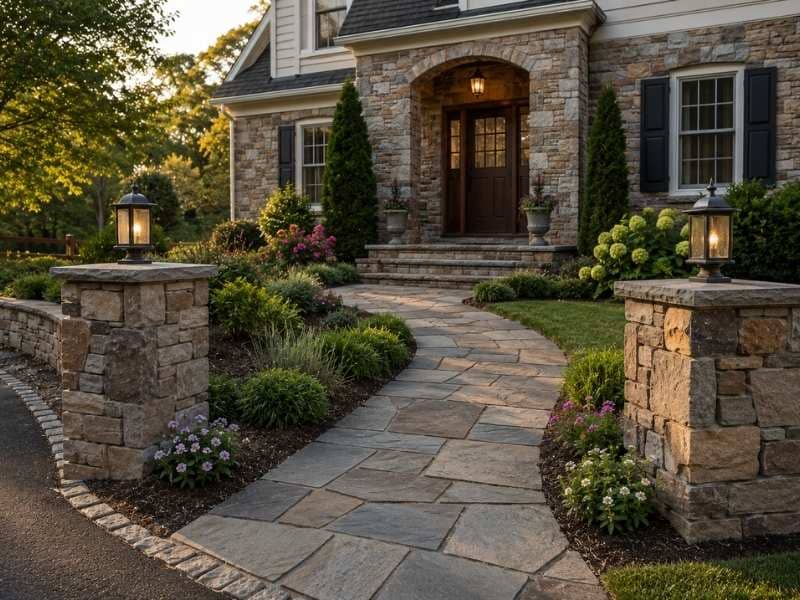
Stone features don’t have to be large to make a real difference. A flat-stone walkway from the sidewalk to the front door changes how a home reads from the street immediately. A few low steps leading to the entry make the whole approach feel more deliberate.

Low stone walls along garden beds separate plants from lawn without looking harsh. A stone border around the base of the house, called a foundation surround, ties the whole exterior together. Even a single stone pillar at the end of a driveway adds structure and presence that’s hard to ignore.

These are not major construction projects, but they all need precise, experienced hands. A stone mason knows how to set each piece so it stays stable through rain, freeze-thaw cycles, and regular foot traffic.

Make Every Detail Look Neat

The difference between a decent stone job and a great one usually comes down to the small stuff. Straight lines, consistent joint spacing, and tight mortar work make everything look finished and intentional.

Uneven stones or wide, sloppy joints make a project look rushed regardless of how good the stone is. A skilled mason levels each piece carefully, checks spacing as they go, and fills gaps with mortar or compacted gravel correctly. They also cut stone cleanly at corners and edges so nothing looks jagged or improvised.

Good stone work doesn’t look added on. It looks like it was always there.

Match Stone with the Rest of the Yard

Stone works best as part of a complete outdoor design. Plants, driveways, fences, and lighting all shape how the space feels as a whole.

A gravel driveway with stone edging along the sides feels more finished and intentional. Plants near a stone wall soften the hard edges and bring in seasonal color. A wooden fence next to a stone pillar looks planned rather than accidental.

A mason who understands outdoor design helps connect each element to the next. The goal is one unified outdoor look, not a collection of separate projects placed near each other.

Protect the Look for Years

Stone is tough, but it benefits from routine attention. Dirt, moss, and algae build up over time and make even quality stone look dull. A rinse with a garden hose every few months handles most of it. For heavier buildup, mild soap and a stiff brush clean most stone surfaces without damage.

Check for loose stones once or twice a year, especially after winter. Freeze-thaw cycles shift stones and crack mortar over time. A loose piece caught early is a quick, inexpensive fix. Left alone, it turns into a larger and costlier repair. Crumbling mortar joints should be refilled before water gets underneath and causes structural damage below the surface.

Frequently Asked Questions

How do I choose the best stone for my project?

Consider the home’s style, the local climate, and the available budget. A stone mason can walk through the options and recommend materials that match the look you want while holding up to outdoor conditions year-round.

Can a stone feature be added to an older home?

Yes. Stone suits homes of all ages. It often works especially well with older homes because natural stone has a timeless, classic quality that complements traditional architecture.

What makes stone a good choice for outdoor projects?

Stone is dense, weather-resistant, and durable. It handles heat, cold, heavy foot traffic, and moisture better than wood, plastic, or composite materials. With basic care, it lasts 50 years or more.

How can I keep stone looking clean?

Rinse it with water every few months. For stains or moss, scrub with a soft brush and mild soap. Skip harsh chemical cleaners since they can strip the surface color or break down mortar over time.

When should damaged stone be repaired?

As soon as a problem appears. Loose stones and cracked mortar allow water in, which leads to structural damage underneath. A small repair done promptly costs far less than replacing a whole section later.

Does stone increase home resale value?

Yes. The National Association of Realtors consistently lists exterior stone features among the improvements with the strongest return on investment, particularly at the front of a home where buyer first impressions are formed.

7 Signs Your Home May Need Professional Brick Repair

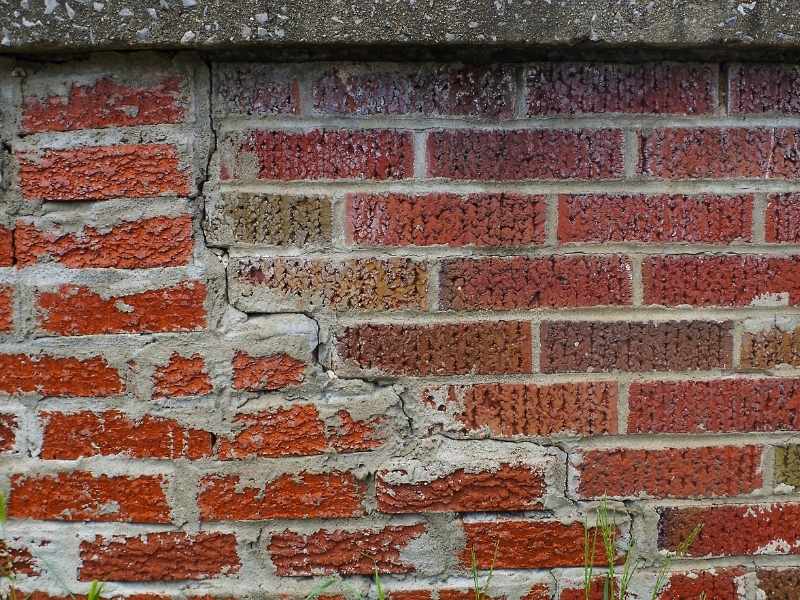
Close-up of a residential brick wall with stair-step cracks and deteriorating mortar, indicating the need for professional brick repair.

Brick is known for its strength and durability, but even well-built masonry can develop problems over time. Small cracks, damaged mortar, and moisture issues may seem minor at first, but they can lead to bigger and more costly repairs if left untreated. Knowing the warning signs can help homeowners address problems early and protect the long-term condition of their property.

Cracks Appearing in Brick Walls or Mortar Joints

Not all cracks are equal. A hairline crack in a single brick is usually cosmetic. A crack running through multiple bricks and mortar joints is a different story.

Stair-step cracks are the ones to watch. They follow the mortar joints in a diagonal line. This pattern often points to foundation movement or shifting soil. Birmingham’s clay-heavy soil moves with moisture changes. That movement puts pressure on masonry walls over time.

Horizontal cracks across a wall are even more serious. They can mean the wall is taking on lateral pressure it wasn’t designed to handle.

Any crack that’s getting wider over weeks or months needs a professional eye. Mark the ends with a pencil and check it again in 30 days. If it grows, that’s a clear sign you need brick repair before the damage spreads.

Loose, Broken, or Missing Bricks Around the Home

A single loose brick might seem minor. It rarely is. Once a brick shifts out of position, the bricks around it lose support. Water gets into the gap. The problem spreads fast.

Broken bricks happen for several reasons. Physical impact is one. But water damage is far more common in Alabama’s climate. Water soaks into porous brick, then expands when temperatures drop. That freeze-thaw cycle chips, splits, and cracks brick over multiple winters.

Missing bricks leave an open hole in the wall. That hole lets in water, insects, and wind. The mortar around the gap dries out and starts to fail faster too. When you spot loose or missing bricks, brick repair is the only way to stop the damage from getting worse.

Crumbling Mortar Between the Bricks

Mortar holds everything together. When it starts to crumble, the whole wall weakens.

Mortar has a lifespan. Most standard mortar lasts 25 to 30 years before it starts to break down. Older homes in Birmingham often have mortar that’s well past that point. You can spot deteriorating mortar by running your finger along a joint. If it comes away as powder or small chunks, it needs attention.

This is where tuckpointing comes in. A mason removes the damaged mortar to about three-quarters of an inch deep, then packs in fresh mortar. Done right, it restores the strength and water resistance of the wall.

Skipping this repair is a mistake. Worn mortar joints are open channels for water. Once water gets behind the brick, the cost of brick repair goes up fast.

White Stains and Moisture Problems on Brick Surfaces

White chalky stains on brick are called efflorescence. It happens when water moves through the masonry and pulls salts to the surface. On its own, efflorescence isn’t structural damage. But it’s a clear sign that water is getting into the wall.

Left alone, that moisture causes real problems. It softens the brick face, weakens mortar joints, and can lead to mold inside the wall cavity. In Birmingham’s humid summers, moisture problems get worse fast if repairs are delayed.

Dark stains or streaks below window sills and above door frames often point to flashing failures. Flashing is the metal barrier that directs water away from openings. When it fails, water runs straight into the masonry.

If you’re seeing white stains, wet spots after rain, or interior moisture near an exterior brick wall, don’t ignore it. That’s a sign brick repair and a full inspection are overdue.

Leaning Walls, Bulging Bricks, and Other Structural Warning Signs

A wall that bows outward is not a cosmetic problem. It’s a structural failure in progress.

Bulging brickwork happens when wall ties corrode or fail. Wall ties are metal connectors between the brick veneer and the structure behind it. Without them, the outer layer of brick starts to separate from the wall. It looks like a gentle curve at first. Over time, sections can collapse.

Leaning chimneys are a specific version of this. A chimney pulling away from the house has lost its footing or its mortar base. This is a safety issue, not just a repair issue.

Separated bricks at corners, sections that look uneven from the side, or doors and windows that suddenly stick are all signs the masonry is moving. Any of these call for brick repair right away. Early action keeps a repair job from turning into a full rebuild.

Frequently Asked Questions

What Are the Most Common Signs That a Home Needs Brick Repair?

The most common signs include cracks in the brick or mortar, crumbling joints, loose or missing bricks, white staining on the wall surface, and brickwork that bows or leans. Any of these mean it’s time for a professional inspection.

Can Cracked Bricks Be Repaired, or Do They Need to Be Replaced?

Small cracks can often be repaired with mortar or a flexible masonry sealant. Bricks with deeper structural cracks, missing sections, or spalling surfaces usually need to be replaced. A mason can determine the best solution based on the extent of the damage.

Why Does Mortar Between Bricks Begin to Crumble?

Age is one of the biggest factors. Standard mortar naturally wears down over time, while water infiltration and freeze-thaw cycles can accelerate deterioration. As mortar weakens, gaps form and allow more moisture to enter the wall.

How Long Does Professional Brick Repair Usually Last?

Tuckpointing and brick replacement performed by an experienced mason can last 20 to 30 years or more when quality materials and proper installation methods are used. Lifespan also depends on climate and drainage conditions around the home.

When Should You Call a Masonry Contractor for Brick Repair?

Homeowners should contact a masonry contractor when they notice widening cracks, loose bricks, deteriorating mortar, or sections of the wall that bow or lean. Addressing these issues early can help prevent more extensive and expensive repairs later.

How to Choose the Best Stone Patio Material for Your Home

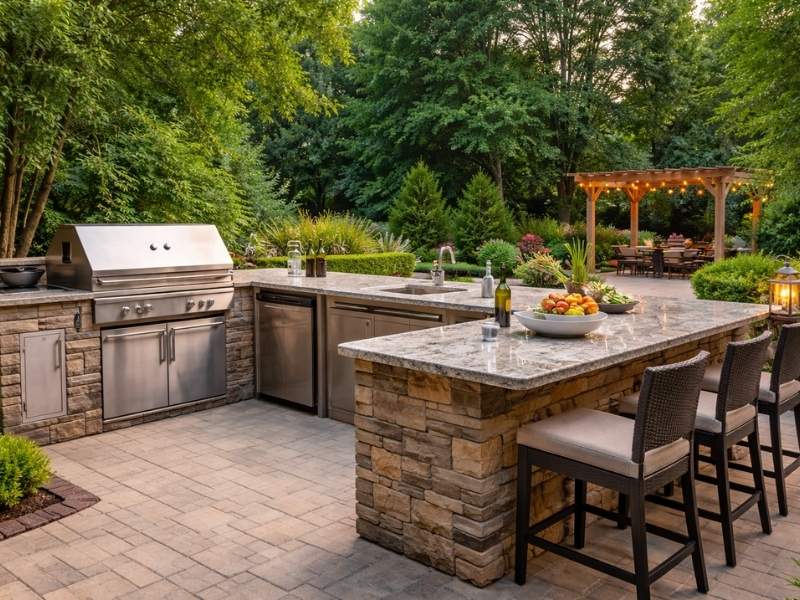
Natural stone patio with an outdoor kitchen, bar seating, and landscaped backyard designed for residential outdoor living.

A stone patio can add beauty, function, and value to your outdoor space. With several materials available, choosing the right one depends on factors such as durability, appearance, maintenance, and cost. Understanding your options can help you select a stone patio material that fits your home and lifestyle.

Understanding the Most Popular Stone Patio Materials

There are five stone types you’ll see most often. Here’s what each one looks like and where it works best.

Flagstone is cut from sandstone, limestone, or slate. The pieces come in irregular shapes. It gives a natural, relaxed look. It’s a popular choice for walkways and casual backyard patios.

Bluestone is a dense, blue-gray stone. It has a clean, consistent color. You can get it with a rough texture or a smooth cut finish. It works well in both casual and formal outdoor spaces.

Limestone is light in color. Most pieces are cream or tan. It pairs well with brick homes, which are common across Birmingham. It absorbs less heat than darker stones, so it stays cooler underfoot.

Slate has a dark, layered look. It does well in shaded areas. Too much direct sun over the years can cause it to flake apart.

Travertine is smooth and elegant. It’s often used around pools and covered patios. It stays cooler than most stones even in full sun.

Each stone feels different underfoot. Each one has different care needs and costs. Knowing the basics before you shop saves time and money.

Comparing Durability and Weather Resistance

Birmingham summers are hot and humid. Winters bring cold snaps and occasional ice. Your stone has to hold up through both.

Here’s how each option performs in this climate.

Flagstone is strong under foot traffic. But some types are porous. Water gets in. When it freezes, the surface can crack. Sealing helps. It adds to your yearly upkeep though.

Bluestone is one of the better options for Birmingham. It’s dense. It resists moisture well. It handles freeze-thaw cycles without cracking. It holds up under heavy use year after year.

Limestone is softer than bluestone. It wears down faster in busy areas. Humidity and acid rain can slowly etch the surface. It still works well in shaded or low-traffic spots.

Slate struggles when temperatures swing between hot and cold. In full sun, it can split along its natural layers over time. It’s better suited for covered patios here.

Travertine is porous. Without sealing, moisture gets in. That leads to staining and cracking. With proper sealing, it holds up well in Alabama’s summers.

For most open patios in Birmingham, bluestone and sealed flagstone are the safest bets.

Matching Stone Colors and Styles to Your Home

Stone color shapes the whole look of your yard. A mismatch stands out right away.

Many homes in Birmingham have red brick exteriors. Lighter stones like limestone and travertine go well with brick. They add warmth without clashing. Bluestone also works against brick if you want a modern look.

Darker homes pair well with slate or dark flagstone. These stones add contrast without competing.

Finishing also matters. A smooth (honed) finish looks formal. A rough or tumbled finish looks casual. Think about the rest of your yard. If it’s relaxed and informal, rough-cut flagstone fits. If you have a pool or a neat garden, a smooth cut stone looks better.

Shape plays a role too. Irregular flagstone has a loose, natural feel. Square-cut bluestone or travertine tiles look more structured and clean.

One tip: grab a sample before you order. Look at it outside next to your home. Colors look different under natural light than they do in a showroom.

What Factors Affect the Cost of a Stone Patio Material?

Several things affect what you’ll pay for a stone patio.

Stone type is the biggest factor. Travertine and natural bluestone cost more than basic flagstone. There are manufactured versions of most stones. They cost less but don’t always last as long.

Local availability makes a difference. Stone shipped from far away costs more. Some limestone and flagstone options come from quarries closer to Alabama. That can lower the material cost.

Thickness affects price and strength. Thin slabs cost less but crack more easily. For a busy patio, thicker stone is worth the extra cost.

Installation complexity affects labor costs. Irregular flagstone takes more time to fit than uniform tile. Curved edges or multi-level designs add to the labor bill.

Maintenance is a cost people often forget. Porous stones need sealing every one to two years. That adds up over time. Dense stones like bluestone need far less upkeep.

A low upfront price doesn’t always mean a low total cost. A stone that needs frequent repairs can end up costing more in the long run.

Questions to Ask Before Choosing a Stone Patio Material

These questions help narrow down your best option.

How will you use the patio? Heavy foot traffic needs a harder stone. A quiet garden seating area can work with softer options.

How much sun does the area get? Full Alabama sun gets very hot. Light-colored stones like travertine and limestone stay cooler underfoot. Dark slate gets uncomfortably hot.

Do you need a slip-resistant surface? Smooth finishes look great but get slippery when wet. If kids or older adults will use the space, choose a textured or rough surface.

How does the area drain? Poor drainage causes water to pool. That speeds up damage on porous stones. Make sure your mason grades the patio to drain properly.

How much maintenance will you actually do? Be honest. If you won’t reseal every year, don’t pick a stone that needs it. Bluestone is a solid low-maintenance choice.

How long do you want it to last? A properly installed natural stone patio can last 25 to 50 years. Manufactured stone products don’t always last as long outdoors.

Ask your mason these questions before you commit. A good contractor will match the material to your lifestyle, not just to what looks nice in a photo.

Frequently Asked Questions

What Is the Best Type of Stone for a Patio?

Bluestone and flagstone are strong choices for Birmingham. They handle heat, humidity, and cold well. The best pick depends on your design goals, budget, and maintenance preference.

Which Stone Patio Material Is the Most Durable?

Bluestone is one of the most durable options. It’s dense, resists moisture, and holds up under heavy use. Granite is harder but costs more and is less common for home patio projects.

Do Natural Stone Patios Require a Lot of Maintenance?

It depends on the stone. Bluestone needs very little care. Porous stones like travertine need sealing every one to two years to prevent staining and water damage.

What Factors Affect the Cost of a Stone Patio?

Stone type, thickness, local availability, installation complexity, and long-term maintenance all affect cost. A cheaper stone with high upkeep can end up costing more over time.

How Long Does a Natural Stone Patio Typically Last?

A well-installed natural stone patio can last 25 to 50 years or more. Lifespan depends on the stone type, installation quality, and ongoing maintenance.

Brick Pavers vs. Stone Pavers: Which Is Right for Your Patio?

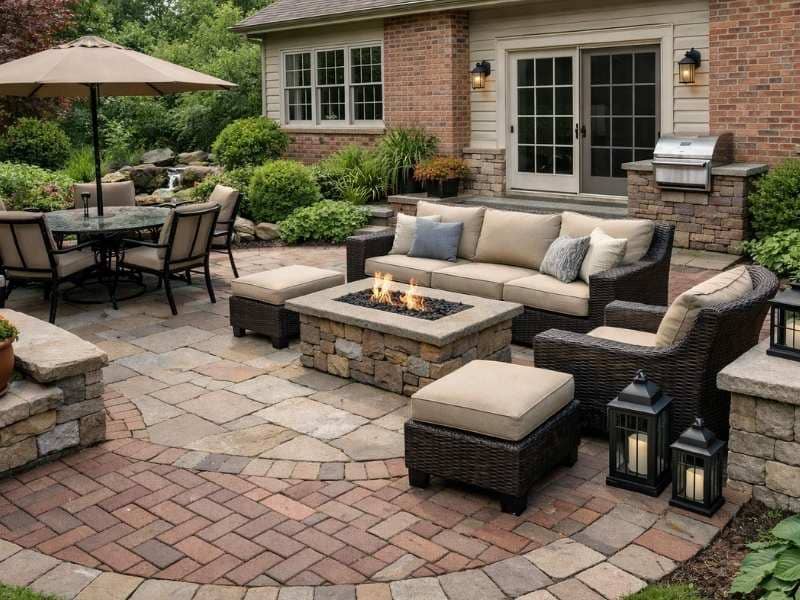
Brick pavers vs stone pavers featured in a backyard patio with a fire pit and outdoor seating area

Planning a new patio is a big decision. There are a lot of materials to choose from, and it can be hard to know where to start. Brick pavers and stone pavers are two of the most popular options for homeowners, and both are great choices. The right one for you depends on your budget, where you live, and the look you want. 

What Is the Difference Between Brick Pavers and Stone Pavers?

Brick pavers are made from fired clay. They are cut into the same size and shape, so they fit together neatly and evenly. Stone pavers are cut from natural rock, such as granite, limestone, flagstone, or travertine. Since they come from the earth, no two pieces look exactly the same.

Both are strong and hold up well outdoors. The main difference is how they look, what they cost, and how much work they need to stay in good shape over the years.

Brick Pavers: What Homeowners Need to Know

Brick pavers are a popular mid-priced option that gives any patio a warm, classic look.

Appearance and Style

Brick pavers come in earthy shades of red and brown. They look great with traditional, colonial, and craftsman-style homes. Because all the pieces are the same size, they can be laid in neat patterns like herringbone, basketweave, or running bond.

Over time, brick pavers develop a natural faded look that many homeowners actually like. It gives the patio a lived-in, charming feel.

Durability and Lifespan

Brick pavers are baked at very high heat during manufacturing. This makes them hard, dense, and resistant to cracking. A well-built brick paver patio can last 25 to 50 years. If one paver cracks or shifts, you can lift it out and replace just that piece without touching the rest of the patio. This makes repairs simple and affordable.

Cost of Brick Pavers

Brick pavers cost between $8 and $20 per square foot, including installation. The price depends on where you live, the pattern you choose, and the size of the project. Brick pavers cost more than basic concrete, but less than most natural stone options.

Maintenance

Brick pavers need to be sealed every three to five years. Sealing protects them from water and stains. This is especially important in places with cold winters. When water soaks into unsealed pavers and then freezes, it can cause cracks. Weeds or moss may grow in the gaps over time, but they are easy to remove with regular cleaning or a special type of sand called polymeric sand.

Stone Pavers: What Homeowners Need to Know

Stone pavers cost more than brick, but they offer a high-end, natural look that is hard to match.

Appearance and Style

The biggest advantage of stone pavers is that every piece looks different. Each one has its own color, texture, and pattern. This gives a stone patio a unique, natural look that no two homes will share exactly.

Popular types of stone pavers include:

  • Flagstone for a relaxed, rustic feel
  • Granite for a clean, modern look
  • Travertine for a warm, Mediterranean style
  • Limestone for a soft, neutral tone that works with almost any home

If you want a patio that looks like a natural part of your yard, stone pavers are the way to go.

Durability and Lifespan

Natural stone is one of the toughest materials you can use outdoors. Most stone pavers last well beyond 50 years when they are installed correctly. Hard stones like granite can handle almost any weather. Softer stones like limestone need a little more care in wet or freezing climates, but they still hold up well with the right maintenance.

Cost of Stone Pavers

Stone pavers cost between $15 and $50 per square foot installed. Flagstone and limestone are on the lower end. Granite and imported travertine can cost more. Stone costs more than brick for two reasons. First, natural stone is a premium material. Second, it takes more skill and time to install because the pieces are heavier and less uniform.

Maintenance

Like brick, stone pavers need to be sealed every three to five years. Hard stones like granite need less attention. Softer stones like travertine do better with more frequent sealing, especially in rainy areas. Light-colored stone can stain, so it helps to clean up spills quickly.

Brick Pavers vs. Stone Pavers: Side-by-Side Comparison

FeatureBrick PaversStone Pavers
MaterialFired clayNatural stone (granite, limestone, flagstone, travertine)
Installed Cost$8 to $20 per sq. ft.$15 to $50 per sq. ft.
AppearanceUniform, classic, warm tonesNatural variation, high-end look
Lifespan25 to 50 years50+ years
Sealing FrequencyEvery 3 to 5 yearsEvery 3 to 5 years
Best ClimateMost climates with proper sealingBest in mild to moderate climates
DIY-FriendlyModerateDifficult due to weight and irregular shapes
Best ForTraditional homes, mid-range budgetsPremium patios, natural look

Which Paver Works Better in Different Climates?

Your local climate matters more than most people think when picking a paver material.

In places with cold winters, both brick and stone pavers need to be sealed on a regular schedule. Unsealed brick can soak up water, which then freezes and causes cracks. Dense stones like granite absorb very little water, so they tend to hold up better in freezing temperatures.

In hot and dry climates, both options work well. Light-colored stone pavers like limestone and travertine stay cooler underfoot in the sun than darker brick. This can make a real difference on a hot summer day.

In humid or rainy areas, moss and mildew can grow in the joints of either material when they are in the shade. Regular cleaning and polymeric sand in the joints will help keep this under control.

Do Pavers Add Value to Your Home?

Yes. A patio is one of the best home improvement projects you can invest in. According to the National Association of Realtors, a new patio earns a satisfaction score of 9.7 out of 10. That is one of the highest ratings for any home project. Homeowners can also expect to get back 50 to 75 percent of what they spent when they sell their home.

The NAR also found that outdoor improvements like patios and walkways rank in the top four projects that home buyers find most appealing. Whether you go with brick or stone, a well-built patio tells buyers that the home has been cared for.

How to Choose the Right Paver for Your Patio

Here is a simple way to decide:

  • Choose brick pavers if you want a classic look at a fair price, your home has a traditional style, and you prefer a simpler installation process.
  • Choose stone pavers if you want a natural, premium look, you have more room in your budget, and you want a surface that can last for generations.
  • Think about your weather. If you live somewhere with harsh winters, talk to your mason about which stone holds up best in freezing temperatures.
  • Look at the bigger picture. Your patio should match the rest of your home and yard. Think about how it will look next to your home’s exterior, your landscaping, and any other masonry features like a retaining wall, an outdoor fireplace, or a masonry mailbox.

If you are still not sure, a professional mason can help. They can look at your yard, your soil, and your drainage and tell you which material will work best for your specific situation.

What Is Brick Masonry? A Complete Guide for Homeowners

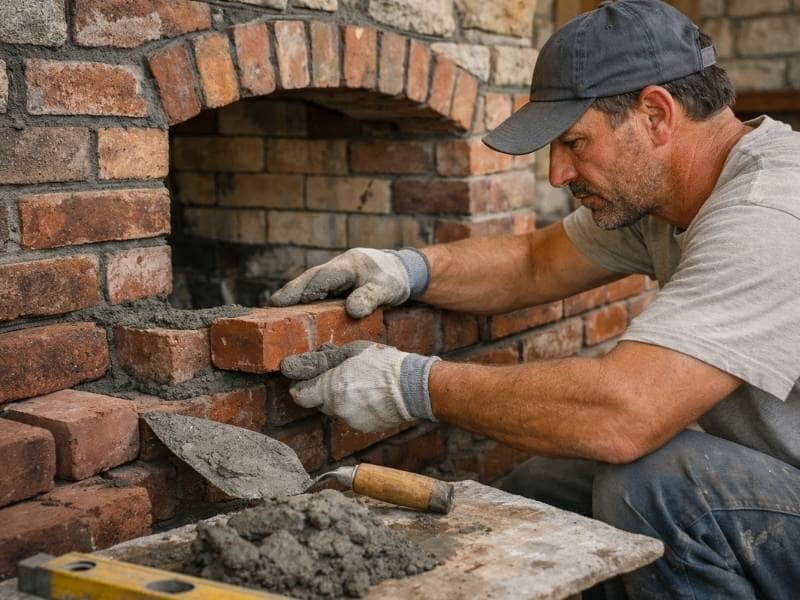
Brick masonry installation for a residential fireplace under construction

Brick masonry is one of the oldest and most dependable building methods in the world. If you own a home with a brick fireplace, a brick patio, or a brick mailbox, you are already living with this craft every day. But what exactly is brick masonry, and why does it matter for homeowners? 

What Is Brick Masonry?

Brick masonry is a construction method where individual bricks are stacked and bonded together using mortar to form a solid, durable structure. The mortar is a thick paste made from cement, sand, and water. When it dries, it holds the bricks tightly in place and keeps moisture from getting in.

The result is a structure that is strong, fire-resistant, and built to last for decades. Brick masonry is used in both new construction and repair work, covering everything from full exterior walls to smaller projects like outdoor fireplaces and retaining walls.

Types of Brick Masonry

Not all brick masonry is the same. The method a brick mason uses depends on the purpose of the structure and the level of strength it needs.

Solid Brick Masonry uses two or more layers of brick, bonded together with mortar. This is the most durable form and is often used in load-bearing walls and chimneys.

Brick Veneer Masonry is a single layer of brick attached to the outside of a structure. Most brick homes you see today use this method. The brick is not load-bearing. It acts as a protective and decorative outer shell.

Reinforced Brick Masonry adds steel rods or mesh inside the brickwork to give it extra strength. This type is common in areas with high wind or earthquake risk.

What Does a Brick Mason Do?

A brick mason is a skilled tradesperson who measures, cuts, and lays bricks to build or repair structures. The work requires precision, physical strength, and a trained eye for detail.

According to the U.S. Bureau of Labor Statistics, there are approximately 294,300 masonry workers employed in the United States as of 2024, with about 20,700 new job openings expected each year through 2034. The median annual wage for a brick mason is $56,600, which reflects the level of skill and training the job requires.

Brick masons typically learn their trade through a formal apprenticeship or years of hands-on experience. When you hire one, you are not just paying for labor. You are paying for the knowledge it takes to build something that will last.

Common Uses of Brick Masonry in Your Home

Brick masonry covers more of your home than you might realize. Here are the most common applications homeowners encounter.

Brick Fireplaces and Hearths

A brick fireplace is one of the most popular uses of brick masonry in the home. The firebox, the surround, and the hearth are all built using heat-resistant bricks and mortar designed to handle extreme temperatures. Brick hearths add warmth, character, and safety to any living space.

Brick Patios and Pavers

Brick patios and brick pavers are a classic choice for outdoor spaces. They are durable, slip-resistant, and easy to repair if a section becomes damaged. A well-laid brick patio can last 25 years or more with proper care.

Brick Mailboxes and Masonry Mailboxes

A brick mailbox or stone mailbox adds curb appeal and a sense of permanence to your property. Masonry mailboxes are far more durable than wood or metal posts and can withstand years of weather and impact without losing their appearance.

Retaining Walls

Brick retaining walls are used to hold back soil on sloped properties and create level areas for landscaping or outdoor living. They need proper drainage and a solid foundation to perform well over time.

Outdoor Kitchens and Outdoor Fireplaces

Brick and stone are the materials of choice for outdoor kitchens and outdoor fireplaces. They handle heat well, stand up to the elements, and give outdoor spaces a finished, high-quality look that other materials cannot match.

Brick Masonry vs. Stone Masonry: Key Differences

FeatureBrick MasonryStone Masonry
MaterialManufactured clay or concrete unitsNatural or cut stone
CostGenerally lowerGenerally higher
AppearanceUniform, classic lookVaried, natural look
Durability100+ years with care100+ years with care
Best ForWalls, patios, fireplaces, mailboxesFeature walls, hearths, outdoor kitchens

Both methods are excellent long-term investments. The right choice depends on your budget, the look you want, and the specific project. 

How Long Does Brick Masonry Last?

Brick masonry is one of the longest-lasting building materials available to homeowners. A properly built brick structure can last 100 years or more with minimal upkeep. The mortar between the bricks is the first thing to wear down over time, and it typically needs to be refreshed every 25 to 50 years through a process called tuckpointing or repointing.

The bricks themselves are highly resistant to fire, moisture, and temperature changes. This is one reason brick homes often carry higher resale values compared to homes built with other exterior materials.

How Much Does Brick Masonry Cost?

The cost of brick masonry work varies depending on the type of project, the materials used, and local labor rates.

As a general guide:

  • Brick installation costs between $10 and $45 per square foot, with most homeowners paying an average of $25 per square foot.
  • A full brick wall averages around $5,309, with most projects falling between $2,210 and $8,535.
  • Brick repair work typically costs $500 to $2,500, depending on the size and severity of the damage.

These are national averages. Your actual cost will depend on your location and the scope of your project. Getting a quote from a licensed brick mason is always the best first step.

How to Find a Qualified Brick Mason

Not every contractor who offers masonry work has the training to do it well. Here is what to look for when hiring a brick mason.

  • Check for licensing and insurance. A qualified mason should be licensed in your state and carry liability insurance. This protects you if something goes wrong during the project.
  • Ask to see past work. Reputable masons are happy to share photos or references from completed projects similar to yours.
  • Get more than one quote. Comparing at least two or three bids gives you a realistic sense of fair pricing for your area.
  • Ask about mortar matching. If you are repairing existing brickwork, the new mortar needs to match the color and texture of the old mortar. This is a small detail that makes a big difference in the finished appearance.

Adding an Indoor Fireplace to Your Home: What You Need to Know First

Indoor brick fireplace with a wood mantel and hearth showing a finished residential fireplace installation in a living room

A fireplace looks great on a floor plan. It also adds real value to a home when it’s done right. But a lot of homeowners and developers skip the planning stage and end up with a fireplace that’s expensive to fix, fails inspection or just doesn’t work the way they expected. This article covers what you need to think through before anyone picks up a trowel.

The Types of Indoor Fireplaces Worth Knowing

Not every fireplace works the same way, and the type you choose affects the build cost, the materials and the maintenance schedule.

Wood-Burning Fireplaces

This is the traditional option. A firebox sits inside a masonry surround, and a chimney carries smoke out of the house. It needs a proper foundation because the masonry is heavy. It also needs a lined flue, a damper and clearances from combustible materials on every side.

Wood-burning fireplaces produce real heat and real ambiance. They also produce creosote, which builds up in the flue and has to be cleaned out regularly. Skip that maintenance and you’re looking at a chimney fire.

Gas Fireplaces

Gas fireplaces use a sealed combustion system or a direct vent that runs through an exterior wall. They’re easier to install in existing homes because they don’t always need a full masonry chimney. They light with a switch and produce consistent heat without ash or smoke.

The tradeoff is that gas fireplaces need a gas line run to the location, which adds cost if one isn’t nearby. They also need annual servicing to check the burner, the ignition and the venting.

Electric Fireplaces

Electric fireplaces are the simplest to install. No venting, no gas line, no masonry. They plug in or wire directly into the home’s electrical panel. The flame is simulated, so they work as a visual feature more than a heat source.

For a developer adding a fireplace to a spec home on a budget, electricity is worth considering. For a buyer who actually wants to use the fireplace on cold nights, it falls short.

What the Build Actually Involves

The Firebox and Surround

The firebox is where the fire lives. For wood-burning and gas fireplaces, the firebox is lined with refractory materials that handle high heat without cracking. The surround is the decorative frame around the opening. It can be stone, brick, tile or a prefabricated unit.

Stone and brick surrounds cost more and take longer to build. They also last longer and tend to hold their value better at resale. A prefabricated metal surround is faster and cheaper, but it reads as cheaper too.

The Chimney and Flue

A wood-burning fireplace needs a chimney with a properly sized flue. The flue size depends on the firebox opening. Get it wrong and the fireplace smokes back into the room instead of drawing up and out.

Chimneys need a cap on top to keep rain and animals out. They need flashing where they meet the roof to keep water out of the house. Both details get skipped more often than they should.

Clearances and Hearth Requirements

Building codes are specific about how much space has to sit between a fireplace and any combustible material. Mantels, wood framing and flooring all have minimum clearance requirements. The hearth extension in front of the firebox has to meet a minimum size too, and it has to be made of non-combustible material.

These aren’t suggestions. A fireplace that fails inspection because of clearance issues means tearing out finished work and starting over.

Costs Developers Should Plan For

Rough ranges give a starting point, but local labor rates and material choices move the number a lot.

  • A basic prefabricated wood-burning fireplace with a metal chimney runs lower than a full masonry build.
  • A custom masonry fireplace with a stone surround and full brick chimney is one of the more expensive single features you can add to a home.
  • Gas fireplace inserts with direct vent systems sit in the middle of that range, and the gas line run adds cost depending on distance.
  • Electric fireplaces are the cheapest to install but add the least value.

Plan for permit fees on top of material and labor. Most jurisdictions require a permit for fireplace installation, and inspections happen at multiple stages of the build.

Common Mistakes That Cost Money

Wrong mortar for the firebox is one of the most repeated errors on fireplace builds. Standard mortar breaks down under heat. The firebox needs refractory mortar rated for high temperatures. Using the wrong mix leads to cracked joints within a season or two.

Undersizing the flue causes smoke problems from day one. A flue that’s too small for the firebox won’t draw properly. Size it correctly from the start.

A fireplace without a working damper loses heat through the chimney every time it’s not in use. A top-mounted damper is a simple fix that saves on heating bills over time.

Newer, tightly sealed homes don’t have enough air infiltration to feed a wood-burning fireplace. Without a dedicated outside air supply, the fireplace pulls heated air from the house and creates negative pressure. The fix is simple to add during construction and expensive to retrofit later.

Pre-Build Checklist

  • Confirm foundation requirements for masonry builds
  • Check local code for clearance and hearth size requirements
  • Size the flue to match the firebox opening
  • Plan the gas line route before framing closes up
  • Include outside air supply in tight construction
  • Budget for permit fees and inspections

Frequently Asked Questions

Does adding a fireplace increase home value? 

A wood-burning or gas fireplace typically adds value, particularly in climates with cold winters. Real estate surveys consistently show buyers will pay more for a home with a fireplace. Electric fireplaces add less value since buyers know they’re primarily decorative.

How long does it take to install an indoor fireplace? 

A prefabricated gas or electric unit can go in within a few days once the rough-in work is done. A custom masonry fireplace with a full brick chimney takes longer, often several weeks depending on the size of the build and how quickly inspections get scheduled.

Can a fireplace be added to an existing home? 

Yes, but it costs more than building one in from the start. Running a gas line or cutting a chase for a chimney through a finished home adds labor and disruption. Gas inserts with direct vent systems are the most practical retrofit option for most existing homes.

What maintenance does an indoor fireplace need? 

Wood-burning fireplaces need annual chimney cleaning and inspection to clear creosote buildup. Gas fireplaces need a yearly check of the burner and venting system. Electric fireplaces need very little beyond keeping the unit clean. All types benefit from checking the surround and hearth for cracks each season.

What permits are needed for a fireplace installation? 

Most jurisdictions require a building permit for any new fireplace installation. Some also require a separate mechanical permit if gas work is involved. Check with your local building department before starting. Skipping permits creates problems at resale when the work shows up as unpermitted during a home inspection.

What Is Stone Masonry? A Simple Guide for Homeowners

Natural stone masonry fireplace with stacked stone construction and detailed stonework used in residential interior design

Stone masonry is one of the oldest building methods around. It’s also one of the most misunderstood. Most homeowners know stone looks great, but have no idea what goes into building it or what to watch for when something goes wrong. This guide covers the basics so you’re not walking into a project blind. 

What Stone Masonry Actually Means

Stone masonry is the process of placing and securing natural or manufactured stone to build walls, steps, foundations and other structures. The stones are held together with mortar or, in some older methods, dry-stacked without any mortar at all.

Two broad categories cover most of what you’ll see.

Rubble Masonry

Rubble masonry uses rough, uncut stones. They’re laid with mortar and fitted together without much shaping. It looks rugged and natural. Older garden walls and field fences often use this method. It’s lower cost but less precise.

Ashlar Masonry

Ashlar masonry uses stones that are cut and dressed to uniform sizes. The joints are tight and clean. It looks sharp and is more common in formal construction, feature walls and high-end residential builds. It takes more time and skill to do right.

Knowing which type you’re looking at helps when you need repairs. Matching rubble is different from matching ashlar, and the wrong mason for the job shows fast.

The Materials Involved

Not all stone performs the same way outdoors or in wet conditions.

Common Stone Types

  • Granite is dense and very hard. It handles weather well and resists staining. Good for high-traffic areas and exterior walls.
  • Limestone is softer and easier to cut. It looks great but absorbs more water than granite. Needs sealing in wet climates.
  • Sandstone is porous. It’s attractive but needs careful maintenance. Prone to spalling in freeze-thaw conditions.
  • Slate splits into flat layers naturally. Common for flooring, cladding and roofing. Durable when installed correctly.
  • Fieldstone is whatever stone is pulled from local land. It varies a lot in hardness and durability depending on where it comes from.

Picking the wrong stone for the climate or the application is a mistake that shows up years later. A mason who knows local conditions is worth asking before you commit to a material.

How Stone Masonry Gets Built

The process depends on the type of structure, but the core steps follow a similar path.

A solid footing goes in first. Stone is heavy, much heavier than brick, so the base has to carry the load without settling. Then the mason lays the first course, fitting stones together so weight distributes evenly. Each course above that overlaps the joints below, just like brick, so the wall ties itself together as it rises.

Mortar fills the gaps and locks everything in place. For dry-stack work, the fit of each stone does that job instead. Dry-stack walls take longer to build well because every stone has to sit right without any help from mortar.

Coping stones go on top of freestanding walls to shed water. Without them, water sits on the top course, works into the joints and causes damage over time.

Problems to Watch for in Stone Masonry

Stone feels indestructible. It’s not.

Failing Mortar Joints

Mortar between stones breaks down over time. Crumbling joints, gaps or soft spots let water in. Left alone, water freezes in winter, expands and pushes the stones apart. Repointing the joints early is a small job. Waiting turns it into a big one.

Efflorescence

White mineral deposits on the stone face mean water is moving through the wall. The stone itself may be fine, but the moisture source needs finding and fixing. Wiping off the white streaks without fixing the water problem means they’ll be back.

Spalling and Surface Damage

Porous stones like sandstone and limestone can spall when water gets in and freezes. The face chips or flakes off. Once it’s gone, it’s gone. Matching replacement stones is harder than most people expect, especially on older builds.

Settlement Cracks

A crack running through multiple stones and joints usually means the footing has shifted. Small cracks from normal settling aren’t always serious. A crack that’s growing or widening is. Get a mason to look at it before it gets worse.

Maintaining Stone Masonry Without Overdoing It

Stone needs less maintenance than most materials, but it does need some.

Check mortar joints every few years. Soft or crumbling spots need repointing before water gets a foothold. Keep soil and plant growth away from the base of stone walls. Roots work into joints over time and slowly pull them apart.

Seal porous stones in wet climates. Limestone and sandstone benefit from a breathable sealer that keeps water out but lets the stone dry from the inside. Avoid film-forming sealers that trap moisture behind them.

Don’t pressure wash stone masonry. High pressure strips mortar from joints and can pit softer stones. A low-pressure rinse and a stiff brush handle most cleaning jobs without causing damage.

Quick Maintenance Checklist

  • Inspect mortar joints every two to three years
  • Repoint any soft or crumbling spots before winter
  • Keep mulch and soil away from the base of stone walls
  • Seal porous stone every three to five years
  • Avoid pressure washing

Frequently Asked Questions

How long does stone masonry last? 

Stone itself can last centuries. The mortar joints are the weak point and typically need attention every 25 to 50 years depending on weather exposure and the original mortar mix used. Dry-stack walls last as long as the stones hold their position, which with a good base can be a very long time.

Is stone masonry more expensive than brick? 

Yes, usually. Stone costs more as a material and takes longer to lay because each piece is irregular. Ashlar masonry with cut stone is the most expensive. Rubble masonry with local fieldstone can be more affordable, but labor still runs higher than brick in most cases.

Can stone masonry be repaired without replacing the whole wall? 

Most of the time, yes. Failed mortar gets repointed. Damaged stones get replaced individually if a match can be found. Full wall replacement is rare and usually only happens after serious structural failure or years of ignored water damage.

What’s the best stone for an exterior wall in a wet climate? 

Granite is the strongest choice for wet conditions. It’s dense, absorbs very little water and holds up in freeze-thaw cycles. Limestone and sandstone can work but need sealing and more regular maintenance in high-moisture areas.

Do I need a permit for stone masonry work? 

It depends on the scope. Repointing and minor repairs usually don’t need a permit. New walls, structural work or anything attached to the home typically does. Check with your local building department before starting any significant project.

Brick Masonry 101: Why Expansion Joints Matter

Uneven brick pavers with visible shifting and gaps showing movement caused by settling and expansion over time

Brick masonry looks solid. It feels permanent. But brick moves, and if you build a wall without giving it room to move, the wall cracks. That’s the short version. Expansion joints are the gaps that let brick grow and shrink without tearing itself apart. Skip them, and you pay for it later.

This matters for developers more than most people. You’re not fixing one house. You’re putting up dozens of units, and one bad detail repeats across every wall on the site.

What an Expansion Joint Actually Does

A brick wall is not still. It expands when it’s hot. It pulls in moisture and swells. Over years, fired clay brick keeps growing a tiny bit on its own. None of this stops.

An expansion joint is a planned gap in the brickwork. The gap gets filled with a soft material that squishes. When the brick pushes out, the joint closes a little. When the brick pulls back, the joint opens. The wall stays whole.

Think of it like the gaps in a sidewalk. Concrete moves too, so we cut lines into it. Brick needs the same mercy.

What Happens Without Them

No joint means no place for the pressure to go. So the brick finds its own way out. You get:

  • Stair-step cracks running through the mortar
  • Brick faces popping off or bowing outward
  • Cracked lintels above windows and doors
  • Mortar crumbling at the corners

These show up two to five years after the build, often. Right around the time the warranty talk gets awkward.

Heat and Humidity Make It Worse

Brick swelling depends a lot on weather. Warm, damp regions are rough on brick walls. The heat drives expansion. The moisture feeds it.

In a place with long hot summers and heavy rain, a brick wall works harder every single day. The freeze stays mild, but the wet and the heat don’t quit. So joints aren’t a nice-to-have here. They’re the thing standing between a clean wall and a callback.

If your build sites sit in that kind of climate, plan joints tighter and check them more.

Where Brick Masonry Joints Belong

You can’t just toss a few in and hope. Placement follows rules. Get these spots right:

Near Corners

Walls meeting at a corner fight each other when they move. Put a joint close to the corner, not on it. A common range is two to ten feet from the corner, depending on the wall.

Along Long Runs

A long wall builds up more force as it grows. The longer the run, the more often you need a joint. Many walls need one every 20 to 30 feet. Hot, wet sites push that number lower.

At Openings and Shape Changes

Windows, doors, and spots where the wall changes height or thickness are weak points. Stress piles up there. A joint nearby gives it an out.

Where Brick Meets Other Stuff

Brick moves one way. Concrete, steel, and wood all move their own way. Where two materials meet, they need a soft joint between them so they can move apart in peace.

The Brick Masonry Mistakes That Cost the Most

Most joint failures aren’t fancy. They’re sloppy. Watch for these:

Wrong filler. Hard mortar in an expansion joint does nothing. The gap has to stay soft. Use the right backer rod and sealant.

Joints too far apart. Saving a few joints to save a few dollars is a bad trade. The repair costs ten times more than the joint.

Painted-over joints. A joint smeared with the wrong sealant or paint can’t flex. It might as well not be there.

Bad maintenance. Sealant dries out and shrinks over the years. Somebody has to check it and redo it. Plan for that.

Why Developers Should Care Early

Here’s the money part. A skipped or botched joint is cheap to prevent and brutal to fix.

Adding a joint during the build costs a small amount per linear foot. Cutting one into a finished wall later means tearing into brick, matching old material, and dealing with an unhappy owner. The cost gap is huge.

Spread that across a whole project and the math gets loud. One repeated detail flaw can eat a real chunk of your budget in repair calls.

So bake it into the plans. Have your experienced masons mark joint locations before the first brick goes up. Inspect the sealant work, not just the brick face. A wall that looks great on closing day can still fail if the joints behind the pretty face were rushed.

A Quick Checklist Before You Build

  • Confirm joint spacing on the drawings, not just on site
  • Match spacing to your local heat and moisture, tighter where it’s hot and wet
  • Specify the right soft filler, not hard mortar
  • Add a maintenance note to the owner’s handover
  • Inspect joints during the build, not after complaints roll in

The Takeaway

Brick moves. Joints give it room. That’s the whole idea, and it protects your timeline, your budget, and your name on the project. The cheapest fix is the one you draw on the plans before anyone lifts a trowel.

Frequently Asked Questions

How often do brick expansion joints need replacing? 

The brick stays. The soft sealant inside the joint does not. Most sealant needs a check every few years and full replacement somewhere around 10 to 20 years, sooner in hot, wet weather.

Can I add expansion joints to an existing brick wall? 

Yes, but it costs more. A mason cuts a clean vertical line into the brick and fills it with backer rod and sealant. It works, though it’s far cheaper to plan joints from the start.

What’s the difference between an expansion joint and a control joint? 

An expansion joint handles brick growing and pushing out. A control joint handles materials like concrete block shrinking and pulling in. Brick veneer uses expansion joints. Don’t mix them up.

Are expansion joints required by code? 

Most building codes and brick standards call for movement joints in brick walls. Your local inspector will look for them. Skipping them can fail an inspection and void some warranties.

Will an expansion joint look ugly on my wall? 

No, if it’s done right. Joints can be tucked near corners and lined up with windows so they blend in. A good mason places them where the eye doesn’t catch them.